Advertisement
Inner Fender
Install Instructions
Patent Pending
Est. install time - Approx. less than 1 hour — Difficulty level: EASY
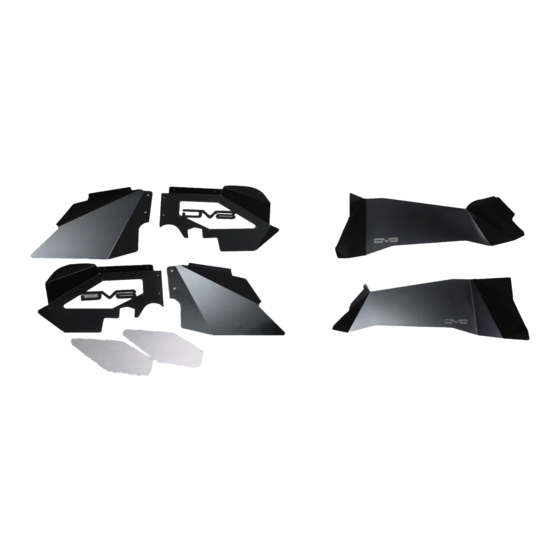
HARDWARE KIT:
A- Front liner arms w/ (long) screws x 2ea.
B– Front liner screws (medium length) x 4
C– Light Controller Receiver Module
Tools Needed:
1 - 7/64th Allen Key for screws
2– 3/8" wrench or socket & ratchet
3-drill with 7/32nds drill bit (rears only)
4-Punch or scribe to mark for drilling (rears only)
*Special Note: You will need to save and re-use the 8 factory 10mm bolts that held the factory liners in the front.
Advertisement
Table of Contents

Subscribe to Our Youtube Channel
Related Manuals for DV8 Inner Fender


Summary of Contents for DV8 Inner Fender
- Page 1 Inner Fender Install Instructions Patent Pending Est. install time - Approx. less than 1 hour — Difficulty level: EASY HARDWARE KIT: A- Front liner arms w/ (long) screws x 2ea. B– Front liner screws (medium length) x 4 C– Light Controller Receiver Module...
- Page 2 2) Start by running the wiring up into the engine bay avoiding any moving components install the solid inner half first. (part without the DV8 logo on it) Se- cure is with the factory bolt on top. 3) Next take the arm that comes with the parts kit and place it behind the panel.
- Page 3 Tighten enough to hold lin- er secure. 6) Now you can install the front half. (part that has the DV8 cut out of it) Place the liner in bottom first just behind the spring perch. Secure it loosely with the factory bolts.
- Page 4 You may need to strip some of the out- er sleeve of the wire in order for the cables to reach 11) Find a secure place to mount the control module. One of our favorite places to mount it is on the subframe away excess wire.
- Page 5 HELPFUL TIPS: *Before installing the front liners you can use super glue to fix the “DV8” logo to the mesh screen to avoid rattles. *You can add a mounting point on front corner near turn signal if using full armor fenders.
Need help?
Do you have a question about the Inner Fender and is the answer not in the manual?
Questions and answers