Table of Contents
Advertisement
Quick Links
Advertisement
Table of Contents

Related Manuals for Ballard Designs SUZANNE KASLER SK Orleans 48 Round Table


Summary of Contents for Ballard Designs SUZANNE KASLER SK Orleans 48 Round Table
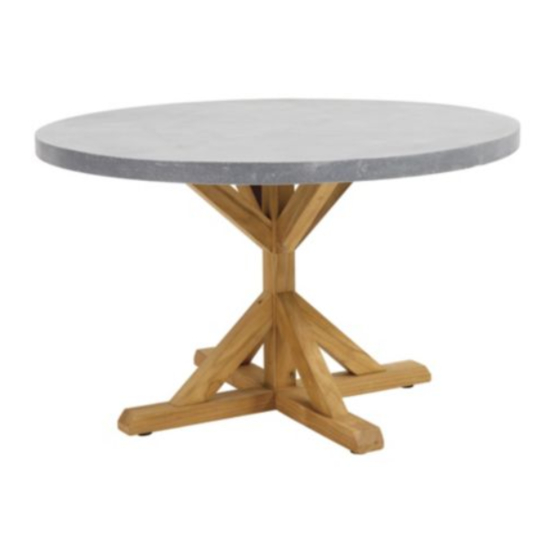
- Page 1 Customer Service: 800-367-2810 SUZANNE KASLER Online: www.ballarddesigns.com BALLARD DESIGNS PRODUCT NAME: SK Orleans 48” Round Table ITEM NUMBER: JC127 DIMENSIONS OF ITEM ASSEMBLED: 30 1/2”H x 48” DIA. PRODUCTS ARE NOT INTENDED MADE IN VIETNAM FOR COMMERCIAL USE. UPDATED: 1/25/2016...
- Page 2 Ltr. Qty. Hardware Included Long Screw TOOLS NEEDED: -Assembly may require 2 people. Short Screw NOTE: When unpacking, lay the parts on a padded surface, such as Bolt the packaging provided. Be sure to locate all hardware before throwing Wooden Plug away any packaging.
- Page 3 Chart listing all hardware as well as the individual STEP 1: To assemble the Base, fit the notch of the Leg (J) into the notch in the bottom of the Assign each piece a letter and list quantity. STEP 1: Instructions for step one here. Post (H).
- Page 4 mponents that are included with piece. STEP 3: Position the Supports (G) in place between the Leg (J) and the Post (H). Use the Long Screws (A) to secure the Supports to the Post. Use the Short Screws (B) to secure the Supports to the Leg.
- Page 5 STEP 5: Insert the Plugs (D) into all the screw holes in the Supports (G). This completes the Base assembly. STEP 6: Set the Table Top (F) upside down on a flat, padded surface such as the packaging. Align the holes in the top of the Base with the holes in the Table Top. Insert the Bolts (C) and tighten with the Allen Wrench (E).
- Page 6 STEP 7: If the table is uneven, adjust the five levelers located underneath the Legs (J) and Post (H). Carefully elevate the table and twist the levelers clockwise and counterclockwise until the table is even. Cleaning & Care: Please refer to the care instructions on the hang tag. Customer Service: 800-367-2810 Page 6 of 6 Online: www.ballarddesigns.com...
Need help?
Do you have a question about the SUZANNE KASLER SK Orleans 48 Round Table and is the answer not in the manual?
Questions and answers