Advertisement
Quick Links
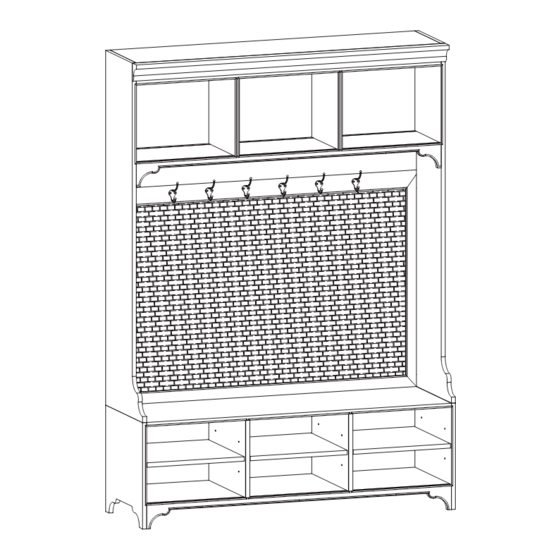
PRODUCT NAME: Hampton Entry Bench and Hutch
ITEM NUMBER: MA265 (Components MA263 (Bench) and MA264 (Hutch))
ASSEMBLED DIMENSIONS : 80"H x 55 1/2 "W x 18"D
PRODUCTS ARE NOT INTENDED
FOR COMMERCIAL USE.
UPDATED: 9-6-2022
Customer Service: 800-367-2810
Online: www.ballarddesigns.com
MADE IN CHINA
Page 1 of 7
Advertisement

Related Manuals for Ballard Designs Hampton MA265


Summary of Contents for Ballard Designs Hampton MA265
- Page 1 Customer Service: 800-367-2810 Online: www.ballarddesigns.com PRODUCT NAME: Hampton Entry Bench and Hutch ITEM NUMBER: MA265 (Components MA263 (Bench) and MA264 (Hutch)) ASSEMBLED DIMENSIONS : 80”H x 55 1/2 ”W x 18”D PRODUCTS ARE NOT INTENDED MADE IN CHINA FOR COMMERCIAL USE. UPDATED: 9-6-2022 Page 1 of 7...
-
Page 2: Tools Needed
NOTE: Assemble furntiure in location for use. Hardware Shelf Ltr. Included Hardware Qty. TOOLS NEEDED: Phillips Screwdriver, Pencil Shelf Supports -Two person assembly suggested. Remove all parts, hardware and Connector Brackets protective packaging from carton and carefully arrange on a clean, Screws level, padded surface. -
Page 3: Required Tools
REQUIRED TOOLS : Hardware Phillips Screwdriver, Pencil -Two person assembly suggested. Remove all parts, hardware and protective packaging from carton and carefully arrange on a clean, level, padded surface. NOTE: To avoid accidentally discarding small parts or hardware, retain all carton contents until assembly and installation are complete. - Page 4 STEP 1: Bench unit is equipped with Rotary Levelers located under each corner. If necessary, tilt bench up and turn Leveler clockwise/counterclockwise to adjust. STEP 2: Join Bench (G) and Hutch (O) as illustrated below. Insert Wood Dowels (F) into pre-drilled holes in top of Bench and place Cam Bolts (D) into base of Hutch.
- Page 5 STEP 3: Further secure Hutch (O) to Bench (G) by attaching Connector Brackets (B) into pre-drilled holes on back of both units. Use Screws (C) and firmly tighten to secure. See illustra- tion below for placement. STEPS 4 through 7 Cover ANTI-TIP ANCHORING HARWARE STEP 4: Locate and pencil mark Wall Stud(s) in wall behind installation location.
- Page 6 STEP 5: With unit pushed against the wall, slide L-Bracket (M) over top back of unit and center in front of Wall Stud. Use a pencil to MARK TOP OF BRACKET. STEP 6: Pull unit away from wall and attach L-Bracket (M) at previously marked location using Long Screws (L).
- Page 7 STEP 7: Slide unit back into place UNDER installed L-Bracket (M) then attach Bracket to top of Hutch (O) using Short Screws (N). NOTE: Floor molding may prevent Bracket from entirely covering top. Use Screws only in holes which cover top. STEP 8: Determine Shelf (K) placement then insert Shelf Supports (A) into pre-drilled holes located inside Bench (G).
Need help?
Do you have a question about the Hampton MA265 and is the answer not in the manual?
Questions and answers