Table of Contents
Advertisement
Quick Links
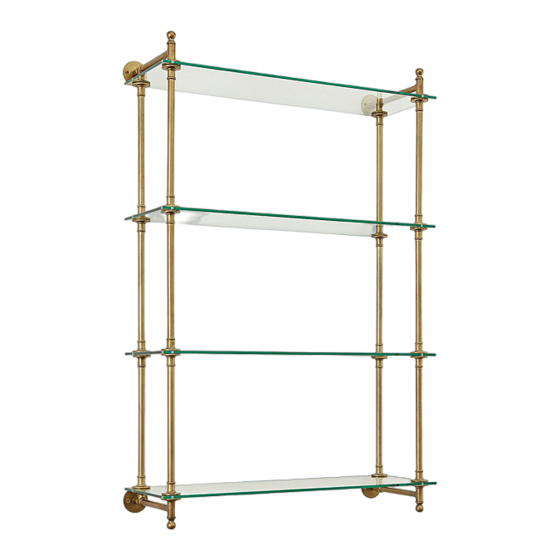
PRODUCT NAME: Marloe Glass Shelf
ITEM NUMBER: WV025
ASSEMBLED DIMENSIONS : 52 1/2"H x 36"W x 12"D
PRODUCTS ARE NOT INTENDED
FOR COMMERCIAL USE.
UPDATED: 4-15-2021
Prevent accidentally discarding small parts or
hardware. Retain all carton contents until assembly
and installation are complete.
Customer Service: 800-367-2810
Online: www.ballarddesigns.com
MADE IN INDIA
Page 1 of 5
Advertisement
Table of Contents

Related Manuals for Ballard Designs Marloe Glass Shelf WV025


Summary of Contents for Ballard Designs Marloe Glass Shelf WV025
- Page 1 Customer Service: 800-367-2810 Online: www.ballarddesigns.com PRODUCT NAME: Marloe Glass Shelf ITEM NUMBER: WV025 ASSEMBLED DIMENSIONS : 52 1/2”H x 36”W x 12”D Prevent accidentally discarding small parts or hardware. Retain all carton contents until assembly and installation are complete. PRODUCTS ARE NOT INTENDED MADE IN INDIA FOR COMMERCIAL USE.
- Page 2 Assemble in location for intended use. SAFETY NOTICE REQUIRED TOOLS: The wall surface must be capable of supporting Phillips Screwdriver, Pencil, the combined weight of the item and any loaded contents; Level, Drill with 3/8” bit otherwise, the structure must be reinforced. -Two person assembly suggested.
- Page 3 IMPORTANT NOTICE Shelf unit must be fully assembled BEFORE hanging. At least two people required to lift, mark and install assembled shelf. Do not assemble on wall. STEP 1: Create base by fitting a Glass Shelf (F) over threaded studs on Lower Brackets (C). Secure by turning Supports with SHORT Studs (D) onto top.
- Page 4 Two or more people required to complete Steps 7 and 8. STOP STOP STEP 7: Determine location for installation and locate Wall Studs in wall. Optimal support is provided when one side of Shelf is attached to a Wall Stud. Two or more people lift assembled Shelf to wall using a Level to adjust.
- Page 5 INSTALLING EXPANSION BOLTS Drywall 3/8” Drill Bit Teeth Tap in Bolt until teeth sink into wall surface. Create Pilot Hole (C, G) Barrel Turn bolt clockwise until it begins to slip. Remove Bolt/Add Bracket/Replace-Tighten Customer Service: 800-367-2810 Page 5 of 5 Online: www.ballarddesigns.com...
Need help?
Do you have a question about the Marloe Glass Shelf WV025 and is the answer not in the manual?
Questions and answers