Table of Contents
Advertisement
FlexTech
Assembly Instructions
EP-550/650, EP-850 & EP-950
Inversion Tables
Pour télécharger et imprimer les instructions de
montage du dossier ComforTrak™ en français,
rendezvous sur teeterinversion.com
Para descargar e imprimir las instrucciones
de montaje de ComforTrak™ en español, visite
5
teeterinversion.com
YEAR
R
Series
TM
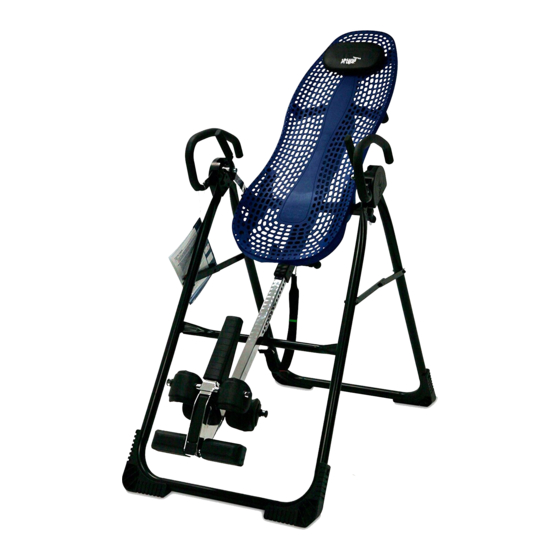
* Inversion Table images may
vary slightly from your model.
The EP-550 is shown here.
Advertisement
Table of Contents

Related Manuals for Teeter Hang Ups FlexTech Series


Summary of Contents for Teeter Hang Ups FlexTech Series
- Page 1 FlexTech Series Assembly Instructions EP-550/650, EP-850 & EP-950 Inversion Tables Pour télécharger et imprimer les instructions de montage du dossier ComforTrak™ en français, rendezvous sur teeterinversion.com Para descargar e imprimir las instrucciones de montaje de ComforTrak™ en español, visite teeterinversion.com YEAR * Inversion Table images may vary slightly from your model.
- Page 2 BEFORE YOU BEGIN: Review all steps before beginning assembly and read all precautions before using the inversion table. Carefully adhere to the Assembly Instructions and Owner’s Manual to help ensure safety and product integrity. IMPORTANT SAFETY INSTRUCTIONS READ ALL INSTRUCTIONS BEFORE USING THE INVERSION TABLE. WARNING WARNING - To reduce the risk of injury to persons: •...
- Page 3 BEFORE YOU BEGIN: Review all steps before beginning assembly and read all precautions before using the inversion table. Carefully adhere to the Assembly Instructions and Owner’s Manual to help ensure safety and product integrity. IMPORTANT SAFETY INSTRUCTIONS READ ALL INSTRUCTIONS BEFORE USING THE INVERSION TABLE. WARNING •...
-
Page 4: Items For Assembly
ITEMS FOR ASSEMBLY (Page 1 of 2) ITEM NAME ITEM NAME ITEM NUMBER ITEM NUMBER Tools Handle Assembly (EP-850) 6mm Allen Wrench (1) EP1128A Over-EZ™ Handle, EP-850 F51118 10/13mm Open-Ended Wrenches (2) F51088 Over-EZ™ Handle Assembly Hardware Kit HK1023 Double-Threaded Bolts (6) F51128 Base Assembly Nuts (12) - Page 5 ITEMS FOR ASSEMBLY (Page 2 of 2) Items not shown to scale. A-Frame(s) Main Shaft(s) Roller Hinges F51067 EP1125 TR1003 NX1630 F71002 Handle(s) Head Pillow (optional) EP1100 FlexTech™ Table Bed EP1105 F51069 F51118 EP1140 GL9505 GL9524...
- Page 6 IMPORTANT: Please identify the model of your Teeter inversion table before beginning assembly. The model name can be found on the Serial Label, located on the back of the Table Bed. My Serial Number: ________________________ EP-550 Models EP-850 Models EP-950 Models We hope you enjoy your new Teeter Hang Ups Inversion Table!
-
Page 7: Understanding Your Inversion Table
UNDERSTANDING YOUR INVERSION TABLE Before reading further, study the drawing below to familiarize yourself with the important components of your new Teeter Hang Ups Inversion Table. ® Identifying Parts and Components Head Pillow Spreader Arms FlexTech Table Bed Angle Tether ™... - Page 8 WARNING LABEL PLACEMENT DIAGRAM Important: Please review all labels and supporting materials before using your inversion table. This drawing indicates the locations of the warning labels found on your product. If a label is missing, illegible or is removed, contact Customer Service at the phone number or website found on the last page to request a complimentary replacement label.
-
Page 9: Before Beginning Assembly
BEFORE BEGINNING ASSEMBLY Unpack and Prepare Your Workspace • If possible, set up the product at or near the space in which you intend to use it to avoid moving it later. • Unpack all parts and support materials. Set aside packing materials and clear your work area. •... -
Page 10: A-Frame Assembly
STEP 1 A-Frame Assembly • On a level surface, carefully position the A-Frame so that it is standing upright and the FIGURE 1 Stability Feet are on the ground. • Gently push down on the Spreader Arms to ensure they are fully open and in the “locked” Right Left position (Figure 1). -
Page 11: Handle Assembly
STEP 2 Handle Assembly Based on your model, the assembly in this step will differ. For users with the EP-550/650, assemble the Tri-Grip Handles FIGURE 2 • Locate the Tri-Grip Handle Assembly Hardware Kit, which contains the hardware that is required for the assembly detailed in this step. - Page 12 STEP 3 Table Bed Assembly • Locate the Table Bed Assembly Hardware Kit, which contains the hardware that is required FIGURE 5 for the assembly detailed in this step. • Place the Table Bed face down on the floor and push down on the Support Beam, so the two holes align evenly with the holes at the base of the Upper Support Arms (Figure 5).
- Page 13 STEP 4 Roller Hinge Assembly Based on your model, the item(s) used for this step will differ but the assembly process remains the same. • Familiarize yourself with the Roller Hinge and Cam Lock terms detailed below in Figure 7. FIGURE 8 FIGURE 7 WARNING...
- Page 14 STEP 5 Attach the Table Bed to the A-Frame • Pick up the Table Bed, holding each side near the Roller Hinges, and stand in front of the FIGURE 11 A-Frame where the Crossbar is located (refer to Figure 3 to determine A-Frame Front). •...
-
Page 15: Step 6 Assembling The Main Shaft
STEP 6 Assembling the Main Shaft Based on your model, the item(s) used for this step will differ but the assembly process remains the same. • Loosen the De-Rattler Knob. FIGURE 14 • Facing the front of the A-Frame, hold the Main Shaft in your left hand with the height markings facing up. -
Page 16: Misassembly Check
MISASSEMBLY CHECK WARNING If your Teeter Hang Ups Inversion Table looks like either of these images, your inversion table has been misassembled and is unfit for use. Improper assembly could result in serious injury or death! Image B Image A Go back to Step 5 for instruction. - Page 17 STEP 9 Attach the Accessories Attach the Angle Tether (OPTIONAL) FIGURE 18 • The tether will come pre-assembled to the A-Frame. • Unfold the adjustable tether and clip it to the U-Bar on the underside of the Table Bed (Figure 18). •...
-
Page 18: Before Inverting
Attach the Owner’s Manual FIGURE 20 The Owner’s Manual contains important information on how to use your Teeter Hang Ups Inversion Table, including how to personalize the user settings, properly secure and release the Ankle Lock System, and test and adjust the rotation control. - Page 19 Adjusting the Roller Hinge Setting Adjustments: Changing the Roller Hinge Setting FIGURE 21 To adjust the Roller Hinge setting, you’ll need to fully remove the Table Bed from the A-Frame. • Remove the Angle Tether from the U-Bar located on the underside of the Table Bed. •...
-
Page 20: Maintenance And Storage
Maintenance & Storage Maintenance FIGURE 24 • To clean the Inversion Table, wipe down with a damp cloth. Do not use abrasive cleaners or solvents. Storage • Remove the Angle Tether from the U-Bar located on the underside of the Table Bed. •... - Page 21 Any modification to this device will void the UL Listing. www.InversionInternational.com Tel. +49 511 62628630 U.S. and Foreign Patents Pending. Teeter Hang Ups is a registered trademark of Teeter. Specifications subject to change without notice. © COPYRIGHT 2013 Teeter. International Law Prohibits Any Copying. EP1795 1113-9...
Need help?
Do you have a question about the FlexTech Series and is the answer not in the manual?
Questions and answers