Advertisement
Quick Links
Advertisement

Related Manuals for Teeter Hang Ups FitForm


Summary of Contents for Teeter Hang Ups FitForm
-
Page 1: Assembly Instructions
Assembly Instructions Want more information about your FitForm Inversion Table? 1. Be sure to watch the instructional DVD 2. Read the Owner’s Manual attached to the table 3. Call the customer service at 1-888-817-1702 4. Visit www.FitForm-Inversion.com... -
Page 2: Important Safety Instructions
PRE-ASSEMBLY Before you begin: Review all steps before beginning assembly and read all precautions before using the inversion table. Carefully adhere to the Assembly Instructions and Owner’s Manual to help ensure user safety and product integrity. IMPORTANT SAFETY INSTRUCTIONS READ ALL INSTRUCTIONS BEFORE USING THE INVERSION TABLE. WARNING WARNING - To reduce the risk of injury to persons:... -
Page 3: Pre-Assembly
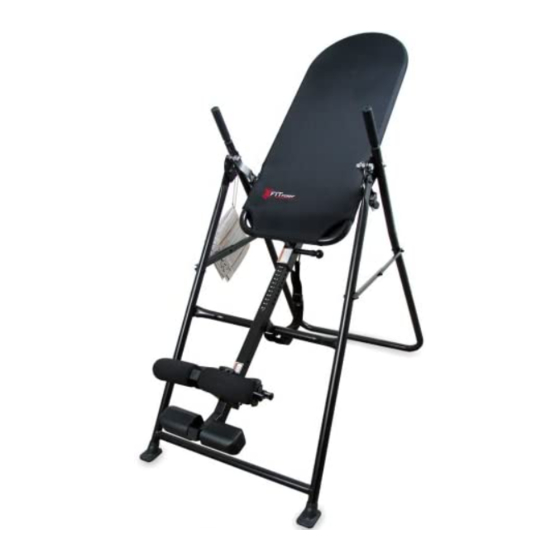
PRE-ASSEMBLY ITEMS FOR ASSEMBLY Carefully remove the individual parts from the carton. You should have all of the items listed below. If any items are missing or damaged, contact the Customer Service number listed on the front of your Owner’s Manual. Items for Assembly Item Numbers A-frame Base... - Page 4 ASSEMBLY Before Beginning Before reading further, study the drawing below to familiarize yourself with the important components of your new FitForm Inversion Table. Bed Mat A-frame Handles Crossbar Front Ankle Clamps Adjustable Foot Platform Adjustable Tether Main Shaft Rear Ankle...
- Page 5 ASSEMBLY Step One Assemble the Stability Feet (FF-1102) and the A-frame Base (FF-1101) Set the A-Frame so the base points up (Figure 1). This will give you downward leverage to properly assemble the Stability Feet. Steady Figure both sides of the A-frame so the legs do not swing open.
- Page 6 ASSEMBLY Step Two Lock the Roller Hinges (F5-1064) onto the Bed Mat (FF-1130) • For ease of assembly, rest the Bed Mat against the side of the A-frame (Figure 3). • Open the Cam Locks on each side of the Bed Mat (Figure 4). •...
- Page 7 ASSEMBLY Step Three Attach the Bed Mat (FF-1130) to the A-frame (FF-1101) • Holding each side near the Roller Hinges, pick up the Bed Mat and stand at the front of the A-frame where the Crossbar is located. Lower each Pivot Pin into the A-frame hinge plates one side at a time (Figure 6).
- Page 8 ASSEMBLY Step Four Height Selector Locking Pin Insert the Main Shaft (FF-1120) into the Bed Mat (FF-1130) • With the height adjustment settings on the Main Shaft facing up, slide the end of the Main Shaft into the Main Shaft housing (Figure 8).
- Page 9 ASSEMBLY Step Five Rotate the Front Ankle Clamps on the Main Shaft (FF-1102) • Pull up on the locking pin of the Ankle Clamps (Figure 10). • Pull outward on the spring- loaded Front Ankle Clamps until the square tubing is disengaged from the Main Shaft.
- Page 10 ASSEMBLY Step Six Install the Rear Bar Assembly With the rounded corners of the rear foam Heel Cup facing down, insert the Rear Bar with one Heel Cup (IA- 1113) into the large hole at the bottom of the Main Shaft (Figure 12).
- Page 11 ASSEMBLY Step Seven Install the Foot Platform Assembly • Slide the Foot Bar (IA-1119) with one Foot Piece (IA-1118) in the hole beneath the Ankle Clamps (Figure 14). • The Foot Pieces are designed with a High and Low setting. Position in Figure 14 the Low setting (Screw holes facing up) for ease of assembly.
- Page 12 • For your reference, the serial number can be found at the base of the Bed Mat on the back. WARNING Read the Owner’s Manual thoroughly before using the FitForm. Improper settings Figure 18 could result in serious injury or death!
- Page 13 WARNING: This operation may pinch fi ngers if not done slowly and carefully. BED MAT: REMOVING/CLEANING/TIGHTENING Note: The step only applies if you have the FitForm Standard Figure 21 • You may fi nd it easier to remove the Bed Mat while the table is in its storage position.
- Page 14 If you have any problems assembling the equipment, or questions about its use, please contact customer service at: USA: (Phone) 888-817-1702 U.S. patents apply. Europe: +44-20-8667-0060 Specifi cations subject to change without notice. International: +1-242-362-1001 © FitForm 2010 International Law Prohibits Any Copying, info@FitForm-Inversion.com XX-XXXX 0210-1 www.FitForm-Inversion.com...
Need help?
Do you have a question about the FitForm and is the answer not in the manual?
Questions and answers