Advertisement
Quick Links
ITEM
QUANTITY
1
1
2
1
3
1
4
1
5
1
6
1
7
1
8
2
9
12
10
24
11
12
12
12
13
4
14
4
15
8
16
4
17
14
18
4
19
8
20
4
21
4
22
4
23
4
24
1
25
1
ANTI-SEIZE LUBRICANT MUST BE USED ON ALL STAINLESS STEEL FASTENERS TO PREVENT THREAD DAMAGE AND GALLING
1. Remove contents from box, verify if all parts listed are present and free from damage.
Carefully read and understand all instructions before attempting installation.
Failure to identify damage before installation could lead to a rejection of any claim.
Westin Automotive Products, Inc.
320 W. Covina Blvd
San Dimas, Ca. 91773
P.N.: 75-5841045-RevA
ECO #: W18-153
INSTALLATION INSTRUCTIONS
APPLICATION:
2016-2019 Toyota Tacoma
PART NUMBER:
58-41045
CONTENT
DESCRIPTION
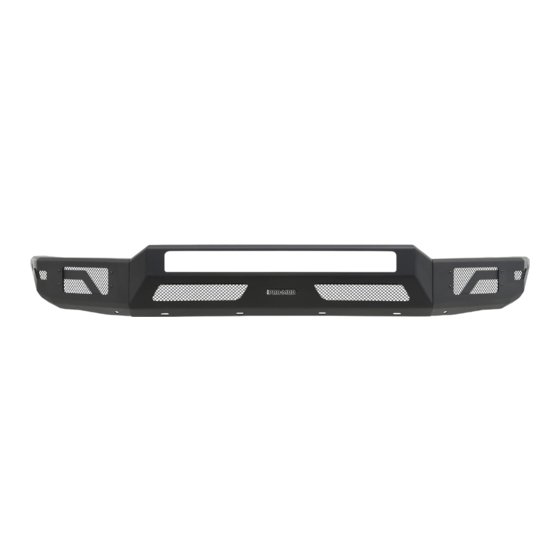
CENTER SECTION
DRIVER SIDE POD
PASSENGER SIDE POD
DRIVER MOUNTING BRACKET
PASSENGER MOUNTING BRACKET
DRIVER SUPPORT BRACKET
PASSENGER SUPPORT BRACKET
LED LIGHT BRACKET
M6 BUTTON HEAD BOLT (BLACK ZINC)
M6 FLAT WASHER (BLACK ZINC)
M6 SERRATED FLANGE NUT (BLACK ZINC)
M6 LOCK WASHER (BLACK ZINC)
M10 BUTTON HEAD BOLT (BLACK ZINC)
M10 SPLIT LOCK WASHER (BLACK ZINC)
M10 FLAT WASHER (BLACK ZINC)
M10 HEX NUT (BLACK ZINC)
M12 FLAT WASHER (YELLOW ZINC)
M10 SERRATED FLANGE NUT (YELLOW ZINC)
M10 FLAT WASHER (YELLOW ZINC)
M10 HEX HEAD BOLT (YELLOW ZINC)
M12 SERRATED FLANGE NUT (YELLOW ZINC)
M12 HEX BOLT (YELLOW ZINC)
M12 LOCK WASHER (YELLOW ZINC)
DRIVER MESH POD COVER
PASSENGER MESH POD COVER
PROCEDURE
1
PRO MOD BUMPER
Thank you for choosing Westin products
for additional installation assistance please call
Customer Service (800) 793-7846
www.westinautomotive.com
TOOLS NEEDED
10MM SOCKET
17MM SOCKET
19MM SOCKET
ALLEN WRENCH
CUTTING TOOL
RULER
MARKER
TAPE
PRYING TOOL
RATCHET
TORQUE WRENCH
DATE: 06/25/19
Advertisement

Subscribe to Our Youtube Channel
Summary of Contents for Westin 58-41045
- Page 1 Carefully read and understand all instructions before attempting installation. Failure to identify damage before installation could lead to a rejection of any claim. Westin Automotive Products, Inc. Thank you for choosing Westin products 320 W. Covina Blvd for additional installation assistance please call San Dimas, Ca.
- Page 2 See Figure 1 and 2. Once all fasteners have been removed, firmly pull radiator from top towards the front of the vehicle. Figure 2 Figure 1 Westin Automotive Products, Inc. Thank you for choosing Westin products 320 W. Covina Blvd for additional installation assistance please call San Dimas, Ca. 91773 Customer Service (800) 793-7846 www.westinautomotive.com...
- Page 3 Also, make sure to disconnect all wires and fog lights attached to the bumper. Figure 6 Westin Automotive Products, Inc. Thank you for choosing Westin products 320 W. Covina Blvd for additional installation assistance please call San Dimas, Ca. 91773 Customer Service (800) 793-7846 www.westinautomotive.com...
- Page 4 It is not necessary to unbolt black plastic piece from the fender. The bumper will be installed back again later after trimming. Westin Automotive Products, Inc. Thank you for choosing Westin products 320 W. Covina Blvd for additional installation assistance please call San Dimas, Ca. 91773 Customer Service (800) 793-7846 www.westinautomotive.com...
- Page 5 Starting at the driver side of the bumper. Measure from the top corner down 1.75”. Mark a dash at that point. See Figure 11-12 Fig. 11 Fig. 12 1.75” Measure here Westin Automotive Products, Inc. Thank you for choosing Westin products 320 W. Covina Blvd for additional installation assistance please call San Dimas, Ca. 91773 Customer Service (800) 793-7846 www.westinautomotive.com P.N.: 75-5841045-RevA...
- Page 6 Re-install the OEM bumper assembly and fender flares after trimming is complete. See Figure 16 for example of trimmed bumper. Westin Automotive Products, Inc. Thank you for choosing Westin products 320 W. Covina Blvd for additional installation assistance please call San Dimas, Ca.
- Page 7 Repeat on passenger side. See Figure 17. Fig. 17 Trimming Procedure complete. Westin Automotive Products, Inc. Thank you for choosing Westin products 320 W. Covina Blvd for additional installation assistance please call San Dimas, Ca. 91773 Customer Service (800) 793-7846 www.westinautomotive.com...
- Page 8 11. Loosely install the center section and side pods to the main brackets using the supplied M12 Hardware. See Figure 19. Fig. 19 Westin Automotive Products, Inc. Thank you for choosing Westin products 320 W. Covina Blvd for additional installation assistance please call San Dimas, Ca.
- Page 9 13. Attach the Mesh Side Covers (24-25) to the Bumper using the supplied M6 Hardware. See Figures 21 & 22. Driver Side Shown Fig. 21 Westin Automotive Products, Inc. Thank you for choosing Westin products 320 W. Covina Blvd for additional installation assistance please call San Dimas, Ca. 91773 Customer Service (800) 793-7846 www.westinautomotive.com...
- Page 10 14. Align bumper as desired and torque all hardware as specified: M6 to 7 ft-lbs, M10 to 38 ft-lbs, M12 to 60 ft-lbs. Westin Automotive Products, Inc. Thank you for choosing Westin products 320 W. Covina Blvd for additional installation assistance please call San Dimas, Ca.
-
Page 11: Install Complete
STAINLESS STEEL PRODUCTS CAN BE CLEANED WITH MILD SOAP AND WATER. STAINLESS STEEL POLISH SHOULD BE USED TO POLISH SMALL SCRATCHES. GLOSS BLACK FINISHES SHOULD BE CLEANED WITH MILD SOAP AND WATER. Westin Automotive Products, Inc. Thank you for choosing Westin products 320 W. Covina Blvd for additional installation assistance please call San Dimas, Ca. 91773 Customer Service (800) 793-7846 www.westinautomotive.com... - Page 12 AND SAFETY. DRILLING: Most Westin products do not require drilling for installation. If drilling is defined as required, use caution when drilling a vehicle. FAILURE TO REVIEW AN AREA TO BE DRILLED MAY RESULT IN PERSONAL INJURY AND/OR INJURY TO OTHERS AS WELL AS VEHICLE DAMAGE.


Need help?
Do you have a question about the 58-41045 and is the answer not in the manual?
Questions and answers