Advertisement
Table of Contents
- 1 Table of Contents
- 2 Safety Information
- 3 Safety Instructions
- 4 Installation
- 5 Product Description
- 6 Control Panel
- 7 Before First Use
- 8 Daily Use
- 9 Clock Functions
- 10 Using the Accessories
- 11 Additional Functions
- 12 Hints and Tips
- 13 Care and Cleaning
- 14 Troubleshooting
- 15 Energy Efficiency
- Download this manual
Advertisement
Table of Contents

Related Manuals for AEG BSE577221M


Summary of Contents for AEG BSE577221M
- Page 1 BSE577221M User Manual Steam oven BSK577221M USER MANUAL...
-
Page 2: Table Of Contents
14. ENERGY EFFICIENCY..................... 43 FOR PERFECT RESULTS Thank you for choosing this AEG product. We have created it to give you impeccable performance for many years, with innovative technologies that help make life simpler – features you might not find on ordinary appliances. Please spend a few minutes reading to get the very best from it. - Page 3 ENGLISH manufacturer is not responsible for any injuries or damage that are the result of incorrect installation or usage. Always keep the instructions in a safe and accessible location for future reference. 1.1 Children and vulnerable people safety This appliance can be used by children aged from 8 •...
-
Page 4: Safety Instructions
Before carrying out any maintenance, disconnect the • appliance from the power supply. WARNING: Ensure that the appliance is switched off • before replacing the lamp to avoid the possibility of electric shock. Do not use the appliance before installing it in the •... - Page 5 ENGLISH to be replaced, this must be carried out by our Authorised Service Centre. Cabinet minimum 590 (600) mm • Do not let mains cables touch or height (Cabinet un- come near the appliance door or the der the worktop mini- niche below the appliance, especially mum height) when it operates or the door is hot.
- Page 6 • Do not change the specification of • Always cook with the oven door this appliance. closed. • Make sure that the ventilation • If the appliance is installed behind a openings are not blocked. furniture panel (e.g. a door) make sure •...
-
Page 7: Installation
ENGLISH 2.6 Steam Cooking – any removable objects (including shelves, side rails etc., provided with the product) particularly any WARNING! non-stick pots, pans, trays, Risk of burns and damage to utensils etc. the appliance. • Read carefully all the instructions for •... - Page 8 3.1 Building In min. 550 min. 560 min. 550 min. 560 3.2 Securing the oven to the cabinet...
-
Page 9: Product Description
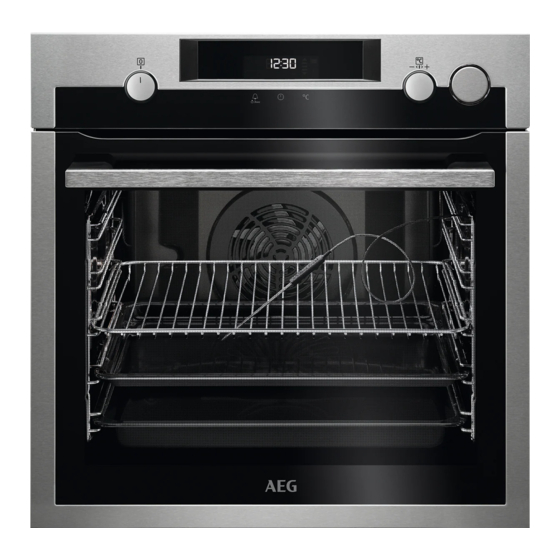
ENGLISH 4. PRODUCT DESCRIPTION 4.1 General overview Control panel Knob for the heating functions Display Control knob (for the temperature) Water drawer Heating element Socket for the food sensor Lamp 10 Shelf support, removable 11 Draining pipe 12 Water outlet valve 13 Shelf positions 14 Steam inlet 4.2 Accessories... -
Page 10: Before First Use
5.2 Display A. Timer / Temperature B. Heat-up and residual heat indicator C. Water drawer D. Food Sensor (selected models only) E. Door lock (selected models only) F. Hours / minutes G. Demo Mode H. Clock functions 6. BEFORE FIRST USE 6.1 Initial Cleaning... - Page 11 ENGLISH 7.2 Heating functions Oven function Application Oven function Application To roast large meat joints or poultry with bones on The oven is off. one shelf position. To Turbo Grilling make gratins and to Off position brown. To decrease the heat-up To steam dishes.
- Page 12 7.4 How to set: Heating 3. Fill the water drawer with water until the display shows Tank Full indicator. function The maximum capacity of the tank is 900 ml. It is sufficient for Step 1 Turn the knob for the heating...
-
Page 13: Clock Functions
ENGLISH manual. Put the connector (B) onto 3. Open the oven door and put the one of the ends of the draining pipe. connector (B) into the outlet valve 2. Put the second end of the draining (A). pipe (C) into a container. Put it at a 4. - Page 14 Step 1 Turn the knob for the temperature to set the hour. Step 2 - press to confirm. The display shows the set hour and: min. 00 - flashes. Step 3 Turn the knob for the temperature to set the minutes.
- Page 15 ENGLISH 8.5 How to set function: Time Delay Step 1 Set a heating function. Step 2 - press repeatedly. - starts to flash. Step 3 Turn the knob for the temperature to set the minutes for the function: Dura- tion. Press: Step 4 Turn the knob for the temperature to set the hour for the function: Duration.
-
Page 16: Using The Accessories
9. USING THE ACCESSORIES The display shows the symbol of the core WARNING! temperature sensor and the default core Refer to Safety chapters. temperature. 4. Press to save the new core 9.1 Using the core temperature, or wait 10 seconds for temperature sensor the setting to be saved automatically. - Page 17 ENGLISH 9.2 Inserting accessories desired, it can be modified within 5 seconds. This info is available A small indentation at the top increases only during the heating up phase. safety. The indentations are also anti-tip 2. Use the knob for the temperature to devices.
- Page 18 Glass bowl (A) Lid (B) 2. Put the deep pan into the oven on the necessary shelf position. You can use the trivet to grill flat dishes in large quantities and to toast. 1. Put the trivet into the deep pan so that the supports of the wire shelf point down.
- Page 19 ENGLISH Injector for direct steam cooking (D) • Do not clean the baking dish with Steel grill (E) abrasives, scourers and powders. • Do not put the hot baking dish on cold / wet surfaces. 9.5 Steam cooking in a dietary baking dish Put the food onto the steel grill in the baking dish and put the lid on it.
-
Page 20: Additional Functions
Make sure that you do not crush the 2. Put the baking dish onto the first or injector tube or let it touch a heating second shelf position from the element on the top of the oven. bottom. 4. Set the oven for the steam cooking Make sure that you do not crush the function. -
Page 21: Hints And Tips
ENGLISH the temperature in the oven is more than The signal sounds. SAFE , - appear on 40 °C.Turn the knob for the temperature the display. The door is locked. left or right to check the oven temperature. - the symbol appear on the display also when 10.4 Automatic switch-off Pyrolysis function operates. - Page 22 11.1 Cooking Leave the meat for approximately 15 minutes before carving so that the juice recommendations does not seep out. The oven has five shelf positions. To prevent too much smoke in the oven during roasting, add some water into the Count the shelf positions from the deep pan.
- Page 23 ENGLISH CAKES / PASTRIES (°C) (min) Biscuits, preheating is 20 - 35 3 (2 and 4) Baking tray not needed Sweet buns 180 - 200 12 - 20 Baking tray Brioches 15 - 20 3 (2 and 4) Baking tray Use the cake mould.
- Page 24 Use the second shelf position. Set the temperature to 130°C. (°C) (min) VEGETABLES Whole goose, 3 160 - 170 150 - 200 Use the second shelf position. (min) Tomatoes FISH Aubergines 15 - 20 Broccoli, florets 20 - 25...
- Page 25 ENGLISH FISH SIDE DISHES (min) (min) Trout / Salmon fillet 25 - 30 Boiled potatoes, quar- 35 - 45 tered Set the temperature to 130°C. Polenta 40 - 45 Unpeeled potatoes, me- 50 - 60 dium SIDE DISHES (min) Rice 35 - 40 11.5 Baking and roasting CAKES...
- Page 26 CAKES Conventional Cook- True Fan Cooking (min) (°C) (°C) Plum cake, 50 - 60 Bread tin preheat the empty oven Muffins, pre- 150 - 160 20 - 30 Baking tray heat the empty oven Muffins, two 140 - 150...
- Page 27 ENGLISH CAKES Conventional Cook- True Fan Cooking (min) (°C) (°C) Rich fruit cake 160 110 - 120 Cake mould, Ø 24 cm Preheat the empty oven. BREAD AND PIZZA Conventional True Fan Cooking Cooking (min) (°C) (°C) White bread, 1 60 - 70 - 2 pieces, 0.5 kg each...
- Page 28 FLANS Conventional Cooking True Fan Cooking (min) (°C) (°C) Pasta flan, preheating 40 - 50 is not needed Vegetable flan, pre- 45 - 60 heating is not needed Quiches 50 - 60 Lasagne 180 - 190 180 - 190...
- Page 29 ENGLISH MEAT Conventional Cooking True Fan Cooking (min) (°C) (°C) Pork shoulder, with rind 120 - 150 Pork shin, 2 pieces 100 - 120 Leg of lamb 110 - 130 Whole chicken 70 - 85 Whole turkey 210 - 240 Whole duck 120 - 150 Whole goose...
- Page 30 BEEF LAMB (°C) (min) (°C) (min) Roast beef or fil- 180 - 190 6 - 8 Lamb leg / Roast 150 - 170 100 - 120 let, medium lamb, 1 - 1.5 kg Roast beef or fil- 170 - 180...
- Page 31 ENGLISH 11.7 Defrost (kg) Defrosting Further defrosting time (min) time (min) Chicken 100 - 140 20 - 30 Place chicken on an upturned saucer placed on a large plate. Turn halfway through. Meat 100 - 140 20 - 30 Turn halfway through.
- Page 32 11.9 Food Sensor (°C) (°C) Chicken Roast veal 75 - 80 Hare 70 - 75 Veal knuckle 85 - 90 Trout / Sea bream 65 - 70 English roast beef, rare 45 - 50 Tuna / Salmon 65 - 70 English roast beef, medium 60 - 65 11.10 Moist Fan Baking -...
- Page 33 ENGLISH (°C) (min) Swiss roll baking tray or dripping 25 - 35 Brownie baking tray or dripping 25 - 30 Soufflè, 6 pieces ceramic ramekins on 25 - 30 wire shelf Sponge flan base flan base tin on wire 15 - 25 shelf Victoria sandwich baking dish on wire 40 - 50...
- Page 34 (°C) (min) Mediterranean baking tray or dripping 25 - 30 vegetables, 0.7 11.12 Information for test institutes Tests according to IEC 60350-1. (°C) (min) Small Convention- Baking 20 - 30 cakes, 20 al Cooking tray per tray Small True Fan...
-
Page 35: Care And Cleaning
ENGLISH (°C) (min) Sponge True Fan Wire shelf 2 and 40 - 60 Preheat the oven cake, Cooking for 10 minutes. cake mould Ø26 cm Short True Fan Baking 140 - 20 - 40 bread Cooking tray Short True Fan Baking 2 and 140 -... - Page 36 Clean the cavity after each use. Fat accumulation or other residue may cause fire. Moisture can condense in the oven or on the door glass panels. To de- crease the condensation, let the oven work for 10 minutes before cook- Everyday Use ing.
- Page 37 ENGLISH Before the pyrolytic cleaning: Turn off the oven and Remove all accessories. Clean the oven floor and the in- wait until it is cold. ner door glass with warm water, a soft cloth and a mild deter- gent. Step 1 Set the function: - flashes.
- Page 38 Step 1 Turn off the oven. Step 2 Place a deep pan below the steam inlet. Step 3 Pour water into the water drawer: 850 ml. Add citric acid: 5 teaspoons. Wait for 60 min. Step 4 Turn on the oven and set the function: True Fan + Steam. Set the temperature to 230 °C.
- Page 39 ENGLISH 1. Fully open the door and find the hinge to the right side of the door. 2. Use a screwdriver to lift and turn fully the right side hinge lever. 8. Pull the door trim to the front to remove it.
-
Page 40: Troubleshooting
12.7 How to replace: Lamp Make sure that you install the middle panel of glass in the seats correctly. WARNING! Risk of electric shock. The lamp can be hot. Always hold the halogen lamp with a cloth to prevent grease residue from burning on the lamp. - Page 41 ENGLISH Problem Possible cause Remedy The oven does not heat up. The door is not closed cor- Fully close the door. rectly. The oven does not heat up. The fuse is blown. Make sure that the fuse is the cause of the malfunction. If the fuse is blown again and again, contact a quali- fied electrician.
- Page 42 Problem Possible cause Remedy There is not enough water in Fill the tank with water until The indicator is off. the tank. the indicator turns on. If wa- ter starts to leak in the oven, and the indicator is still off, contact a qualified service engineer.
-
Page 43: Energy Efficiency
Product number (PNC) ......... Serial number (S.N.) ......... 14. ENERGY EFFICIENCY 14.1 Product Information and Product Information Sheet* Supplier's name BSE577221M 949494757 Model identification BSK577221M 949494758 Energy Efficiency Index 81.2 Energy efficiency class Energy consumption with a standard load, conven- 0.93 kWh/cycle... - Page 44 When possible, do not preheat the oven heat inside the oven will continue to before cooking. cook. Keep breaks between baking as short as Use the residual heat to warm up other possible when you prepare a few dishes dishes.
- Page 45 ENGLISH...
- Page 46 www.aeg.com...
- Page 47 ENGLISH...
- Page 48 www.aeg.com/shop...
Need help?
Do you have a question about the BSE577221M and is the answer not in the manual?
Questions and answers