Table of Contents
Advertisement
Quick Links
Advertisement
Table of Contents

Related Manuals for AEG BSE577021M


Summary of Contents for AEG BSE577021M
- Page 1 BSE577021M User Manual Steam oven USER MANUAL...
-
Page 2: Table Of Contents
14. ENERGY EFFICIENCY..................39 FOR PERFECT RESULTS Thank you for choosing this AEG product. We have created it to give you impeccable performance for many years, with innovative technologies that help make life simpler – features you might not find on ordinary appliances. Please spend a few minutes reading to get the very best from it. - Page 3 ENGLISH responsible for any injuries or damage that are the result of incorrect installation or usage. Always keep the instructions in a safe and accessible location for future reference. 1.1 Children and vulnerable people safety This appliance can be used by children aged from 8 •...
-
Page 4: Safety Instructions
Service Centre or similarly qualified persons to avoid an electrical hazard. WARNING: Ensure that the appliance is switched off • before replacing the lamp to avoid the possibility of electric shock. WARNING: The appliance and its accessible parts •... - Page 5 ENGLISH • Do not let mains cables touch or come near the appliance door or the Cabinet depth 550 (550) mm niche below the appliance, especially Height of the front of 594 mm when it operates or the door is hot. •...
- Page 6 2.3 Use • Discoloration of the enamel or stainless steel has no effect on the WARNING! performance of the appliance. Risk of injury, burns and • Use a deep pan for moist cakes. Fruit electric shock or explosion. juices cause stains that can be permanent.
- Page 7 ENGLISH 2.5 Pyrolytic cleaning Ovens and can be also a source for low level harmful fumes. WARNING! • Fumes released from all Pyrolytic Risk of Injury / Fires / Ovens / Cooking Residues as Chemical Emissions described are not harmful to humans, (Fumes) in Pyrolytic Mode.
-
Page 8: Installation
3. INSTALLATION 3.1 Building in WARNING! Refer to Safety chapters. www.youtube.com/electrolux www.youtube.com/aeg How to install your AEG/Electrolux Oven - Column installation (*mm) min. 550 min. 560 (*mm) min. 550 min. 560... -
Page 9: Product Description
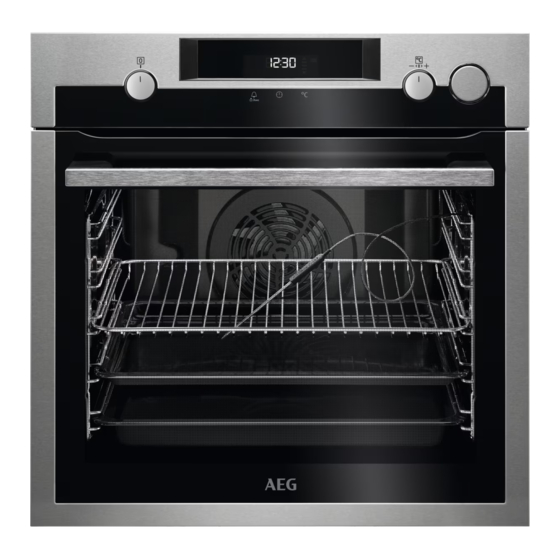
ENGLISH 3.2 Securing the oven to the cabinet 4. PRODUCT DESCRIPTION 4.1 General overview Control panel Knob for the heating functions Display Control knob (for the temperature) Water drawer Heating element Socket for the food sensor Lamp Shelf support, removable Draining pipe Water outlet valve Shelf positions... -
Page 10: Before First Use
5.2 Sensor fields / Buttons To set the MINUTE MINDER. Hold it for more than 3 sec‐ onds to turn on or turn off the oven lamp. To set a clock function. To check the oven temperature or the temperature of the core temperature sensor (if applicable). -
Page 11: Daily Use
ENGLISH 7. DAILY USE 2. Press the cover of the water drawer WARNING! to open it. Refer to Safety chapters. 3. Fill the water drawer with water until the display shows Tank Full indicator. 7.1 How to set: Heating The maximum capacity of the tank is function 900 ml. - Page 12 7.6 Emptying the water tank Heating func‐ Application CAUTION! tion Make sure that the oven is cold before you start to To decrease the heat-up empty the water tank. time. Fast Heat Up 1. Prepare the draining pipe (C),...
-
Page 13: Clock Functions
ENGLISH 7.8 Notes on: Moist Fan Baking Heating func‐ Application tion This function was used to comply with the energy efficiency class and To roast large meat joints ecodesign requirements according to EU or poultry with bones on 65/2014 and EU 66/2014. Tests one shelf position. - Page 14 Step 1 Turn the knob for the temperature to set the hour. Step 2 - press to confirm. The display shows the set hour and: min. 00 - flashes. Step 3 Turn the knob for the temperature to set the minutes.
- Page 15 ENGLISH 8.5 How to set function: Time Delay Step 1 Set a heating function. Step 2 - press repeatedly. - starts to flash. Step 3 Turn the knob for the temperature to set the minutes for the function: Duration. Press: Step 4 Turn the knob for the temperature to set the hour for the function: Duration.
-
Page 16: Using The Accessories
9. USING THE ACCESSORIES The display shows the symbol of the WARNING! core temperature sensor and the default Refer to Safety chapters. core temperature. 4. Press to save the new core 9.1 Using the core temperature, or wait 10 seconds for temperature sensor the setting to be saved automatically. - Page 17 ENGLISH 5 seconds. This info is available devices. The high rim around the shelf only during the heating up phase. prevents cookware from slipping of the 2. Use the knob for the temperature to shelf. change the temperature. 9.2 Inserting accessories A small indentation at the top increases safety.
- Page 18 Glass bowl (A) Lid (B) Injector, injector tube, and a steel grill. Injector tube (C) is for steam cooking, injec‐ tor (D) is for direct steam cooking. Steel grill (E) • Do not put the hot baking dish on •...
-
Page 19: Additional Functions
ENGLISH 9.5 Direct steam cooking Put the baking dish on the steel grill. Add some water. Do not use the lid. WARNING! The injector may be hot when oven operates. Always use oven gloves. Remove the injector from the oven when you do not use steam function. Step 1 Connect injector with injector tube. -
Page 20: Hints And Tips
10.4 Automatic switch-off 10.5 Cooling fan For safety reasons the oven turns off When the oven operates, the cooling fan after some time, if a heating function turns on automatically to keep the works and you do not change any surfaces of the oven cool. - Page 21 ENGLISH • the numbers of the shelf positions. • information about the oven functions, recommended shelf positions and temperatures for dishes. 11.3 True Fan + Steam Preheat the empty oven. CAKES / PASTRIES (°C) (min) Tarts, preheating is 30 - 40 Cake mould, Ø...
- Page 22 STEAM (°C) (min) REHEATING (°C) (min) Lamb leg, 1 kg 110 - 130 Pasta and 10 - 15 sauce Whole chicken, 55 - 65 1 kg Side dishes 10 - 15 Whole turkey, 4 180 - 240 One-plate 10 - 15...
- Page 23 ENGLISH Set the temperature to 130°C. MEAT SIDE DISHES (min) (min) Poached chicken breast 25 - 35 Rice 35 - 40 Cooked ham 55 - 65 Boiled potatoes, quar‐ 35 - 45 Kasseler 80 - 100 tered Set the temperature to 130°C. Polenta 40 - 45 Unpeeled potatoes, medi‐...
- Page 24 Conventional Cook‐ True Fan Cooking CAKES (min) (°C) (°C) Muffins, pre‐ 150 - 160 3 20 - 30 Baking tray heat the emp‐ ty oven Muffins, two 140 - 150 2 and 4 25 - 35 Baking tray levels, pre‐...
- Page 25 ENGLISH Conventional True Fan Cooking Cooking BREAD AND PIZZA (min) (°C) (°C) White bread, 1 60 - 70 - 2 pieces, 0.5 kg each Rye bread, 30 - 45 Bread tin preheating is not needed Bread rolls, 6 - 2 (2 and 4) 25 - 40 Baking tray 8 rolls...
- Page 26 Conventional True Fan Cooking Cooking MEAT (min) (°C) (°C) Beef 50 - 70 Pork 90 - 120 Veal 90 - 120 English roast beef, rare 50 - 60 English roast beef, medium 60 - 70 English roast beef, well done...
- Page 27 ENGLISH 11.6 Turbo Grilling Preheat the empty oven. VEAL Use the first or the second shelf position. (°C) (min) To calculate the roasting time multiple Veal knuckle, 1.5 160 - 180 120 - 150 the time given in the table below by the - 2 kg centimetres of thickness of the fillet.
- Page 28 11.7 Defrost (kg) Defrosting Further defrosting time (min) time (min) Chicken 100 - 140 20 - 30 Place chicken on an upturned saucer placed on a large plate. Turn halfway through. Meat 100 - 140 20 - 30 Turn halfway through.
- Page 29 ENGLISH 11.9 Food Sensor (°C) (°C) Pork shoulder 80 - 82 Roast veal 75 - 80 Pork shin 75 - 80 Veal knuckle 85 - 90 Lamb 70 - 75 English roast beef, rare 45 - 50 Chicken English roast beef, medium 60 - 65 Hare 70 - 75 English roast beef, well...
- Page 30 (°C) (min) Swiss roll baking tray or dripping 25 - 35 Brownie baking tray or dripping 25 - 30 Soufflè, 6 pieces ceramic ramekins on 25 - 30 wire shelf Sponge flan base flan base tin on wire 15 - 25...
- Page 31 ENGLISH (°C) (min) Mediterranean baking tray or dripping 25 - 30 vegetables, 0.7 11.12 Information for test institutes Tests according to IEC 60350-1. (°C) (min) Small Conven‐ Baking 20 - 30 cakes, tional tray 20 per Cooking tray Small True Fan Baking 150 - 160 20 - 35 cakes,...
-
Page 32: Care And Cleaning
(°C) (min) Sponge True Fan Wire shelf 2 40 - 50 Preheat the oven cake, Cooking for 10 minutes. cake mould Ø26 cm Sponge True Fan Wire shelf 2 and 4 40 - 60 Preheat the oven cake, Cooking for 10 minutes. - Page 33 ENGLISH 12.1 Notes on cleaning Clean the front of the oven with a soft cloth with warm water and a mild detergent. Use a cleaning solution to clean metal surfaces. Clean stains with a mild detergent. Cleaning Agents Clean the cavity after each use. Fat accumulation or other residue may cause fire.
- Page 34 12.3 How to use: Pyrolysis CAUTION! If there are other appliances Clean the oven with Pyrolysis. installed in the same WARNING! cabinet, do not use them at There is a risk of burns. the same time as this function. It can cause damage to the oven.
- Page 35 ENGLISH Step 1 Turn off the oven. Step 2 Place a deep pan below the steam inlet. Step 3 Pour water into the water drawer: 850 ml. Add citric acid: 5 teaspoons. Wait for 60 min. Step 4 Turn on the oven and set the function: True Fan + Steam. Set the temperature to 230 °C.
- Page 36 Step 1 Open the door fully and hold both hinges. Step 2 Lift and turn the levers fully on both hinges. Step 3 Close the oven door halfway to the first opening position. Then lift and pull forward and remove the door from its seat.
-
Page 37: Troubleshooting
ENGLISH Make sure that you put the glass panels (A and B) back in the correct sequence. Check for the symbol / printing on the side of the glass panel, each of the glass pan‐ els looks different to make the disassembly and assembly easier. - Page 38 The oven does not turn on or does not Error codes heat up 12:00 There was a power Problem Check if... cut. Set the time of day. You cannot activate The oven is correct‐ or operate the oven. ly connected to an If the display shows an error code that is electrical supply.
-
Page 39: Energy Efficiency
We recommend that you write the data here: Model (MOD.) ......... Product number (PNC) ......... Serial number (S.N.) ......... 14. ENERGY EFFICIENCY 14.1 Product Information and Product Information Sheet* Supplier's name Model identification BSE577021M 949494755 Energy Efficiency Index 81.2 Energy efficiency class... - Page 40 Energy consumption with a standard load, conven‐ 0.93 kWh/cycle tional mode Energy consumption with a standard load, fan-forced 0.69 kWh/cycle mode Number of cavities Heat source Electricity Volume 72 l Type of oven Built-In Oven Mass 33.7 kg * For European Union according to EU Regulations 65/2014 and 66/2014.
- Page 41 ENGLISH 15. ENVIRONMENTAL CONCERNS appliances marked with the symbol Recycle materials with the symbol with the household waste. Return the Put the packaging in relevant containers product to your local recycling facility or to recycle it. Help protect the contact your municipal office. environment and human health by recycling waste of electrical and electronic appliances.
- Page 44 www.aeg.com/shop...
Need help?
Do you have a question about the BSE577021M and is the answer not in the manual?
Questions and answers