Clean Water Systems Tannin 5900e Series Installation & Start?Up Manual
Hide thumbs
Also See for Tannin 5900e Series:
- Installation & start?up manual (24 pages) ,
- Installation & start?up manual (18 pages) ,
- Installation & start?up manual (19 pages)
Table of Contents
Advertisement
Quick Links
Clean Water Made Easy
www.cleanwaterstore.com
Tannin 5900e Installation & Start-Up Guide
Thank you for purchasing a Clean Water System! With proper installation and a little
routine maintenance your system will be providing clear water for many years.
Please review this start‐up guide entirely before beginning to install your system, and
follow the steps outlined for best results.
Questions?
Call us toll-free: 1-888-600-5426 or 1-831-462-8500
Email us:
support@cleanwaterstore.com
See more information on our website:
www.cleanwaterstore.com/resources
Advertisement
Table of Contents
Troubleshooting

Related Manuals for Clean Water Systems Tannin 5900e Series


Summary of Contents for Clean Water Systems Tannin 5900e Series
- Page 1 Clean Water Made Easy www.cleanwaterstore.com Tannin 5900e Installation & Start-Up Guide Thank you for purchasing a Clean Water System! With proper installation and a little routine maintenance your system will be providing clear water for many years. Please review this start‐up guide entirely before beginning to install your system, and follow the steps outlined for best results.
-
Page 2: Table Of Contents
Tannin 5900e Installation & Startup Guide Table of Contents Packing List ................................3 Pre-Installation ..............................4 Best Practices for Piping & Drain Installation ......................4 Installation of Your System into Copper or Metal Piping Systems ..............5 How Your Tannin Filter Works ..........................6 Fig 1: How Your Tannin Filter Works ......................... -
Page 3: Packing List
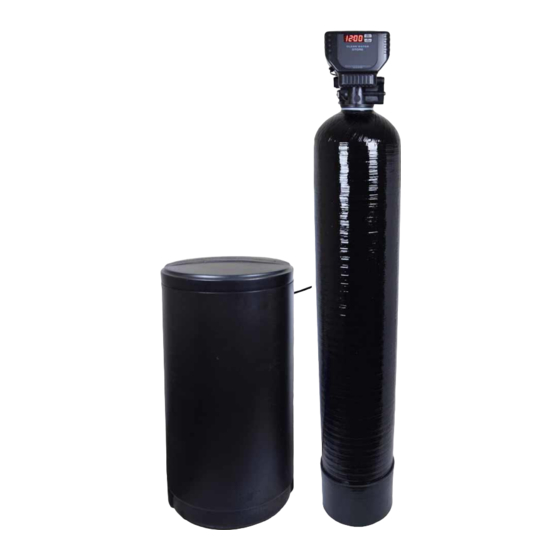
Tannin 5900e Installation & Startup Guide C. To Replace Piston Assembly ........................23 D. To Replace Seals and Spacers ........................23 E. To Replace Meter ............................24 F. To Check Drive Motor Operation ........................ 24 Packing List 1 CF Tannin 5900e System Quantity Description 5900e backwash control valve &... -
Page 4: Pre-Installation
Tannin 5900e Installation & Startup Guide Pre-Installation 1. Review your packing list and make sure you have received all the parts before beginning installation. Please ensure that all parts are included before scheduling a plumber or installer to come to the site. 2. -
Page 5: Installation Of Your System Into Copper Or Metal Piping Systems
Tannin 5900e Installation & Startup Guide 7. The drain line tubing (not supplied) is connected to a drain from the drain outlet using flexible ½” ID tubing. Note that the drain can run up above the 5900e control and into a drain, it does not have to drain down, as the filter backwashes under line pressure from your well pump. -
Page 6: How Your Tannin Filter Works
Tannin 5900e Installation & Startup Guide How Your Tannin Filter Works See Fig 1. In the Tannin filter, water enters the top of the tank and flows down through the media and up the distributor tube. Tannins are drawn to the resin beads in the Tannin filter. During backwash, the water flow is reversed and water flows down the distributor tube and up through the media, lifting and expanding the tannin resin, and removing any trapped particles. -
Page 7: Fig 2 - Typical Tannin 5900E Piping Installation With Ball Valve And Hose Bib After The Filter Along With Pre- And Post-Filtration If Necessary
Tannin 5900e Installation & Startup Guide Fig 2 - Typical Tannin 5900e piping installation with ball valve and hose bib after the filter along with pre- and post-filtration if necessary: Page 7 www.cleanwaterstore.com Rev 062915... -
Page 8: Fig 3: 5900E From The Rear Showing The Inlet And Outlet End-Connector Fittings 3/4" Or 1" Npt In Noryl Plastic. Brass End-Connectors Are Also Available For Connecting To Copper Tubing
Tannin 5900e Installation & Startup Guide Fig 3: 5900e from the rear showing the inlet and outlet end-connector fittings 3/4” or 1” NPT in Noryl plastic. Brass end-connectors are also available for connecting to copper tubing. Fig 4: 5900e Bypass/Service Mode Knob Positions Page 8 www.cleanwaterstore.com Rev 062915... -
Page 9: Installation Instructions
Tannin 5900e Installation & Startup Guide Installation Instructions 1. Wrap the top of distributor tube with electrical or duct tape so that no gravel or Tannin resin will go down the distributor tube when adding the media. Plug or tape top of distributor tube when adding media to prevent media from entering. -
Page 10: 5900E Bypass And Service Mode Positions
Tannin 5900e Installation & Startup Guide 7. Insert the bypass assembly if it has not been pre-assembled. See the bypass image below. Note the pipe connectors, while the other end is what gets attached to the control valve. The 5900e valve is usually shipped in by-pass position. -
Page 11: Attaching The Brine Line Tubing To The Brine Tank & The 5900E Brine Valve
Tannin 5900e Installation & Startup Guide should you ever desire for testing purposes, it is OK to use rigid PVC pipe for the drain. Make sure the drain tubing is firmly clamped to the barbed fitting with a hose clamp to prevent leaks. 13. - Page 12 Tannin 5900e Installation & Startup Guide 16. Add approximately 5 gallons of water to the brine tank, and then fill the brine tank with salt, using about 300 lbs, or 6 50-lb bags. It is OK to use any kind of water softening salt, however we find that extra coarse salt works better than pellets.
-
Page 13: Programming Your Valve
Tannin 5900e Installation & Startup Guide Programming Your Valve *While scrolling through numbers, it only increases the value. To decrease the value, you will have to “go all the way around” to get back to a lower value. 1. To enter main menu press the Menu/Enter button (Time of day will flash) 2. -
Page 14: Master Programming Mode
Tannin 5900e Installation & Startup Guide Master Programming Mode Entering Master Programming Mode -To enter Master Programming Mode press and hold both buttons for 5 seconds. 1. Regeneration Type (t) This display is used to set the Regeneration Type. This option setting is identified by the letter ‘t’... -
Page 15: Sample Regeneration Displays
Tannin 5900e Installation & Startup Guide Exiting the Master Programming Mode Press the Menu/Enter Button until all steps have been viewed. The Program Mode will be exited and normal operation resumed. If no buttons are pressed for 60 seconds or longer in Master Programming Mode it will be exited automatically. -
Page 16: Initial Backwash
Tannin 5900e Installation & Startup Guide Initial Backwash 1 If days remaining is not already at 1 press and hold the Set/Change button. Now, press and hold the set change button again, until the valve begins the backwash cycle and the display reads 1 – 10. -
Page 17: Maintenance
Tannin 5900e Installation & Startup Guide Maintenance Normal Operation -Normal display alternates between time of day and days until regeneration. -Days remaining until the next regeneration will count down from the regeneration day override value to 1 day remaining. -Once the count reaches 1, a regeneration cycle will be initiated at the next designated regeneration time. -
Page 18: Troubleshooting The 5900 Softener
Tannin 5900e Installation & Startup Guide Troubleshooting the 5900 Softener (Originally written for a softener, but is applicable for a Tannin filter) Page 18 www.cleanwaterstore.com Rev 062915... - Page 19 Tannin 5900e Installation & Startup Guide Page 19 www.cleanwaterstore.com Rev 062915...
-
Page 20: More Troubleshooting Tips
Tannin 5900e Installation & Startup Guide More Troubleshooting Tips Brine Solution Not Being Sucked In During Regeneration Most problems occur when the 5900e is not drawing in the brine. Make sure the injector is drawing in the brine: 1. Remove the brine tank tubing where it enters the 5900e control valve. 2. -
Page 21: System Not Programmed Correctly - Program Settings
Tannin 5900e Installation & Startup Guide System Not Programmed Correctly – PROGRAM SETTINGS In some cases, the 5900e may not be programmed correctly, try to verify the correct programming. Brine Tank Not Filling With Enough Water Sometimes if the brine tank is not filling adequately, it is possible that the float assembly in the tank is set too low. -
Page 22: Service Instructions
Tannin 5900e Installation & Startup Guide Service Instructions A. Replacing The Brine Valve, Injectors, and Screen 1. Turn off water supply to Tannin filter: a. If the Tannin filter installation has a “three valve” by-pass system, first open the valve in the by- pass line, then close the valves at the Tannin filter inlet and outlet. -
Page 23: To Replace Powerhead
Tannin 5900e Installation & Startup Guide B. To Replace Powerhead 1. Remove the control valve back cover. Remove the three screws along the outer edge of the back plate and remove the front cover. Disconnect the power supply and the circuit board signal wire from the motor and feed them back through the control. - Page 24 Tannin 5900e Installation & Startup Guide 6. Place powerhead on top of valve. Be sure drive pin on main gear engages slot in drive yoke (wide side of drive yoke upright must face to the left away from motor). 7. Replace powerhead mounting screws. Replace screw and washer at drive yoke. 8.
Need help?
Do you have a question about the Tannin 5900e Series and is the answer not in the manual?
Questions and answers