Moxa Technologies ioThinx 4530 Series Quick Installation Manual
Hide thumbs
Also See for ioThinx 4530 Series:
- Hardware user manual (23 pages) ,
- User manual (20 pages) ,
- Quick installation manual (12 pages)
Table of Contents
Advertisement
Quick Links
ioThinx 4530 Series
Quick Installation Guide
Moxa Americas:
Toll-free: 1-888-669-2872
Tel:
1-714-528-6777
Fax:
1-714-528-6778
Moxa Europe:
Tel:
+49-89-3 70 03 99-0
Fax:
+49-89-3 70 03 99-99
Moxa India:
Tel:
+91-80-4172-9088
Fax:
+91-80-4132-1045
Version 1.2, December 2019
Technical Support Contact Information
www.moxa.com/support
2019 Moxa Inc. All rights reserved.
Moxa China (Shanghai office):
Toll-free: 800-820-5036
Tel:
+86-21-5258-9955
Fax:
+86-21-5258-5505
Moxa Asia-Pacific:
Tel:
+886-2-8919-1230
Fax:
+886-2-8919-1231
P/N: 1802045300003
*1802045300003*
Advertisement
Table of Contents

Related Manuals for Moxa Technologies ioThinx 4530 Series


Summary of Contents for Moxa Technologies ioThinx 4530 Series
- Page 1 4530 Series Quick Installation Guide Version 1.2, December 2019 Technical Support Contact Information www.moxa.com/support Moxa Americas: Moxa China (Shanghai office): Toll-free: 1-888-669-2872 Toll-free: 800-820-5036 Tel: 1-714-528-6777 Tel: +86-21-5258-9955 Fax: 1-714-528-6778 Fax: +86-21-5258-5505 Moxa Europe: Moxa Asia-Pacific: Tel: +49-89-3 70 03 99-0...
-
Page 2: Package Checklist
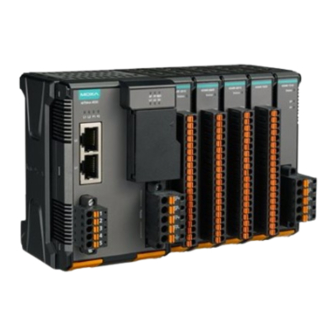
Introduction The ioThinx 4530 Series is an advanced modular controller with a unique hardware and software design that makes it ideal for a variety of industrial data acquisition applications. ATTENTION If the equipment is used in a manner not specified by the manufacturer, the protection provided by the equipment may be impaired. - Page 3 DIN rail when the product is attached to it. Connecting the Field Power The ioThinx 4530 Series can receive field power through a 12/24 VDC power input. Field power can be used to supply power for some types of I/O modules, such as digital input and analog output modules.
-
Page 4: Connecting The Field Power Ground
Connecting to the Network Ethernet Communication The ioThinx 4530 Series is equipped with two RJ45 LAN ports with two MAC addresses. Connect a network Ethernet cable to either port to provide an Ethernet connection to the unit. - Page 5 Installing the System on a DIN Rail Reserve at least 55 mm of space above the DIN rail to ensure that there is enough room to install the unit. Step 1: Hook the top mounting clip of the unit onto the DIN rail and then rotate the unit downwards until the bottom mounting clip comes in contact with the DIN rail.
- Page 6 Step 2: Push the 45M module until it touches the DIN rail. Next, apply more force until the module clips to the DIN rail. NOTE After the module is firmly attached to the DIN rail, the connections between the module and the internal bus will be established.
-
Page 7: Horizontal Installation
Installing Covers on the First and Last Modules Attach the covers to the first and last module to protect the modules’ contacts. NOTICE Be sure to attach the covers to provide protection against electrostatic discharge. Horizontal Installation Before installing the device, make sure there is enough space between the device and nearby items... -
Page 8: Led Indicators
P1/P2 Serial 1 of each Blinking: Data is being Amber transmitted Off: Inactive Connecting to the ioThinx 4530 Series Controller Use the following configuration information to log in to the ioThinx 4530 Series controller: Port Default IP Subnet Mask LAN1 192.168.127.254... -
Page 9: Specifications
NOTE It should take about 20 seconds from the time the RDY LED starts blinking green until it stops blinking red. How to Download the Software Related software packages can be downloaded from the Moxa website. Step 1: Go to the following address: https://www.moxa.com/en/support Step 2: Select a product list from the drop-down box or type the model name in the search box. - Page 10 3. Cables rated for a minimum temperature of 105°C must be used for the Power Supply Terminal. 4. We suggest using the following cable types for wiring: • ioThinx 4530 Series: > AWG 12 to 16 for power connections > AWG 16 to 28 for serial connections >...
Need help?
Do you have a question about the ioThinx 4530 Series and is the answer not in the manual?
Questions and answers