
Related Manuals for Moxa Technologies ioLogik 4000 Series


Summary of Contents for Moxa Technologies ioLogik 4000 Series
- Page 1 4000 Series User’s Manual Fourth Edition, December 2012 www.moxa.com/product © 2012 Moxa Inc. All rights reserved. RSPSupply - 1-888-532-2706 - www.RSPSupply.com http://www.RSPSupply.com/p-11304-Moxa-NA-4010.aspx...
- Page 2 4000 Series User’s Manual The software described in this manual is furnished under a license agreement and may be used only in accordance with the terms of that agreement. Copyright Notice © 2012 Moxa Inc. All rights reserved. Trademarks The MOXA logo is a registered trademark of Moxa Inc.
-
Page 3: Table Of Contents
Table of Contents Overview ............................1-1 ioLogik 4000 System Overview ......................1-2 Package List ............................1-2 Product Features ..........................1-3 Product Descriptions ........................... 1-3 Network Adaptors ........................1-3 Analog Input Modules ........................1-3 Analog Output Modules ........................ 1-3 Digital Input Modules ........................1-3 Digital Output Modules ......................... - Page 4 When to Use the Power Expansion Module ..................... 2-9 When to Use the Field Power Distributor ....................2-9 When to Use the Potential Distributor ....................2-9 Safety Notes ............................ 2-10 Installation and Cabling Precautions .................... 2-10 Operating Precautions ........................ 2-10 Getting Started ..........................
-
Page 5: Overview
Overview The ioLogik 4000 is a standalone Active Ethernet I/O server that can connect sensors and on/off switches for automation applications over Ethernet and IP-based networks. The following topics are covered in this chapter: ioLogik 4000 System Overview Package List ... -
Page 6: Iologik 4000 System Overview
ioLogik 4000 Overview ioLogik 4000 System Overview The ioLogik 4000 is a network I/O server that can connect sensors and on/off devices in any combination and can transfer the captured data or device status to a host computer via an Ethernet or RS-485/232 network. The ioLogik 4000 consists of two main parts. -
Page 7: Product Features
ioLogik 4000 Overview Product Features Detailed specifications of ioLogik 4000 are available in the software’s product specification help files. Refer to the help file for more information. • Remotely acquire sensor data and control I/O points via Ethernet, RS-232, or RS-485. •... -
Page 8: Digital Output Modules
ioLogik 4000 Overview Digital Output Modules Model Name Description M-2800 8 DOs, sink, MOSFET, 24 VDC, 0.5 A, RTB M-2801 8 DOs, source, MOSFET, 24 VDC, 0.5 A, RTB M-2600 16 DOs, sink, MOSFET, 24 VDC, 0.3 A, 20-pin M-2601 16 DOs, source, MOSFET, 24 VDC, 0.3 A, 20-pin M-2450 4 DOs, relay, 230 VAC, 24 VDC, 2.0 A, RTB... -
Page 9: Common Specifications For The Na-4010 And Na-4020/4021
ioLogik 4000 Overview NA-4020/4021 Serial Communication Parameters Parity: None, Even, Odd Data Bits: 7, 8 Stop Bits: 1, 2 Baudrate: 1200 to 115200 bps Signals: • NA-4020: Data+, Data-, Gnd, DIR (5-contact terminal block) • NA-4021: TxD, RxD, Gnd (9-pin D-Sub female) Software Features Protocols: Modbus/RTU, Modbus/ASCII Modbus Address: 00 to 99 (set by rotary switches) -
Page 10: Analog Input Modules
ioLogik 4000 Overview Analog Input Modules M-3802: 8 analog inputs, 4 to 20 mA, 12 bits Analog Inputs: 8 channels Resolution in Ranges: 12 bits, 3.91 µA/bit Input Current Range: 4 to 20 mA (single-ended) Data Format: 16-bit integer (2’s complement) Accuracy: •... -
Page 11: M-4410: 4 Analog Outputs, 0 To 10 V, 12 Bits
ioLogik 4000 Overview M-4410: 4 analog outputs, 0 to 10 V, 12 bits Analog Outputs: 4 channels Resolution in Ranges: 12 bits, 2.44 mV/bit Output Current Range: 0 to 10 VDC (single-ended) Data Format: 16-bit integer (2’s complement) Accuracy: • ±0.1%, FSR @ 25°C •... -
Page 12: M-1600: 16 Digital Inputs, Sink Type, 24 Vdc
ioLogik 4000 Overview M-1600: 16 digital inputs, sink type, 24 VDC Digital Inputs: 16 channels Type: sink On-state Voltage: 24 VDC nominal, 11 to 28.8 VDC Off-state Voltage: 0 to 5 VDC On-state Current: 6 mA/point @ 28.8 VDC (max.) Input Impedance: 5.1K ohms (typical) Filtering Time: 1.5 ms (typical) Common Type: 16 channels for 2 COMs (single common) -
Page 13: M-1451: 4 Digital Inputs, 220 Vac
ioLogik 4000 Overview M-1451: 4 digital inputs, 220 VAC Digital Inputs: 4 channels, 220 VAC On-state Voltage: 240 VAC nominal, 170 to 264 VAC Off-state Voltage: 0 to 45 VAC On-state Current: 12 mA/point @ 264 VAC (max.) Input Impedance: 22K ohms (typical) Common Type: 4 channels for 2 COMs (single common) Power Consumption: 35 mA @ 5 VDC Isolation: I/O to logic (photocoupler isolation) -
Page 14: M-2600: 16 Digital Outputs, Sink Type, 24 Vdc, 0.3 A
ioLogik 4000 Overview M-2600: 16 digital outputs, sink type, 24 VDC, 0.3 A Digital Outputs: 16 channels Type: sink Output Range: 24 VDC nominal On-state Voltage Drop: 0.3 VDC @ 25°C (max.) On-state Current: 1 mA per channel (min.) Off Leakage Current: 50 µA (max.) Current Rating: 0.5 A per channel Common Type: 8 channels per external common (single common) Power Consumption: 60 mA @ 5 VDC... -
Page 15: Power Modules
ioLogik 4000 Overview Power Modules M-7001: System power module System Input Voltage: 24 VDC, 11 to 28.8 VDC Field Power Input Voltage: 24 VDC (±20%) Current for I/O Modules: 1.5 A @ 5 VDC (Max.) System Bus Output Voltage: 5 VDC (Max.) Field Power Contacts Current: 10 A (Max.) MTBF: 19,569,840 hrs (Database: Telcordia/Bellcore) M-7002: Field power module... -
Page 16: Temperature Input Modules
ioLogik 4000 Overview Temperature Input Modules M-6200: 2 analog inputs, RTD: PT100, JPT100 RTD Inputs: 2 channels Sensor Types: • PT50, PT100, PT200, PT500, PT1000 (resistance 100 milli-ohms/bit) • JPT100, JPT200, JPT500, JPT1000 (resistance 10 milli-ohms/bit) • NI100, NI200, NI500, NI1000, NI120, CU10 (resistance 20 milli-ohms/bit) Resolution: 0.1°C/10 milli-ohms Data Format: 16-bit integer (2’s complement) Accuracy:... -
Page 17: Hardware Installation
Hardware Installation This chapter includes information about installing the ioLogik 4000 I/O server, including the Ethernet network adaptors and RS-485, RS-232 network adaptors. The following topics are covered in this chapter: System Architecture Connecting the Network Adaptor to I/O Modules ... -
Page 18: System Architecture
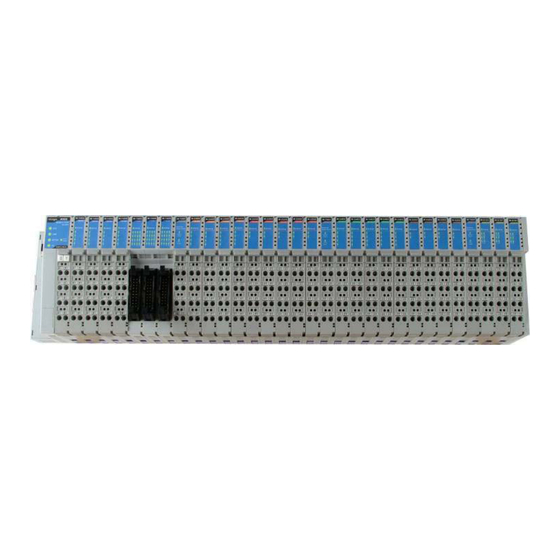
ioLogik 4000 Hardware Installation System Architecture • The ioLogik 4000 slice-type I/O server consists of a network adaptor that supports Ethernet, RS-485, or RS-232, and up to 32 I/O modules. • The ioLogik 4000’s network adaptor is the brains of the system. Its responsibility is to collect information from each I/O module, and determine the parameters for the I/O module’s operation. -
Page 19: Connecting The Network Adaptor To I/O Modules
ioLogik 4000 Hardware Installation Connecting the Network Adaptor to I/O Modules This section describes how to install ioLogik 4000 I/O modules with the network adaptor. Appearance Installing I/O Modules on a DIN Rail Step 1: Align the I/O module and network adaptor side by side, making sure the upper and lower rails are hooked. -
Page 20: Removing I/O Modules From A Din Rail
ioLogik 4000 Hardware Installation Removing I/O Modules from a DIN Rail Step 1: Use your finger or a screw driver to push down the tab located on the lower part of the module. Step 2: Pull out the I/O module. Installing an RTB (Removable Terminal Block) Removing the RTB from the I/O Module Pull hard to remove the plastic belt from the... -
Page 21: Installing The Rtb On The I/O Module
ioLogik 4000 Hardware Installation Installing the RTB on the I/O Module Align the lower part of the terminal block with the I/O module, and then push the RTB so that it fits into the I/O module. Connecting the Power System Two 24 VDC power sources are required to power the ioLogik 4000. -
Page 22: Ethernet Pin Assignments
ioLogik 4000 Hardware Installation Ethernet Pin Assignments Signal NA-4020 RS-485 Network Adaptor To configure the NA-4020 for the first time, we recommend connecting the NA-4020 to a host computer running the ioAdmin utility. Once the I/O system is configured, you can move the entire system to the field. Connecting a Single Serial I/O Server RS-485 or RS-232 E.g., COM1... -
Page 23: Na-4021 Rs-232 Network Adaptor
ioLogik 4000 Hardware Installation NA-4021 RS-232 Network Adaptor To configure the NA-4020 for the first time, connect the NA-4020 to a host computer running the ioAdmin utility. NA-4021 RS-232 Port Pin Assignment LED Indicators This section describes the ioLogik 4000 system’s LED indicators. LED Indicators for Network Adaptors NA-4010 LED Name... -
Page 24: Led Indicators For I/O Modules
ioLogik 4000 Hardware Installation NA-4020/4021 LED Name LED Color LED Function No power. Green Steady On: Operating condition normal. Red/Green Toggling: Modbus error (e.g., watch dog timer error) Steady On: EEPROM checksum error. Flashing: Memory error or CPU watchdog error. Note: Please contact your vendor for assistance. -
Page 25: When To Use The Power Expansion Module
When to Use the Field Power Distributor Most of the field power DIO/AIO modules for the ioLogik 4000 series are 24 VDC. If you need to connect 48 VDC or 110 VAC, 230 VAC digital input or output modules, you must use the Field Power Distributor to isolate different field powers within a single ioLogik 4000 system. -
Page 26: Safety Notes
ioLogik 4000 Hardware Installation Safety Notes Installation and Cabling Precautions • Check the rated voltage and current for the products before wiring. • Use the rated power supply and specified cables. Using the wrong power supply could cause a fire. •... -
Page 27: Getting Started
Getting Started In this chapter, we illustrate how to configure the ioLogik 4000 Ethernet I/O system and ioLogik 4000 RS-485/232 I/O system. The following topics are covered in this chapter: Installing ioAdmin Utility Configuring the NA-4010 Ethernet I/O System ... -
Page 28: Installing Ioadmin Utility
ioLogik 4000 Getting Started Installing ioAdmin Utility Insert the CD-ROM from the network adaptor package into the host computer. Run SETUP.EXE, which is located in the root directory. The installation program will guide you through the installation process and install the ioAdmin utility along with the MXIO DLL library. - Page 29 ioLogik 4000 Getting Started Enter the MAC Address of the NA-4010, and the new IP address. To complete the configuration, click on Reset. ioAdmin automatically changes the IP address and tests the new IP. 6. If ioAdmin is not installed on your host computer, you may use the ARP command manually to set a new IP address for the NA-4010.
-
Page 30: Linking The Ethernet I/O System To Ioadmin
ioLogik 4000 Getting Started Linking the Ethernet I/O System to ioAdmin Before using ioAdmin to link to the Ethernet I/O system, make sure the Ethernet connection for both the I/O server and host computer are working normally. You should also make sure that the power to the I/O server is There are two ways to use ioAdmin to link to the Ethernet I/O server: (1) Auto Search, and (2) Manually enter the IP address. - Page 31 ioLogik 4000 Getting Started 2. Click on NA-4010, and then enter the IP address. 3. After using auto search, or keying in the ioAdmin IP address manually, the Ethernet I/O servers that were located will appear as follows. The left frame of ioAdmin shows the I/O Servers connected to the network that were located by the search process.
-
Page 32: Password Protection
ioLogik 4000 Getting Started Password Protection Network configuration, Firmware Upgrade, Watchdog configuration, Reset to Default, and Restart System can all be protected by a password to prevent unauthorized access. The password is blank by default. If you have not configured a password, click on Login to display the firmware upgrade, network configuration, and watchdog configuration tabs. -
Page 33: Na-4010 Ethernet Network Adaptor Default Values
ioLogik 4000 Getting Started NA-4010 Ethernet Network Adaptor Default Values Bootp 192.168.127.254 Network mask 255.255.0.0 Gateway (Empty) Modbus watchdog disabled Watchdog timeout 60 sec (120 x 0.5sec) Password (Empty) System Restart In general, you do not need to restart the I/O server when changing I/O module configurations. However, when the I/O server indicates an I/O error, you may use this function to restart the I/O server system remotely. -
Page 34: Tcp Socket Timeout Interval
ioLogik 4000 Getting Started host computer didn’t send any packets via the Ethernet network. When the value is “0,” the Ethernet network adaptor remains connected unless the host computer actively disconnects the Modbus/TCP. TCP Socket Timeout Interval The Socket timeout interval in the System menu is used to configure the timeout for each Modbus/TCP query from the host computer to the Ethernet network adaptor. -
Page 35: Watchdog Timer
ioLogik 4000 Getting Started Watchdog Timer The Watchdog timer function is used to monitor the Modbus/TCP connection between the Ethernet Network adaptor and the host computer. The default is “off.” When there are no queries from the host computer over a preset time interval (in 100 msec increments), the Ethernet network adaptor sets all digital output and analog output values to a predefined Safe Status. -
Page 36: Exporting The System Configuration
ioLogik 4000 Getting Started Exporting the System Configuration To help you record the I/O module combination and parameters, ioAdmin can generate a text report file that can help you manage the system. The report consists of the following parts. 1. Date, Time, and Firmware version 2. - Page 37 ioLogik 4000 Getting Started Click on a slot number to view the status of the module installed in that slot. The following example shows the status of a thermocouple module. 3-11 RSPSupply - 1-888-532-2706 - www.RSPSupply.com http://www.RSPSupply.com/p-11304-Moxa-NA-4010.aspx...
-
Page 38: Configuring The Na-4020/4021'S Rs-485/232 I/O System
ioLogik 4000 Getting Started Configuring the NA-4020/4021’s RS-485/232 I/O System Configuring Communication Parameters When configuring the NA-4020 or NA-4021 for the first time, connect the ioLogik directly to your PC’s RS-232 port. The ioLogik side of the connection requires a DB9 connector. If your computer does not have an RS-232 port, you can install a Moxa multiport serial board (for example, the CP-132U) or use a Moxa USB-to-serial hub (for example, the NPort 1220). -
Page 39: Linking The Rs-485/232 I/O Server To Ioadmin
ioLogik 4000 Getting Started DIP Switch Configuration Table Configuration Settings Baudrate 1200 bps 2400 bps 4800 bps 9600 bps 19200 bps 38400 bps 57600 bps 115200 bps Watchdog ON: Enable OFF: Disable 5 to 7 Communication Parameters OFF None, 8 data bits, 1 stop bit OFF Even, 8 data bits, 1 stop bit OFF Odd,... -
Page 40: Linking To The Rs-232/485 Server
ioLogik 4000 Getting Started Linking to the RS-232/485 Server There are two ways to link to the RS-485/232 I/O server: (1) with Auto Search, and (2) by entering the Unit ID manually. Linking with Auto Search To start the Auto Search function, click on Auto Scan Active Ethernet I/O Server under System. ioAdmin can automatically allocate available COM ports on the host computer and scan Unit IDs from 01 to 99 for each COM port. - Page 41 ioLogik 4000 Getting Started Linking Manually To add RS-485/232 I/O servers to ioAdmin manually, click the right mouse button, and then click on the ioLogik in the left ioAdmin frame. Click on NA-4021, choose the connected COM port number, and then select the Unit ID for Modbus address.
-
Page 42: Password Protection
ioLogik 4000 Getting Started The left ioAdmin frame shows all I/O servers found on the network. The upper right frame indicates the combination of all I/O modules by slot number. The lower right frame lists detailed information for installed I/O modules. -
Page 43: Restarting The System
ioLogik 4000 Getting Started Restarting the System In general, you don’t need to restart the I/O server when changing I/O module configurations. However, when the I/O server indicates an I/O error, you may use this function to restart the I/O server system remotely. Right click on the target I/O server and then click Restart System to proceed. -
Page 44: Modbus Address Mapping
ioLogik 4000 Getting Started Modbus Address Mapping Finding a Modbus Address for I/O Channels The Modbus Address for each I/O channel is arranged dynamically by the network adaptor according to the slot sequence and the type of I/O module. Changing an Ethernet network adaptor to an RS-485 or RS-232 network adaptors will not change the Modbus address mapping. -
Page 45: Configuring I/O Modules
Configuring I/O Modules In this chapter, we describe the common features related to using ioAdmin to configure I/O modules. The following topics are covered in this chapter: On-Line Wiring Guide Digital Input Modules Digital Output Modules Digital Output Module Safe Status ... -
Page 46: On-Line Wiring Guide
ioLogik 4000 Configuring I/O Modules On-Line Wiring Guide ioAdmin has a graphical interface that features the “What You See Is What You Install” philosophy. The ioLogik 4000 is easy-to-use, and ioAdmin comes with an on-line I/O wiring guide that makes your job easy. Use the mouse to move the cursor over any of the I/O modules and then click the right mouse button to display a Wiring Guide. -
Page 47: Digital Input Modules
ioLogik 4000 Configuring I/O Modules Digital Input Modules ioAdmin can monitor the status of each digital input channel. We use M-1800 to illustrate. To check the status of a DI channel, click on the I/O module on the main page to display the I/O status on the “I/O Status” tab. To check the Modbus Address, click on the “Modbus Address”... -
Page 48: Digital Output Modules
ioLogik 4000 Configuring I/O Modules Digital Output Modules ioAdmin can monitor the status of each digital output channel. We use M-2404 to illustrate. To check the DI channel status, click on the I/O module on the main page. You will see the I/O status on the “I/O Status” tab. To check the Modbus Address, click on the “Modbus Address”... -
Page 49: Digital Output Module Safe Status
ioLogik 4000 Configuring I/O Modules Digital Output Module Safe Status The digital output channel can be set to safe status when the following situations occur. • Modbus watchdog is activated • An I/O error is detected You may set the digital output status to following settings. -
Page 50: Analog Input Modules
ioLogik 4000 Configuring I/O Modules Analog Input Modules ioAdmin can monitor the status of each analog input channel. We use M-3412 to illustrate. To check the status of the DI channel, click on the I/O module on the main page. The I/O status is located on the “I/O Status” tab. To check the Modbus Address, click on the “Modbus Address”... -
Page 51: Analog Output Module Safe Status
ioLogik 4000 Configuring I/O Modules Analog Output Module Safe Status The analog output channel can be set to safe status when the following situations occur. • Modbus watchdog is activated • An I/O error is detected You may set the analog output status to the following setings. -
Page 52: Temperature Sensing Modules
ioLogik 4000 Configuring I/O Modules Temperature Sensing Modules The ioLogik 4000 provides RTD (Resistance Temperature Detector) and TC (Thermocouple) temperature sensing modules. To check the temperature status, click on the I/O module from the main page. The temperature is on the “I/O Status”... -
Page 53: Thermocouple
ioLogik 4000 Configuring I/O Modules Thermocouple To check the temperature status, click on the I/O module from the main page. The temperature will be shown on the “I/O Status” tab. To check the Modbus Address, click on the “Modbus Address” tab. The thermocouple module supports different kinds of temperature sensor. -
Page 54: Mxio Dll Library
MXIO DLL Library The following topics are covered in this chapter: Overview What is MXIO DLL Library? How to install MXIO DLL Library MXIO Function Groups System Commands Modbus Command Sets Direct I/O Command Sets RSPSupply - 1-888-532-2706 - www.RSPSupply.com http://www.RSPSupply.com/p-11304-Moxa-NA-4010.aspx... -
Page 55: Overview
ioLogik 4000 MXIO DLL Library Overview What is MXIO DLL Library? MXIO DLL Library is a Windows library specially designed for programmers who are not familiar with the Modbus protocol, but who need to create applications to get real world temperature, data, and on/off control signals. -
Page 56: Direct I/O Command Sets
ioLogik 4000 MXIO DLL Library Direct I/O Command Sets Digital Input Commands DI_Reads DI_Read Digital Output Commands DO_Reads DO_Read DO_Writes DO_Write Analog Input Commands AI_Reads AI_Read Analog Output Commands AO_Reads AO_Read AO_Writes AO_Write RTD Commands RTD_Reads RTD_Read Thermocouple Commands TC_Reads TC_Read Special Commands for ioLogik 4000 Adp4K_ReadFirmwreRevisi on... -
Page 57: Pinouts And Cable Wiring
Pinouts and Cable Wiring The following topics are covered in this appendix: Port Pinout Diagrams Ethernet Port Pinouts Serial Port Pinouts Ethernet Cable Wiring Diagrams RSPSupply - 1-888-532-2706 - www.RSPSupply.com http://www.RSPSupply.com/p-11304-Moxa-NA-4010.aspx... -
Page 58: Port Pinout Diagrams
ioLogik 4000 Pinouts and Cable Wiring Port Pinout Diagrams Ethernet Port Pinouts Signal Serial Port Pinouts NA-4020 RS-485 Network Adaptor Pin Assignment NA-4021 RS-232 Network Adaptor Pin Assignment RSPSupply - 1-888-532-2706 - www.RSPSupply.com http://www.RSPSupply.com/p-11304-Moxa-NA-4010.aspx... -
Page 59: Ethernet Cable Wiring Diagrams
ioLogik 4000 Pinouts and Cable Wiring Ethernet Cable Wiring Diagrams RSPSupply - 1-888-532-2706 - www.RSPSupply.com http://www.RSPSupply.com/p-11304-Moxa-NA-4010.aspx...
Need help?
Do you have a question about the ioLogik 4000 Series and is the answer not in the manual?
Questions and answers