Moxa Technologies ioThinx 4530 Series User Manual
Hide thumbs
Also See for ioThinx 4530 Series:
- Hardware user manual (23 pages) ,
- Quick installation manual (12 pages) ,
- Quick installation manual (10 pages)

Related Manuals for Moxa Technologies ioThinx 4530 Series


Summary of Contents for Moxa Technologies ioThinx 4530 Series
- Page 1 4530 Series Linux User’s Manual Version 1.0, January 2019 www.moxa.com/product © 2019 Moxa Inc. All rights reserved.
- Page 2 4530 Series Linux User’s Manual The software described in this manual is furnished under a license agreement and may be used only in accordance with the terms of that agreement. Copyright Notice © 2019 Moxa Inc. All rights reserved.
-
Page 3: Table Of Contents
Table of Contents Introduction ............................1-1 Getting Started..........................2-1 Connecting to the ioThinx 4530 Controller ..................... 2-2 Connecting Through the Serial Console ..................2-2 Connecting Through the SSH Console .................... 2-4 User Account Management ........................2-6 Switching to the Root Account ...................... 2-6 Creating and Deleting User Accounts ..................... -
Page 4: Introduction
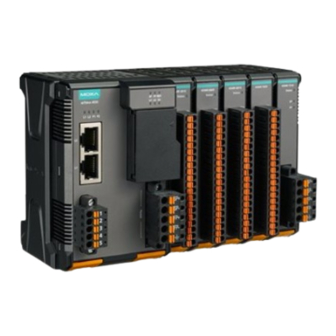
Introduction This user’s manual applies to the ioThinx 4530 Series models listed below: ioThinx 4530 Series • ioThinx 4533-LX Series Detailed instructions on configuring advanced settings are covered in Chapters 3 and 4. -
Page 5: Getting Started
Getting Started In this chapter, we describe how to configure basic settings for the ioThinx 4530 controller. The following topics are covered in this chapter: Connecting to the ioThinx 4530 Controller Connecting Through the Serial Console Connecting Through the SSH Console ... -
Page 6: Connecting To The Iothinx 4530 Controller
You will need to use a computer to connect to the ioThinx 4530 controller and to log in through the command line interface. There are two ways to connect: through the serial console port or through the Ethernet port. Refer to the ioThinx 4530 Series Hardware Manual to see how to set up the physical connections. - Page 7 ioThinx 4530 Linux Manual Getting Started 3. Select Serial port setup. 4. Select A to change the serial device. Note that you need to know which device node is connected to the ioThinx 4530 controller. 5. Select E to configure the port settings according to the Serial Console Port Settings table provided. 6.
-
Page 8: Connecting Through The Ssh Console
ioThinx 4530 Linux Manual Getting Started 3. Select the Serial connection type and choose settings. Connecting Through the SSH Console The ioThinx 4530 controller supports SSH connections over an Ethernet network. Use the following default IP addresses to connect to the ioThinx 4530 controller. Port Default IP LAN 1... - Page 9 PuTTY (free software) to set up an SSH console for the ioThinx 4530 controller in a Windows environment. The following figure shows a simple example of the configuration that is required. NOTE The ioThinx 4530 Series only supports SSH connections.
-
Page 10: User Account Management
ioThinx 4530 Linux Manual Getting Started User Account Management Switching to the Root Account sudo su You can switch to root using sudo -i (or ). For security reasons, do not operate the root commands from the account. sudo Click the following link for more information on the command. -
Page 11: Network Settings
ioThinx 4530 Linux Manual Getting Started Network Settings Configuring Ethernet Interfaces After the first login, you can configure the ioThinx 4530 controller’s network settings to fit your application better. Note that it is more convenient to manipulate the network interface settings from the serial console than from an SSH login because an SSH connection can disconnect when there are network issues and the connection must be reestablished. -
Page 12: System Administration
ioThinx 4530 Linux Manual Getting Started Setting Dynamic IP Addresses: dhcp To configure one or both LAN ports to request an IP address dynamically use the option in place of static iface in the command, as follows: Default Setting for LAN1 Dynamic Setting using DHCP iface eth0 inet static iface eth0 inet dhcp... -
Page 13: Setting The Time Zone
ioThinx 4530 Linux Manual Getting Started Setting the Time Zone There are two ways to configure the Moxa embedded computer’s timezone. One is using the TZ variable. The other is using the /etc/localtime file. Using the TZ Variable The format of the TZ environment variable looks like this: TZ=<Value>HH[:MM[:SS]][daylight[HH[:MM[:SS]]][,start date[/starttime], enddate[/endtime]]] Here are some possible settings for the North American Eastern time zone: TZ=EST5EDT... -
Page 14: Determining Available Drive Space
ioThinx 4530 Linux Manual Getting Started Hours From Greenwich Mean Time (GMT) Value Description Arizona Mountain Standard Time Central Standard Time Eastern Standard Time Indiana East Atlantic Standard Time -3.5 Newfoundland Eastern South America Eastern South America Azores Using the Localtime File /etc/localtime The local timezone is stored in the and is used by GNU Library for C (glibc) if no value... -
Page 15: Shutting Down The Device
ioThinx 4530 Linux Manual Getting Started Shutting Down the Device To shut down the device, disconnect the power source to the computer. When the computer is powered off, main components such as the CPU, RAM, and storage devices are powered off, although an internal clock powered by a super capacitor may keep running. -
Page 16: Firmware Update And System Recovery
Firmware Update and System Recovery The following topics are covered in this chapter: Firmware Update and Set-to-Default Functions Set-to-Default Firmware Update Using an SFTP Server or microSD Card... -
Page 17: Firmware Update And Set-To-Default Functions
ioThinx 4530 Linux Manual Firmware Update and System Recovery Firmware Update and Set-to-Default Functions Set-to-Default 1. Power off the device. 2. Press and hold the reset button; while holding the reset button: a. Power on the device; the RDY LED will blink green while the device is booting up. b. -
Page 18: Programming Guide
Programming Guide Click the following link to download the ioThinx 4530 Programming Guide: https://www.moxa.com/en/products/industrial-edge-connectivity/controllers-and-ios/advanced-controllers- and-i-os/iothinx-4530-series#resources The ioThinx 4530 Programming Guide includes the following sections: Tutorials: Shows users how to build code, use the cloud SDK, and use Python to access I/O data. I/O Libraries: Shows users how to access ioThinx 45M modules. -
Page 19: Cycle Time Calculation
In this case, the eight modules form one group. The cycle time of this combination is 1900 µs = 1200 µs + 7 x 100 µs. The ioThinx 4530 Series will round up the cycle time to the ms level, and consequently the cycle... - Page 20 ioThinx 4530 Linux Manual Cycle Time Calculation Case 2. 4 x 45MR-1600, 4 x 45MR-2601, 2 x 45MR-3800. In this case, the 10 modules are separated in two groups. The first group is outlined in red above, whereas the second group is outlined in orange. The combination of modules in the first group is the same as in Case 1, which was shown to have a cycle time = 1900 µs.
Need help?
Do you have a question about the ioThinx 4530 Series and is the answer not in the manual?
Questions and answers