
Related Manuals for Durr Dental Hygoclave 40


Summary of Contents for Durr Dental Hygoclave 40
- Page 1 Hygoclave 40 Hygoclave 40 Plus Installation and operating instructions 988250035 *9000-000-00/30* *9000-000-00/30*...
-
Page 3: Table Of Contents
Contents Important information Settings ..............59 4.8.1 User settings(for the Premium version only)..59 1 Safety standards ............41 4.8.2 Date and time settings ........59 Intended users ............41 4.8.3 Printer settings ..........60 Intended use ............... 41 4.8.4 Language settings ...........60 General safety warnings ..........41 4.8.5 Measurement unit settings .......60 Operating and transport environmental conditions .. -
Page 4: Important Information
Important information SYBOLS SIMBOLOGIE IMBALLO HAZARD HIGH Paragraphs marked with this symbol contain instructions that you must follow carefully to avoid damaging the device, injuring the operator and possibly the patient. DO NOT WET WARNING These instructions warn that you must take particular care to avoid situations that could damage the device. -
Page 5: Safety Standards
Safety standards Follow all the instructions given in this manual. Electrical hazard warnings The autoclave must be used by personnel speciically trained in the The device must be connected to the electrical mains. sterilisation process, within medical clinics, chiropody studios and The electrical system must comply with the IEC 364-1 beauty salons, under the responsibility of the director of health and standard and the “National regulations for installation... -
Page 6: Operating And Transport Environmental Conditions
1.4 Operating and transport environmental conditions Operation failure hazard warning n its packaging, the equipment can withstand the following If an error message appears while a sterilisation cycle is environmental conditions for no more that 15 weeks: running, it will be necessary to repeat the cycle. Ambient temperature from -20°C to +70°C Accidentally dropping the device may deform it and Relative humidity from 10% to 90%... -
Page 7: Product Description
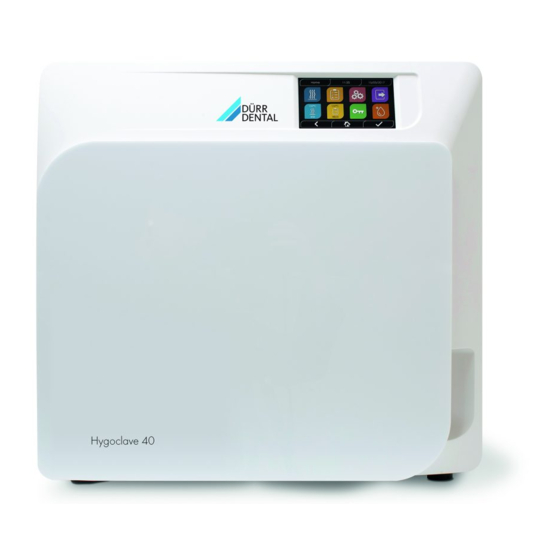
Product description Equipment description Fig. 1 1. Touch screen display 2. Bio-x ilter 3. Motorised closure screw 4. USB port 5. Main switch 6. Feed tank illing connection 7. Discharge tank draining connection 8. Feed tank draining connection 9. Manual feed tank emergency illing connection 10. -
Page 8: Variants
2.1 Variants The following autoclave variants are available: Versions Chamber size Hygoclave 40 Hygoclave 40 Plus 220 V 230 V 240 V 220 V 230 V 240 V Power supply 60 Hz 50/60 Hz 50 Hz 60 Hz 50/60 Hz... - Page 9 messages and, if necessary, stops the cycle. Type test carried out in accordance with the EN13060 standard Type B cycles Cycles B Cycles S Pressure dynamic in sterilisation chamber Air leakage Empty chamber Solid load - Double wrapping Small porous load Double wrapping Full porous load Double wrapping...
-
Page 10: Installation
12 Validation for commissioning � � � � � � � � 28 5�3 Overview of programs � � � � � � � � � � 15 5�4 Tyscor Pulse (optional) � � � � � � � � � 15 Important information Installation Operation... -
Page 11: First Power-Up
3.1 FIRST POWER-UP - Press the illuminated main switch (5 ig. 1). 1 - Wait for the main screen to load 2 - Select the desired language. 3 - Warranty Activation” screen. 4 - Home page loading following the choices made during warranty activation. Select the “07 open door”... -
Page 12: Operating Instructions
Operating instructions Operating instructions Operate the autoclave as follows: - Press the main switch (5 fig. 1). - Wait for the main screen to load USING THE MENUS The main menu contains the following: 01 Sterilisation programs 02 Test programs 03 Settings 04 Data output 05 Last cycle run... -
Page 13: Symbols
4.1 SYMBOLS The icons in the Basic version are thye same as those in the Premium version, but the graphics are in black and white, and some functions are disabled (see the menu architecture). Description Icon What it does/what it means Indication icon only. - Page 14 Description Icon What it does/what it means Goes to the 121°C Helix Test screen, which displays all of the cycle 121°C Helix Test speciications. Programs the test start time. Programmed start Increases the value in the relative ield by one unit or goes to the next option. Next Decreases the value in the relative ield by one unit or goes to the previous option.
- Page 15 Description Icon What it does/what it means Croatian Sets the language for all menus to CROATIAN. Greek Sets the language for all menus to GREEK. Goes to the Ethernet settings screen, where you can set the network parameters Ethernet settings (IP address, subnet mask, gateway).
-
Page 16: Menu Architecture
Description Icon What it does/what it means Indication icon only. Cannot be selected. Remaining time indicator Shows the reamining drying time in the cycle (to be checked) . Indication icon only. Cannot be selected. Temperature indicator Shows the temperature in the selected cycle. Maximum textile Indication icon only. -
Page 17: Selecting Sterilisation Programs
4.3 Selecting sterilisation programs Selezione dei programmi di sterilizzazione 01 Select the “Sterilisation cycles” menu 02 Alternatively, directly select “Last cycle run” and go to step 04 03 Select the desired cycle 04 Screen with all the parameters of the selected cycle 05 (Optional) You can open them door to insert other instruments 06 (Optional) Select the programmed start button to set the start time... -
Page 18: Sterilisation Program Types
4.3.1 Sterilisation program types Hygoclave 40/Hygoclave 40 Plus Nisea Diagramma ciclo 134° C B-Flash When the machine is cold, the preheating time is approximately 10 134°C B-Flash Cycle B B B B B B B minutes. Selecting the “Programs” submenu accesses the list of... -
Page 19: Sterilisation Program Specifications
4.4 Sterilisation program specifications Sterilisation cycles type B Sterilisation cycles typ S Cycle name 134 STD 121 STD 134 Prion 134 B- Flash Universal S Softprogr. Cycle type Sterilisation temperature 134°C 121°C 134°C 134°C 134°C 121°C Sterilisation pressure 316 kPa 214kPa 316 kPa 316 kPa... -
Page 20: Filling And Draining Water
NOTE To prevent the formation of limescale stains, rinse with deionised or distilled water if possible. Always dry the instruments if you use hard tap water. For handpieces (turbines, counterangles, etc.), in addition to the above, use special equipment that will clean them properly inside (which may also include lubrication). -
Page 21: Test Programs
4.7 Test programs 01 Select the “Test cycles”menu 02 Alternatively, directly select “Last test run” and go to step 04 03 Select the desired cycle 04 Screen with all the parameters of the selected cycle 05 (Optional) you can open the door to insert other instruments 06 (Optional) Select the programmed start button to set the start time 07 Start the test cycle... -
Page 22: Test Program Types
To run this test, the chamber must have no instruments in it. The instrument used to test narrow hollow loads must be positioned on the lower tray. 4.7.5 Test diagrams Hygoclave 40/Hygoclave 40 Plus Diagramma 134°C Helix e Bowie & Dick Test Pressure Time Hygoclave 40/Hygoclave 40 Plus Diagramma 121°C Helix Test... -
Page 23: Settings
4.8 Settings ENG - User Management Settings – 4.8.1 User settings 01 Select “Settings” 02 Select “User” 03 Enter the administrator pin (factory setting “2222”) and confirm With the Administrator PIN (2222), it is possible to set the users and to manage their PIN and the Cycle Validation Protocol. -
Page 24: Printer Settings
4.8.3 Printer settings 4.8.5 Measurement unit settings 01 Select “Settings” 01 Select “Settings” 02 Select “Printer” 02 Select “Measurement unit” 03 Click on the arrows to change 03 Click on the arrows to change from automatic to manual print from “bar” to “kPa” to “mbar” mode and vice versa 04 Click on the arrows to change 04 Conirm to save... -
Page 25: Connections
The Hygoclave 40 / Hygoclave 40 Plus series sterilizers can be connected to a local Ethernet network by means of a speciic cable connected to Le sterilizzatrici serie Nisea sono collegabili ad una rete Ethernet locale mediante s the special connector (14 - ig. - Page 26 A questo punto, con la sterilizzatrice accesa sulla schermata Home, da un PC connesso alla rete locale, o You will then have access to a “Hygoclave 40 / Hygoclave 40 Plus Panel control” Web page dedicated to downloading reports of cycles that...
-
Page 27: Data Output
*9000-000-00/30* Nisea monitor page Hygoclave 40 / Hygoclave 40 Plus monitor page Nisea monitor page *9000-000-00/30* monitor page 4.9 Data output 01 Select the “Data output” menu 02 Select the USB symbol 03 Insert the USB pen drive and waitfor it to be recognised... - Page 28 ‐ ...
-
Page 29: Routine Maintenance
ROUTINE MAINTENANCE 5.1 General table Frequency Operation Daily Monthly Quarterly Annually 5 cycles 50 cycles 500 cycles 1000 cycles Clean the door seal • Clean the chamber edge • (area where the seal touches) Clean the door cover • • Clean the chamber and accessories Clean the front panel • Clean the side walls and top panel • Clean the chamber ilter •... -
Page 30: Lubricating And Cleaning The Screw And Nut Screw
Inserire a pag. 51 capitolo 5.1.9 Inserire a pag. 51 capitolo 5.1.9 5.2 Annual maintenance 5.1.9 Lubricating and cleaning the screw and nut screw 5.1.9 Lubrificazione e pulizia vite e boccola filettata 5.1.9 Lubrificazione e pulizia vite e boccola filettata After every 1000 cycles, or one year after installation, a reminder message appears to perform maintenance. -
Page 31: Troubleshooting Troubleshooting
Troubleshooting Troubleshooting Troubleshooting guide 6.1 Error Codes Reset Code Message Description procedure Dooring closing ER 001 The door closing time is too long timeout ER 002 Door switch error condition Door switch ER 003 Door unlocking timeout The door unlocking time is too long ER 004 Door opening timeout The door opening time is too long... -
Page 32: Alarm Codes
6.2 Alarm Codes Reset Code Message Description procedure AL 001 Reset pressed The reset button was pressed AL 002 Blackout A blackout has occurred Water illing time The time to ill the feed tank is too long AL 003 Chamber probe fault The chamber probe reading circuit is faulty AL 100 The generator probe reading circuit is faulty... -
Page 33: Reset Procedures
6.4 Reset procedures Reset procedure ”A” If the cycle is “running”, reset the error by selecting the conirm icon on the safety screen and then select the Home icon to return to the initial screen. Reset procedure ”B” Reset the error be selecting the conirm icon on the safety screen. N.B. - Page 34 Code Possible cause Possible solution Reset the machine. Check: There is a malfunction in the sterilisation condition ER 152 a) that there is water in the feed tank; holding/control system. b) the amount of load in the chamber. There is a malfunction in the sterilisation condition Then repeat the selected program.
-
Page 35: Message Solutions
Code Possible cause Possible solution There is a malfunction in the pressure transducer AL 103 reading circuit. There is a malfunction in the door closing/opening AL 104 control system. There is a malfunction in the door closing/opening AL 105 Reset the machine. control system. -
Page 36: Technical Specifications
Techical specifications Hygoclave 40 Hygoclave 40 Plus Power supply voltage 220 V 230 V 240 V 220 V 230 V 240 V Mains frequency 60 HZ 50/60 HZ 50 HZ 60 HZ 50/60 HZ 50 HZ Power 1880 W 2050 W... -
Page 37: Product Reference Table
6048100003 Hygoclave 40 Type B 220V 60Hz 751020035 6048100004 Hygoclave 40 Type B 240V 50Hz 751010035 6048100005 Hygoclave 40 Type B 230V 50/60Hz CH 751031035 6048100006 Hygoclave 40 Type S 220V 60Hz 751001035 6048100007 Hygoclave 40 Type S 230V 50/60Hz... - Page 38 alla dir M A N Hersteller: FARO S.p.A. Via Faro, 15 - 20876 Ornago (MB) ITALY 0051 Hersteller/Manufacturer: Vertreiber/Distributor: DÜRR DENTAL SE Höpfigheimer Str. 17 74321 Bietigheim-Bissingen Germany Fon: +49 7142 705-0 www.duerrdental.com info@duerrdental.com...
Need help?
Do you have a question about the Hygoclave 40 and is the answer not in the manual?
Questions and answers