Durr Dental VistaVox S Operating Instructions Manual
Hide thumbs
Also See for VistaVox S:
- Operating instructions manual (56 pages) ,
- Service manual (143 pages)
Table of Contents
Advertisement
Quick Links
Advertisement
Table of Contents

Related Manuals for Durr Dental VistaVox S


Summary of Contents for Durr Dental VistaVox S
- Page 1 VistaVox S Operating Instructions 0297 2210200378L02 *2210200378L02*...
-
Page 3: Table Of Contents
Contents Contents Exposure button ... . . Memory card slot ... . Sensor window ....Important information About this document . - Page 4 Contents 10.1 Recommended maintenance schedule ....Troubleshooting 11 Tips for operators and service techni- cians ......Appendix 12 Program parameters .
-
Page 5: Important Information
These operating instructions are valid for Order number VistaVox S, order number: 2210200001. Refer to the separate installation instructions for information about assembly, installation and con- Serial number figuration of the unit (document no. -
Page 6: Copyright Information
Important information Warning – X-rays CAUTION X-RAY ATTENTION: X-RAY Fragile, handle with care ON WHEN EQUIPMENT IN OPERATION Warning – dangerous high voltage Lower and upper atmospheric pressure limits Warning – X-rays Lower and upper temperature limits Copyright information Lower and upper humidity limits All circuits, processes, names, software pro- no condensation grams and units mentioned in this document are... -
Page 7: Safety
Important information Safety General safety information Always comply with the specifications of all ❯ The unit has been developed and designed in guidelines, laws, and other rules and regula- such a way that dangers are effectively ruled out tions applicable at the site of operation for the if used in accordance with the Intended Use. -
Page 8: Specialist Personnel
Important information Specialist personnel NOTICE Operation Negative effects on the EMC due to Unit operating personnel must ensure safe and non-authorised accessories correct handling based on their training and Use only Dürr Dental parts or acces- ❯ knowledge. sories specifically approved by Dürr Instruct or have every user instructed in han- ❯... -
Page 9: General Safety Information
Important information 2.10 Notification requirement of 2.13 Disposal serious incidents An overview of the waste keys for Dürr The user / patient is required to report to the Dental products can be found in the manufacturer and the competent authority of the download area at www.duerrdental.com Member State, in which the user and/or patient is (document no. -
Page 10: Product Description
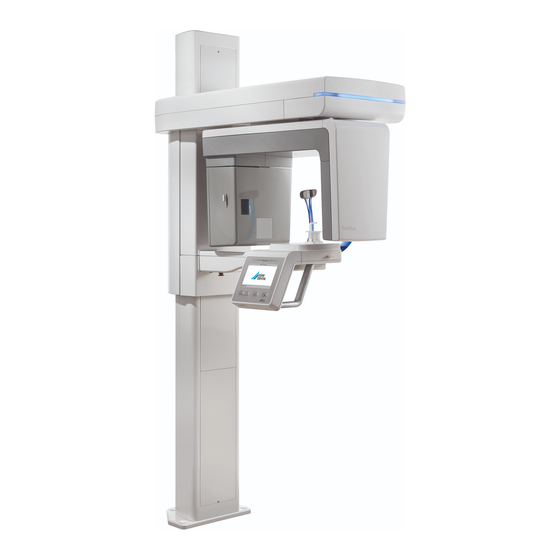
Product description Product description Overview 16 15 3D and panoramic X-ray device 10 Head support with cushion Wall bracket 11 Hygienic protective covers for bite block Frame grabber card 12 Bite block USB dongle 13 Adapter bite block USB stick with device-specific calibration 14 Chin holder for maxillary joint image data 15 Chin holder for edentulous jaws... -
Page 11: Scope Of Delivery
Product description Optional items Scope of delivery The following optional items can be used with the The following items are included in the scope of device: delivery (possible variations due to country-spe- Bottom wall bracket set, short cific requirements and/or import regulations): (wall/wall installation) . -
Page 12: Consumables
Product description Consumables The following materials are consumed during operation of the device and must be ordered separately: Hygienic protective cover bite block (100 pieces) ....2207-010-50 Silicone pads for head support Plus . -
Page 13: Technical Data
Product description Technical data Electrical data for the unit Rated voltage V AC 200 - 240 Frequency 50/60 Protection class Operating mode X-ray tube S6 = 6.3% 320 s duty cycle 20 s / 5 min (switch-on/switch-off time) Operating mode height adjustment S3 = 9% duty cycle 1 min / 9 min (switch-on/switch-off time) Rated power... -
Page 14: X-Ray Tube Performance Data
Product description X-ray emitter Nominal current, high-voltage generator 4 - 16 (± 10%, max. 75 kV 16 mA, max. 99 kV 10 mA) Cooling, high-voltage generator Automatic monitoring Shut-off at ≥ 60°C Additional filtering at 50 kV mm Al 2.0 + 3.0 (autom. added for CBCT) in Al 0.08 + 0.12 (autom. - Page 15 Product description Emission and Filament Characteristics Constant potential high-voltage generator Nominal Focus Spot Value: 0.5 80kV 100kV 50kV FILAMENT CURRENT [A] Anode Thermal Characteristics 175 W COOLING HEATING TIME (min) Detector Pano/CBCT Brand Xmaru 1404CF Type CMOS photodiode array Pixel size μm 49.5 99 (2x2 binning)
- Page 16 Product description Detector Pano/CBCT Frame rate 53.5 107 (2x2 binning) 308 (4x4 binning) Greyscale Acquisition Magnification factor mode (magnification factor) 477.7 122.3 Panoramic 1.26 23.62 18.81 4.81 FDD: distance from focal spot to detector FOD: distance from focal spot to object ODD: distance from object to detector (ODD = FDD - FOD) Magnification factor = FDD/FOD Electromagnetic compatibility (EMC)
- Page 17 Product description Immunity to interference table, near fields of wireless HF communication devices Radio service Frequency band Test level TETRA 400 380 - 390 GMRS 460 430 - 470 FRS 460 LTE band 13, 17 704 - 787 GSM 800/900 TETRA 800 iDEN 820 800 - 960...
- Page 18 Product description Electromagnetic compatibility (EMC) Interference immunity measurements supply input Immunity to interference due to voltage dips, short inter- ruptions and voltage variations IEC 61000-4-11:2004 0% U for 0.5 period Compliant 0% U for 1 period 70% U for 25/30 periods (50/60 Hz) 0% U for 250/300 periods (50/60 Hz) 2210200378L02 1907V009...
-
Page 19: Dimensions
Product description Dimensions 572,5 mm 22,54 in 1212 mm 47,72 in 2210200378L02 1907V009... -
Page 20: Type Plate
Product description Type plate Unit type plate X-ray tube type plate Evaluation of conformity This device has been subjected to conformity acceptance testing in accordance with the cur- rent relevant European Union guidelines. This equipment conforms to all relevant requirements. 2210200378L02 1907V009... -
Page 21: Operation
Product description Operation Operating elements Touch screen Emergency stop switch Button for opening/closing the head sup- On/off switch ports X-ray tube Button for positioning beam localisers on/off C-shaped elbow Buttons for height adjustment Status LED The touch screen can be used to operate the Operating elements unit. -
Page 22: Status Led
Product description Status LED Lever for positioning the upper canine posi- tioning beam Mid-sagittal positioning beam Grips The applied parts in accordance with IEC 60601-1 are: – Grips – Head support with cushion – Positioning aids (e.g. bite block and mounting for bite block, chin support for edentulous patients) Description of the positioning aids... -
Page 23: Exposure Button
Product description Exposure button Sensor window The active sensor surface area is displayed via Exposure switch the markings in the corners of the sensor win- The exposure switch is used to trigger the pre- dow. The cross indicates the geometric mid- pared image acquisition and start the X-ray expo- point of the active sensor surface area. -
Page 24: Usage
Usage Using menus Usage The menus integrated in the main window con- tain additional commands, which can be selected as required. Operating the touch To open the menu, touch ❯ screen NOTICE Damage to the touch screen due to incorrect handling Only touch the touch screen with your ❯... -
Page 25: Operation
Usage Operation Switch on the device at the main power switch. ❯ CAUTION Health risks for the patient due to contraindications Before using the unit on the patient, ❯ check that none of the contraindica- tions listed exist. In this section, the term "Child" is used to describe children and adolescents from the age of 7. -
Page 26: Adjusting The Imaging Software
Usage Adjusting the imaging soft- Parameter overview ware Depending on the chosen image acquisi- tion program, different parameters are The settings are described using the available (e.g. the image volume is not example of the VistaSoft imaging soft- available for panoramic images, but the ware. - Page 27 Usage Child (< 13 years) Arch The selected jaw form influences the rotational behaviour of the C-shaped angle connector piece during image acquisition. This enables an image with an ideal layer position to be captured even on a particularly narrow or wide jaw. Normal arch Narrow arch Wide arch...
- Page 28 Usage Image acquisition programs CBCT images CBCT The CBCT image shows the jaw area. The size of the jaw area shown depends on the selected image volume. Resolution: 200 μm CBCT 5x5 Maxilla Molar right The X-ray image depicts the right molar region of the maxilla with a volume of 5x5 cm.
- Page 29 Usage Panoramic images Standard The standard panoramic image records the com- plete dental area with ascending dental branches and maxillary joints. Front The image shows a reduced dental area without ascending dental branches. Right The image only shows the right dental area. Left The image only shows the left dental area.
- Page 30 Usage Panoramic images Bite wing right The image shows the right posterior region with a size limited to the bite wings. Bite wing left The image shows the left posterior region with a size limited to the bite wings. Maxillary joint imaging Maxillary joint, lateral The image shows the lateral maxillary joints with an open and closed mouth in 4-fold depiction on...
- Page 31 Usage Sinus images Sinus, PA The image shows the posterior-anterior sinuses. 2210200378L02 1907V009...
-
Page 32: Inserting The Positioning Aids
Usage Inserting the cushions of the head supports Inserting the positioning aids If no cushions are inserted in the head supports For the X-ray image, the patient is positioned in or if they are dirty, insert new cushions before the unit using the corresponding positioning aids positioning the patient. - Page 33 Usage Inserting the positioning aid for CBCT images The bite block can be used with or with- We recommend using the mounting for the bite out a hygienic protective cover. block on CBCT images. The bite block can be We recommend using the bite block with used optionally in addition to this.
- Page 34 Usage On edentulous patients the chin support for ❯ WARNING edentulous patients can be used. There is a danger of cross contamina- tion if hygienic protective covers are not used or they are used more than once. Reprocess the bite block without the ❯...
- Page 35 Usage Inserting the positioning aid for panoramic Inserting the positioning aid for the maxillary images with hygienic protective cover (optional) joint image Correct image acquisition is only possible with WARNING the chin support for maxillary joint images. Insert the chin support for the maxillary joint Risk of cross contamination due to ❯...
-
Page 36: Positioning The Patient
Usage Opening the head supports CAUTION Danger of injury due to movement of the the C-shaped angle connector piece After switching on the unit and confirm- ing the parameters on the touch screen, the C-shaped angle connector piece is positioned. Persons can be injured dur- ing this. - Page 37 Usage CBCT image acquisition Sinus image The patient is positioned as follows depending on Position the patient so that their bottom lip ❯ the indication: presses lightly against the chin support. The patient bites onto the bite block, with the ❯...
- Page 38 Usage Check the beam localiser for the mid-sagittal Correct any inclination of the head via the ❯ ❯ plane and correct the position of the patient if height of the unit. necessary. If necessary, correct the beam localiser manu- ally. Align the head of the patient according to the ❯...
-
Page 39: Start A Test Run
Usage If necessary, correct the beam localiser manu- Close the head supports with the button. ❯ ❯ ally. To do this, just press the button briefly – don't press and hold. The head supports automatically close against the head of the patient with a defined pressure. Once the patient has been correctly positioned ❯... -
Page 40: Taking The X-Ray Image
Usage Taking the X-ray image Press Start to confirm the parameters. ❯ The C-shaped arm is positioned. The LED on the exposure switch and the status LED on the CAUTION unit light up green. Injuries through x-rays The touch screen displays that the unit is ready X-rays can cause tissue damage. -
Page 41: Emergency Stop Switch
Usage the unit is damaged. It can also be used to avert an unwanted collision. The yellow labels on the patient positioning sys- tem with the symbol show the location of the emergency stop switch. On maxillary joint images, it is then nec- essary to acknowledge a message on the touch screen and trigger a second image acquisition. - Page 42 Usage Press the emergency stop switch. ❯ The unit will automatically restart. Device is switched off. Releasing the emergency stop switch CAUTION Danger of injury due to movement of the the C-shaped angle connector piece After switching on the unit and confirm- ing the parameters on the touch screen, the C-shaped angle connector piece is positioned.
-
Page 43: Cleaning And Disinfection
Usage Cleaning and disinfection Remove any soiling with a soft, damp, lint-free ❯ cloth. Disinfect the surfaces using a disinfection wipe. ❯ NOTICE Alternatively, use a quick-acting surface disin- The use of unsuitable agents and fectant on a soft, lint-free cloth. Comply with methods can damage the unit and the operating instructions for the disinfectant accessories. - Page 44 Usage Remove the cushion holder. ❯ Remove any soiling with a soft, damp, lint-free ❯ cloth. Disinfect the surfaces using a disinfection wipe. ❯ Alternatively, use a quick-acting surface disin- fectant on a soft, lint-free cloth. Comply with the operating instructions for the disinfectant when doing this.
-
Page 45: Reprocessing
Usage Reprocessing Reprocessing procedure in accordance with EN ISO The following accessories need to be repro- 17664 cessed: – Bite block: The reprocessing procedure after each patient – Manual cleaning treatment is carried out according to the repro- – Manual disinfection cessing procedure established by EN ISO 17664. -
Page 46: General Information
Usage The reprocessing procedure was validated as fol- Use clean, dry, oil and particle-free com- ❯ lows: pressed air. – Pre-cleaning: Do not exceed temperatures of 138 °C. ❯ – FD 350 disinfection wipes (Dürr Dental) Subject all devices used (ultrasonic bath, ❯... -
Page 47: Automatic Cleaning, Intermediate Rinsing, Disinfection, Final Rinse, Drying
Usage For further information, see: "8 Cleaning and dis- For further information, see: "9.3 General infor- infection". mation". Cleaning Cleaning and disinfection Place individual parts in a cleaning agent bath Place all components in the cleaning and disin- ❯ ❯ making sure that all parts are covered. -
Page 48: Issue Clearance For The Parts For Sterilisation
Usage Requirements placed on the steam steriliser: – Corresponds to EN 13060 or EN 285 and/or ANSI AAMI ST79 – Suitable programme for the products listed (e. g. with hollow bodies, fractionated vacuum procedure in three vacuum steps) – Sufficient product drying –... - Page 49 Usage 10 Maintenance 10.1 Recommended maintenance schedule Only trained specialists or personnel trained by Dürr Dental may service the device. DANGER Risk of electric shock due to live parts Install an all-pole disconnect switch with a contact opening width of at least 3 mm in the elec- ❯...
-
Page 50: Maintenance
Usage Maintenance Maintenance work interval Every 3 years Visually and acoustically check the linear movement on the C-shaped arm. ❯ Check the operation of the lift motor. Does the unit lift and lower with minimal ❯ noise? 2210200378L02 1907V009... -
Page 51: Troubleshooting
Troubleshooting Troubleshooting CAUTION Any oil leaking from the X-ray tube in the event of a fault is harmful. Wipe up any oil immediately. ❯ Do not swallow the oil. ❯ Stop using the unit and inform a service technician. ❯ 11 Tips for operators and service technicians Any repairs exceeding routine maintenance may only be carried out by qualified personnel or our service. - Page 52 Troubleshooting Error Possible cause Remedy Error messages during start of Energy-saving options incor- Deactivate the energy-saving ❯ an X-ray image or during shut rectly configured options in Windows and the down of the PC BIOS completely. Supply voltage for graphic card Check the plug connections.
-
Page 53: Appendix
Appendix Appendix 12 Program parameters The extraoral dental X-ray system meets the requirements set out in standard IEC 60601-2-63. The dosage information complies with the requirements of the standard and is stated in mGy. The accuracy of the DAP/dose values is ± 50%. 12.1 CBCT program parameters CBCT image acquisition, normal image volume, 16.4 s... -
Page 54: Panoramic Program Parameters
Appendix 12.2 Panoramic program parameters Pano image acquisition, normal jaw arch, normal patient, quality HQ, 13.5 s 4.0 mA 6.3 mA 10.0 mA mGycm mGycm mGycm 60 kV 3.85 24.28 6.06 38.15 9.57 60.31 67 kV 4.74 29.84 7.43 46.83 11.76 74.09 70 kV... -
Page 55: Information On Scattered Radiation
Appendix 1.5 m 13 Information on scattered ° mR/h mR/h mR/h radiation 76.4 19.4 13.1 CBCT scattered radiation Test equipment: Dosimeter Radcal 9015 Test conditions Program parameters CBCT Image acquisition vol- Normal Voltage 99 kVp Current 14 mA 1.5 m °... -
Page 56: Information On The Leakage Rate
Appendix 14 Information on the leak- Direction HD, Adult, HD, Child, 13.5 s 11.5 s age rate ° Test equipment: Dosimeter Victoreen 660 6.2 mR/h 2.4 mR/h Test conditions 1.2 mR/h 6.6 mR/h Program parameters HD / Adult, child / 1.6 mR/h 4 mR/h Standard Pano... - Page 60 Hersteller/Manufacturer: DÜRR DENTAL SE Höpfigheimer Str. 17 74321 Bietigheim-Bissingen Germany Fon: +49 7142 705-0 www.duerrdental.com info@duerrdental.com...
Need help?
Do you have a question about the VistaVox S and is the answer not in the manual?
Questions and answers