Table of Contents
Advertisement
Quick Links
If Mounting to Ultra Wall Track
MOUNT ULTRA TRACK TO WALL
MOUNT ULTRA TRACK TO WALL
• Remove small socket head cap screw in the top center of
• Remove small socket head cap screw in the top
the Wall Track. Remove plastic cover.
center of the Wall Track. Remove plastic cover.
• Locate the wall stud and mark the top hole of the Wall Track.
• Locate the wall stud and mark the top hole of the
• Drill 11/64 pilot hole, insert #14 screw and tighten slightly.
Wall Track.
Use a level, mark the lower holes, drill pilot holes and then insert
• Drill 11/64 pilot hole, insert #14 screw and tighten
the #14 screws.
slightly. Use a level, mark the lower holes, drill
pilot holes and then insert the #14 screws.
NOTE: #14 wood screws are supplied with unit. If installing into metal
studs you will need to replace these with proper metal stud fasteners
NOTE: #14 Wood screws are supplied with unit. If installing into
or the provided snap togglers. All hardware used to secure track mount
metal studs, you will need to replace these with proper metal
must have a proper countersunk head.
stud fasteners
ATTACH SLIDER TO ULTRA TRACK
• Insert slider into wall track.
• Insert slider into
• Replace the plastic cover
wall track.
and small socket
• Replace the
small socket
head cap screw.
head cap
screw and
plastic cover.
If Mounting to a Desk
ATTACH ULTRA DESK MOUNT
• Drill a 3/8" hole thorugh the
• Drill a 3/8" hole through the horizontal
horizontal mounting surface.
mounting surface.
• Screw stud into base of desk mount.
• Screw stud into base of desk mount.
• Push the stud on the desk mount
• Push the stud on the desk mount
through the hole.
through the hole.
• Slide the large mounting washer
over the stud from underneath.
• Slide the large mounting washer over
• Secure in place with 3/8" nylock nut.
the stud from underneath.
• Add the 3/8 split-washer.
Desk Mount
Stud
Part Number
Length
Desk Thickness
• Secure in place with the 3/8 nylock.
D0
3.50"
D1
3.50"
D3
5.50"
D5
7.50"
D7
10.50"
Page 1 of 4
Page 1
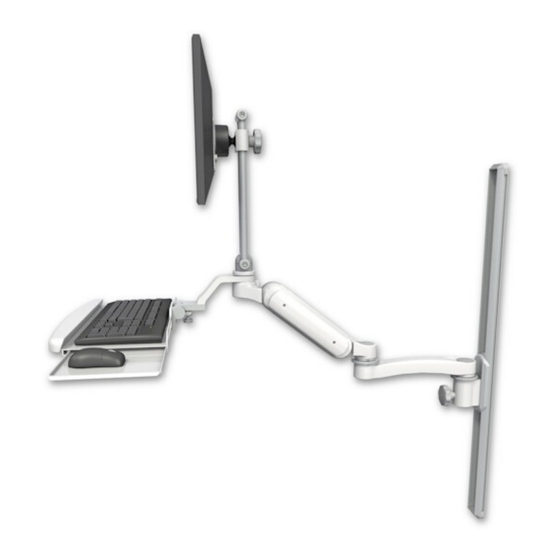
ULTRA 180 & 182 ARM INSTALLATION
Maximum
Screw stud into
2.47"
desk mount
Screw stud
1.87"
into desk mount
1.87"
1.87"
2.38"
MAXIMUM LOAD CAPACITY: 32 LBS. (14.5 KG)
ADJUST SLIDER POSITION
ADJUST SLIDER POSITION
ADJUST SLIDER POSITION
STANDARD
STANDARD
STANDARD
STANDARD
Adjust slider to desired height. Tighten slider using adjustment knob.
Adjust slider to desired height. Tighten slider using adjustment knob.
Adjust slider to desired height. Tighten slider using adjustment knob.
ICW recommends
wood or metal stud
mounting only.
ADJUST SLIDER POSITION
STANDARD
INVERTED
INVERTED
INVERTED
INVERTED
Adjust slider to desired height. Tighten slider
Desk
Washer
Desk
Washer
ULTRA 180 & 182 ARM INSTALLATION - 6/29/20
INVERT
Desk
Nylock
Desk
Nylock
Advertisement
Table of Contents

Subscribe to Our Youtube Channel
Related Manuals for ICW ULTRA 180 ARM


Summary of Contents for ICW ULTRA 180 ARM
- Page 1 If Mounting to Ultra Wall Track MOUNT ULTRA TRACK TO WALL MOUNT ULTRA TRACK TO WALL ICW recommends wood or metal stud • Remove small socket head cap screw in the top center of • Remove small socket head cap screw in the top mounting only.
- Page 2 ULTRA 180 & 182 ARM INSTALLATION If Mounting to an MD Track ICW recommends wood or metal stud mounting only. MOUNT WALL PLATE TO MD TRACK • Install track as per MD track installation. • Loosely attach track adapters to wall ear (W2, W3 or W5).
- Page 3 ULTRA 180 & 182 ARM INSTALLATION If Using EV710 MOUNT WALL PLATE TO WALL ADJUST BALL VESA HEIGHT & TENSION • Mount VESA assembly • To adjust the height of to slide rails. monitor, loosen slider knob, position monitor Slider •...
- Page 4 CLEANING OF THE ICW MOUNTING DEVICE Adjusting Rotation Limits When cleaning your ICW mounting unit please follow the points below. Proper cleaning of the mounting device will help assure proper function and extend the life of the unit.
Need help?
Do you have a question about the ULTRA 180 ARM and is the answer not in the manual?
Questions and answers