Table of Contents

Related Manuals for Gator G2KSR1


Summary of Contents for Gator G2KSR1
- Page 1 2KSR1 2K q HD 1080P DaSH cam wIFI / GPS / SSR / TLR OWNER’S MANUAL Note: This manual is considered correct at time of printing but is subject to change. For latest manuals and updates refer to the website. www.gatordriverassist.com...
-
Page 2: Table Of Contents
Table of contents...........2 Product overview..........3 Product features............3 System contents...........4 Optional accessories..........4 Product structure...........5 Inserting Micro SD Card........7 Fixing the Dash Cam..........7 Installation of Dash Cam........8 Button function............9 Video recording screen........10 Mode button............11 Menu button (Settings/Setup)......11 Video settings menu..........12 Still picture settings menu........13 Playback settings menu........13 Setup menu (All modes)........14 Pairing to your Smartphone.........15... -
Page 3: Product Overview
Product overview Thank you for purchasing the Gator G2KSR1 2K QHD Dash Cam. This product is a convenient and durable traveling video and data recorder. Please ensure that you have read the product manual and instructions in full, prior to installation and use. -
Page 4: System Contents
System contents Dash Cam GPS power cable 16G Micro SD Card Dash Cam & Adhesive Mount Optional accessories (Sold separately) NOTE: The GUNIHWC Hardwire Kit is a simple plug and play solution to hardwire any Dash Cam or device using Mini or Micro USB for power. The Hardwire Kit is compatible with 12V/24V DC for car or truck installations. -
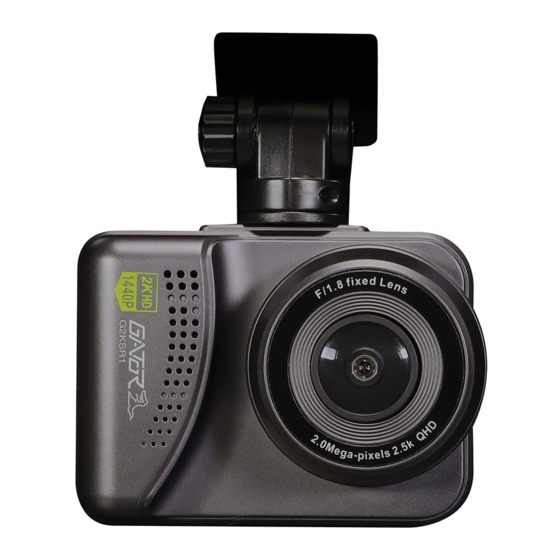
Page 5: Product Structure
Product structure 1. Led Indicator 2. Mounting bracket fixing point 3. Power/OK button 4. Mode button 5. Up button 6. Menu button 7. Down button... - Page 6 8. Speaker 9. Camera lens 10. Micro USB Power socket 11. Reset button 12. Micro SD card slot...
-
Page 7: Inserting Micro Sd Card
Fixing the Dash Cam Suggested... -
Page 8: Installation Of Dash Cam
Installation of Dash Cam 1. Check the mounting position of the Dash Cam camera first before installation. 2. Ensure windscreen is clean and free of debris. Use an Alcohol wipe to enhance adhesion. 3. Place mounting bracket on Dash Cam after checking Dash Cam position. -
Page 9: Button Function
Button function 1. To power ON and OFF, press and hold for 3 seconds. Power/OK 2. Short press to confirm selections. Button 3. When recording video, short press to stop & start recording. 1. Short press it to switch modes when not recording 2. -
Page 10: Video Recording Screen
Video recording screen When connected to power the Dash Cam will automatically turn on. Once power is disconnected it will automatically turn off and save the last recorded file. A video camera icon at the top left corner of the LCD flashes to signify you are recording video. -
Page 11: Mode Button
Video recording screen cont... 1) Video mode 8) Battery meter (Flashes when active) 9) Date stamp 2) WDR icon 10) Time 3) Microphone icon 11) Speed measurement 4) Locked file icon 12) Traffic light recognition 4) Parking mode (TLR) 5) GPS icon 13) Speed sign recognition 6) Wifi icon (SSR) -
Page 12: Video Settings Menu
Video settings menu Settings can only be accessed when not in recording mode. Function Description Resolution QHD P30, FHD P60, FHD P30, HD P30 Loop recording OFF, 1, 3, 5 or 10 Minutes Off / On +2/3,+1/3,+0.0,-1/3,-2/3,-1.0, Exposure -4/3,-5/3,-2.0 G Sensor Off, Low, Medium or High Record Audio Off / On... -
Page 13: Still Picture Settings Menu
Still picture settings menu Function Description Capture Mode Single, 2, 5, 10 second timer Resolution 12/10/8/5/3/2/1.3 M & VGA Fine, Normal, Economy Quality Auto, 100, 200, 400 Anti-Shaking Off / On Date Stamp Off, Date, Date/Time Exit Exit Menu Playback settings menu Function Description Delete... -
Page 14: Setup Menu (All Modes)
Setup menu (All modes) Function Description WiFi Off / On Date / Time DD /MM / YY OFF, 15, 30 Seconds or 1 Minute Screen Saver Delayed Power Off 5, 10 or 15 seconds Beep Sound Off, Low, Medium or High Language English, Vietnamese Frequency... -
Page 15: Pairing To Your Smartphone
WiFi Connected 7. A green WiFi symbol will also appear on the top of the Dash Cam’s screen 8. Then launch the ‘GATOR G2KSR1’ Dash Cam APP to access functions and settings. 9. On the Home App screen select wording ‘WIFI CAMERA’... -
Page 16: Dash Cam Startup Screen
Dash Cam startup screen Once your Smartphone’s WiFi is connected to the Dash Cam, press here to connect with the G2KSR1 APP. -
Page 17: Dash Cam Interface Screen
Dash Cam interface screen Settings Live View Current Resolution Disconnect from Dash Cam Edit Resolution Video/Photo modes Start/Stop/ Take picture View recorded video & photo files... -
Page 18: Photo & Video File Display Screen
Photo & Video file display screen Recorded file Types Select to download photo & video files to your Smartphone Recorded file File size... -
Page 19: Photo & Video Download Screen
Photo & Video download screen Check to select files Press to download... -
Page 20: Download To Your Phone
Dash Cam to your computer and view it through the free downloadable software (GPSPlayer) from our website. Go to www.gatordriverassist.com and search for the model G2KSR1. This viewer is for both PC & MAC format. NOTE: To avoid any possible GPS signal interference, make sure the Dash Cam is away from any other car audio equipment. -
Page 21: Dash Cam Features Explained
Dash Cam features explained Speed sign speed limit recognition (SSR) This feature will detect the traffic speed limit signs whilst travelling on the road. A voice prompt will alert the driver of the speed. Traffic light recognition (TLR) When the traffic indicator status of the traffic light changes from red to green, a tone will alert you that the lights have changed. - Page 22 Loop recording function This feature allows you to set the size of the files your Dash Cam will record before saving and creating a new file. It allows the Dash Cam to record over the oldest recorded files once the card is full. This can be turned OFF, or record 1, 2, 3, 5 or 10 minute video files.
-
Page 23: Formatting The Sd Card
Formatting the SD card You should do this at least every 2 to 3 months It is recommended you do this to keep the card in good running order and to ensure you purge any locked footage that may have been saved in the past that you no longer need and is taking up space. -
Page 24: Connecting To A Computer
Connecting to a computer You can remove the SD card from the Dash Cam and plug the card directly into your computer to access files. With the SD card inserted, and when connected to a computer. Three options will be available; Mass Storage , PC Camera and Video. -
Page 25: Product Specifications
Product specifications Product specifications Display 2.0" High-resolution screen Viewing Angle 161 Degree wide angle lens Video 2K QHD 1440P @ 30fps Resolution Video format WiFi & GPS In built, tracking via App Video Codec H.264 Picture format Picture WDR, G-Sensor, Loop recording Functions SOS lock function, Date stamp OSD Language... -
Page 26: Trouble Shooting Guide
Trouble shooting guide Under normal operating conditions, if there are problems with the device, please refer to the following methods to resolve them. Problem: Cannot take pictures or record video? Solution: • This kind of issue is almost ALWAYS an issue related to the Memory card. - Page 27 Trouble shooting guide PLEASE NOTE: SD cards have a finite life. Their life is based on the amount of times the card is written to. The SD card WILL eventual wear out over time. Dash Cams are very heavy users of the SD card because they are constantly writing to memory.
- Page 28 Troubleshooting guide Problem: The Dash Cam will not power on Solution: • Vehicle Accessory Socket - Check the vehicle accessory socket has power, simply plug another device and see if it powers up (or use a test light / multimeter to check for power).
- Page 29 Troubleshooting guide Problem: The Dash Cam feels warm when it is operating Solution: • It is normal for the Dash Cam to feel warm to the touch during typical use, especially when it is recording HD video. Problem: Cannot record video or take pictures Solution: •...
- Page 30 Solution: • Reset the unit by pushing and holding the reset button for a few seconds and try again. • Format Micro SD Card in a computer. • Should the problem persist please contact your Gator Service Agent for your country.
-
Page 31: Safety Information & Warnings
Gator is NOT responsible for the loss of any recorded video during operation. Although designed to withstand high impact of a car collision, Gator does NOT guarantee recording of accidents where the impact may cause the device to be damaged. -
Page 32: Technical Assistance
Technical assistance If you need assistance setting up or using your Gator product now or in the future, call Gator Support. Australia TEL: 03 – 8587 8898 FAX: 03 – 8587 8866 Mon-Fri 9am – 5pm AEST If you would like to download a digital copy of this manual, or other Gator manuals/software, please visit the http://gatordriverassist.com website and click on ‘Firmware...
Need help?
Do you have a question about the G2KSR1 and is the answer not in the manual?
Questions and answers