Table of Contents
Advertisement
Quick Links
Advertisement
Table of Contents

Related Manuals for DFI EB100-KU


Summary of Contents for DFI EB100-KU
- Page 1 EB100-KU Fanless Embedded System User’s Manual Preliminary Version A-529-M-2026...
- Page 2 1. The changes or modifications not expressly approved by the party responsible for com- pliance could void the user’s authority to operate the equipment. 2. Shielded interface cables must be used in order to comply with the emission limits. User's Manual | EB100-KU...
-
Page 3: Table Of Contents
ACPI Configuration ......................24 CPU Configuration ......................25 Video Configuration .......................25 Audio Configuration.......................26 SATA Configuration .......................26 USB Configuration ......................27 USB Power Control ......................27 PCI Express Configuration ....................28 ME Configuration ......................28 MEBX Configuration ......................29 Active Management Technology Support ..............29 User's Manual | EB100-KU... - Page 4 The system and accessories in the package may not come similar to the information listed above. This may differ in accordance with the sales region or models in which it was sold. For more information about the standard package in your region, please contact your dealer or sales representative. User's Manual | EB100-KU...
- Page 5 Make sure the system is placed or mounted correctly and stably to prevent the chance of dropping or falling may cause damage. • The openings on the system shall not be blocked and shall be kept in distance from User's Manual | EB100-KU...
- Page 6 The specifications listed here may be based on editions that do not resemble your actual products. Please visit the download page at go.dfi. POWER Type DC JACK, DC 12V input com/EB100-KU, or via the QR code to the right for the latest datasheet. User's Manual | EB100-KU...
-
Page 7: Chapter 2 - Hardware Installation
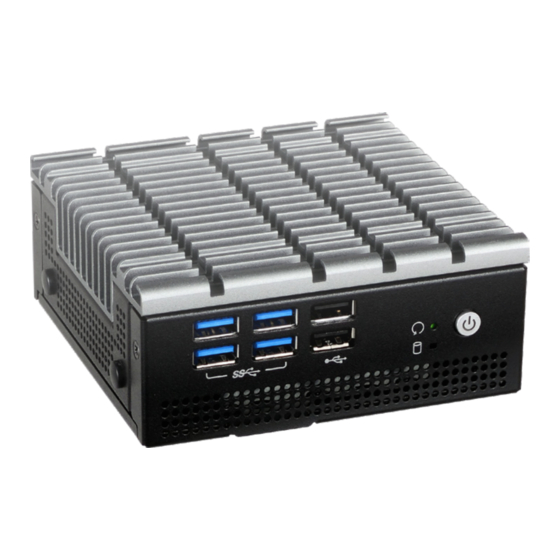
Front Panel 4 x USB 3.0 2 x USB 2.0 Power Button with LED SSD LED & Reset Rear Panel 115.00 + 0.20 12V DC-In LAN1 LAN2 2 x HDMI Audio Out & Mic In Ground User's Manual | EB100-KU... -
Page 8: Mounting Options
Place the system top-side down on a stable worksurface. Locate the mounting holes on the bottom of the system and the bracket and make sure them align. Screw the brackets onto the system with four screws as illustrated below. User's Manual | EB100-KU... - Page 9 Mount the assembly onto the VESA mount bracket previously attached to the back of a moni- tor. Make sure the step screws sit perfectly into the step screw holes. n i t n i t n i t User's Manual | EB100-KU...
- Page 10 Route the Fasten the screws and secure the drive onto cable in the manner that there is no contact the tray as illustrated with four screws. with heat generating chips and wafers. User's Manual | EB100-KU...
-
Page 11: Rear Panel
DC In connector as shown below. DV-In Rear Panel - s i Place the assembly top-side down on a stable worksurface. Attache the front and rear panels to the assembly, and screw on the four screws as illustrated. - s i User's Manual | EB100-KU... - Page 12 (B). Fasten the spring screws into the standoffs to secure the system board. - s i - s i User's Manual | EB100-KU...
- Page 13 Connect the internal cable to the expansion board's antenna connector, screw the antenna con- nector through the antenna hole on the front panel with washers and nuts, and screw on the antenna as illustrated below. Board Connector Cable Antenna Connector Washer Antenna Chassis Wall User's Manual | EB100-KU...
- Page 14 Failure to do so will cause severe damage to the motherboard and com- ponents. USB 3/4 (USB 3.0) USB 1/2 (USB 3.0) SPI Flash BIOS SATA (Data and Power) SSD LED Battery DDR4 SO-DIMM DDR4 SO-DIMM M.2 M Key 2280 Mini PCIe Half-size Buzzer User's Manual | EB100-KU...
- Page 15 DIMMs. Not all slots need to be populated. Dual Channel DIMMs of the same memory configuration are on different channels. Features • Two 260-pin SODIMM up to 32GB • Dual Channel DDR4 1866/2133MHz 4 5 ° Step 1 User's Manual | EB100-KU...
-
Page 16: Jumper Settings
Note: The jumper is located on the top side of the board, and can only be accessed after removing the board from the top cover. Please refer to previous sections for instruction. User's Manual | EB100-KU... -
Page 17: I/O Ports
S3 (STR - Suspend To RAM) state. BIOS Setting Configure USB devices in the "Advanced" menu (“USB Configuration” and "USB Power Control" submenus) of the BIOS. Refer to Chapter 3 for more information. User's Manual | EB100-KU... -
Page 18: Rj45 Lan Ports
Calculating the system’s approximate power usage is important to ensure that the power supply meets the system’s consump- tion requirements. • LAN1: 1 x Intel® I219LM (10/100/1000Mbps) • LAN2: 1 x Intel® I210AT (10/100/1000Mbps) User's Manual | EB100-KU... -
Page 19: Battery
There is a converter cable for converting the 20-pin board connector to a common 7-pin + 15- pin SATA data + power connector. BIOS Setting Configure the Serial ATA drives in the "Advanced" menu (“SATA Configuration” submenu) of the BIOS. Refer to chapter 3 for more information. User's Manual | EB100-KU... -
Page 20: Expansion Slots
M.2 more suitable in application for solid-state storage. The board preserves space and a standoff for the M.2 M key socket (22mm x 80mm). The M.2 M key supports SATA, PCIe, and reset signals. User's Manual | EB100-KU... - Page 21 Screw tight the card onto the stand- off with a screw driver and a stand- off screw until the gap between the card and the stand-off closes up. The card should be lying paral- lel to the board when it’s correctly mounted. User's Manual | EB100-KU...
-
Page 22: Chapter 3 - Bios Settings
When “X” appears on the left of a particular field, it indicates that a submenu which contains additional options are available for that field. To display the submenu, move the highlight to that field and press <Enter>. User's Manual | EB100-KU... -
Page 23: Main
The date format is <day>, <month>, <date>, <year>. Day displays a day, from Sunday to Sat- urday. Month displays the month, from 01 to 12. Date displays the date, from 01 to 31. Year displays the year, from 2005 to 2099. User's Manual | EB100-KU... -
Page 24: Acpi Configuration
Real-time clock (RTC) battery. [Wake up time] Configure the time of day the system will wake on RTC — [HH:MM:SS]. This field will only ap- pear when “Wake On RTC” is enabled. User's Manual | EB100-KU... - Page 25 Please make sure that the OS operating on your system is optimized for Hyper-Threading, e.g. Windows and Linux. This field is not available when the equipped CPU does not support Hyper- threading. User's Manual | EB100-KU...
- Page 26 The mode selection determines how the SATA controller(s) operates. AHCI This option allows the Serial ATA controller(s) to use AHCI (Advanced Host Control- ler Interface). Port 0, 2/Hot Plug Enable or disable each Serial ATA port and its hot plug function. User's Manual | EB100-KU...
- Page 27 Select between 5V_Dual and 5V for each USB controller. When Wake-on-USB from S3/S4 states is required, please select 5V_Dual. Enabled Enable Legacy USB support. Disabled Keep USB devices available only for EFI applications. XHCI Hand-off USB3_3/4 Enable or disable XHCI Hand-off. USB3_1/2 USB2_6/7 Front Panel User's Manual | EB100-KU...
- Page 28 Hot Plug Enable or disable hot plug function of the port. This field may not appear when the port does not support hot plug. WGI219LM WGI210AT Rear Panel User's Manual | EB100-KU...
- Page 29 BIOS Extension (MEBX) setup menu. Please refer to Chapter 4 for instructions. Disabled Disable AMT. When this field is disabled, AMT settings cannot be configured and MEBX is not allowed to enter. Un-configure ME Enable or disable ME unconfiguration without password. User's Manual | EB100-KU...
- Page 30 Network Device will not be configurable in Device Manager if "Network Stack" is disabled in the "Boot" menu. Help ↑ /↓ Select Item F5/F6 Change Values Setup Defaults Exit ←/→ Select Item Enter Select SubMenu Save and Exit User's Manual | EB100-KU...
- Page 31 "Boot Type". Set the supervisor’s password and the length of the password must be longer than one charac- ter. Network Stack This field is used to enable or disable network stacks, i.e. IPv4 or IPv6 network protocols. User's Manual | EB100-KU...
- Page 32 Save and Exit LAN controller of the said LAN (go to "Advanced" > "PCI Express Configuration") are enabled. Please press F10 to save the settings and re-start the system board for the settings to take effect. User's Manual | EB100-KU...
- Page 33 "PXE Boot to LAN", "PXE boot capability", "Network Stack" and the LAN controller of the said LAN (go to "Advanced" > "PCI Express Configuration") are enabled. Please press F10 to save the settings and re-start the system board for the settings to take effect. User's Manual | EB100-KU...
- Page 34 Select YES and press <Enter> to load optimal defaults. Discard Changes Select YES and press <Enter> to exit the system setup without saving your changes. Save Setting to file Select this option to save BIOS configuration settings to a USB flash device. User's Manual | EB100-KU...
-
Page 35: Cpu Configuration
MEBx Setup. Un-Configure ME <Disabled> Note : This option does not disable Manageability Features in FW. Help ↑ /↓ Select Item F5/F6 Change Values Setup Defaults Exit ←/→ Select Item Enter Select SubMenu Save and Exit User's Manual | EB100-KU... -
Page 36: Me Configuration
3. Select MEBX Configuration and press Enter. InsydeH2O Setup Utility Rev. 5.0 Advanced MEBX Configuration Setting MEBX Configuration MEBX Configuration Help ↑ /↓ Select Item F5/F6 Change Values Setup Defaults Exit ←/→ Select Item Enter Select SubMenu Save and Exit User's Manual | EB100-KU... - Page 37 - At least one 7-bit ASCII non alpha-numeric character, above 0x20, (e.g. !, $, ;); - At least one lower case and one upper case characters. 3. Enter the new password again to verify the new password. Verify password User's Manual | EB100-KU...
- Page 38 - At least one 7-bit ASCII non alpha-numeric character, above 0x20, (e.g. !, $, ;); - At least one lower case and one upper case characters. 3. Enter the new password again to verify the new password. Verify password User's Manual | EB100-KU...
- Page 39 > User Consent Password Policy <Anytime> > Network Setup Disabled Activate Network Access Enabled Unconfigure Network Access <Full Unprovision> > Remote Setup And Configuration > Power Control [↑↓] =Move Highlight <Enter> =Complete Entry [Esc] =Discard Changes User's Manual | EB100-KU...
- Page 40 Username and Password Select Enabled or Disabled then press Enter. Select Enabled or Disabled then press Enter. Storage Redirection Select Enabled or Disabled then press Enter. KVM Feature Selection Select Enabled or Disabled then press Enter. Disabled Enabled User's Manual | EB100-KU...
- Page 41 User Opt-in the system is being accessed. Select NONE or KVM or ALL then press Enter. NONE Opt-in Configurable from Remote IT Select Enabled or Disabled then press Enter. Disabled Enabled User's Manual | EB100-KU...
- Page 42 > Intel(R) ME Network Name Settings Enter the computer’s domain name and then press Enter. > TCP/IP Settings Computer Domain Name Shared/Dedicated FQDN Select Shared or Dedicated and then press Enter. Dedicated [↑↓] =Move Highlight [Enter] =Select Entry [Esc] =Exit Shared User's Manual | EB100-KU...
- Page 43 TCP/IP SETTINGS > Wired LAN IPV4 Configuration <Enter> =Complete Entry [Esc] =Discard Changes Enter a value for the Time-to-live (TTL) field and then press Enter. Value in Seconds [↑↓] =Move Highlight [Enter] =Select Entry [Esc] =Exit User's Manual | EB100-KU...
- Page 44 0.0.0.0 Default Gateway Address 0.0.0.0 Preferred DNS Address 0.0.0.0 Alternate DNS Address 0.0.0.0 Alternate DNS Address Insert a value from 0.0.0.0 to 255.255.255.255 in IPv4 format. Alternate DNS address 0.0.0.0 <Enter> =Complete Entry [Esc] =Discard Changes User's Manual | EB100-KU...
- Page 45 > Power Control Activates the current network settings > Power Control Full Unprovision and opens the ME network interface Continue: (Y/N) [↑↓] =Move Highlight [Enter] =Select Entry [Esc] =Exit [↑↓] =Move Highlight <Enter> =Complete Entry [Esc] =Discard Changes User's Manual | EB100-KU...
- Page 46 Provisioning Server FQDN > RCFG > TLS PKI Provisioning Server FQDN Enter the Fully Qualified Domain Name (FQDN) of the server and then press Enter. Enter FQDN of provisioning server [↑↓] =Move Highlight [Enter] =Select Entry [Esc] =Exit User's Manual | EB100-KU...
- Page 47 [Enter] =Select Entry [Esc] =Exit Remote Configuration ** Select Enabled or Disabled then press Enter. Disabled Enabled PKI DNS Suffix Specify the DNS Suffix of the PKI server, and then press Enter. Enter PKI DNS Suffix User's Manual | EB100-KU...
- Page 48 Active: [*] Default: [*] SHA256 Startfield Root CA Active: [*] Default: [*] SHA256 Timeout Value (1-65535) ↓ [Ins] =Add New Hash [Delete] =Delete Hash [+] =Activate Hash 65535 [↑↓] =Move Highlight [Enter] =View Hash [Esc] =Exit User's Manual | EB100-KU...
- Page 49 Copyright(C) 2003-16 Intel Corporation. All Rights Reserved MAIN MENU > Intel(R) ME General Settings > Intel(R) AMT Configuration MEBx Exit Are you sure you want to exit?(Y/N): Exit [↑↓] =Move Highlight [Enter] =Select Entry [Esc] =Exit User's Manual | EB100-KU...
Need help?
Do you have a question about the EB100-KU and is the answer not in the manual?
Questions and answers