
Related Manuals for Nautilus Hyosung MS500


Summary of Contents for Nautilus Hyosung MS500
- Page 1 Operator Manual MS500 System V01.00.03 (2017.11.29) © 2017 Nautilus Hyosung Inc. All Rights Reserved.
- Page 3 V01.00.03 2017/11/29 Added special operation method for each functions Note © 2017 Nautilus Hyosung All Rights Reserved. The content of this specification is protected by copyright laws. 2017. 11. 29. 4th Release © 2017 Nautilus Hyosung Inc. All Rights Reserved.
-
Page 4: Table Of Contents
Case 9: Removing Jam from Center Transport Path (Upper) of Lower Unit ································· 4-39 Case 10: Removing Jam from Center Transport Path (Middle) of Upper Unit ······························ 4-40 Case 11: Removing jam from cassette (RC11~RC31, RJC, CST) ············································· 4-41 Notes ............................Note-1 © 2017 Nautilus Hyosung Inc. All Rights Reserved. -
Page 5: Chapter1. Preface
For the contact of maintenance staffs of Nautilus Hyosung, see the E-mail addresses and telephone numbers provided separately. What is in This Manual ▶ This manual is designed to provide the operation guide for the MS500 and the detailed description of the following: ▪ Replenishing the notes ▪... -
Page 6: Conventions
Body Module-Up (Upper Body of the Module) Bill Recycle Machine Customer Service Module Deposit Cassette Recycle Cassette Reject Cassette Tape Escrow 5-10 Utility Cassette BATT S/W Battery Switch Camera Unit Control Electronics Elementary Program © 2017 Nautilus Hyosung Inc. All Rights Reserved. - Page 7 Liquid Crystal Display Operation Panel for Customers to Operate OSD board On Screen Display Board Power Supply Panel Control Board Switch Sensor and Indications Unit Service Provider Text Terminal Unit (OPL or SPL) © 2017 Nautilus Hyosung Inc. All Rights Reserved.
-
Page 8: Safety Precautions
4. The equipment is to be secured to the building structure before operation 5. A security container shall be permitted to optionally be provided with a secondary lock, but improper use of the secondary lock feature will reduce the security level of the ATM. © 2017 Nautilus Hyosung Inc. All Rights Reserved. - Page 9 ▪ If the above-mentioned abnormalities occur, immediately turn off the power, unplug the equipment and contact the service center. ▪ If you ignore these symptoms, the equipment may catch on fire or cause electric shock. © 2017 Nautilus Hyosung Inc. All Rights Reserved.
-
Page 10: Related Document
▶ The related documents are listed as follows. If needed, please contact staffs of our technical support team and maintenance team. ▪ Installation Manual ▪ Service Manual For the contact of maintenance staffs of Nautilus Hyosung, see the E-mail addresses and telephone numbers provided separately. © 2017 Nautilus Hyosung Inc. All Rights Reserved. -
Page 11: Chapter2. Introduction
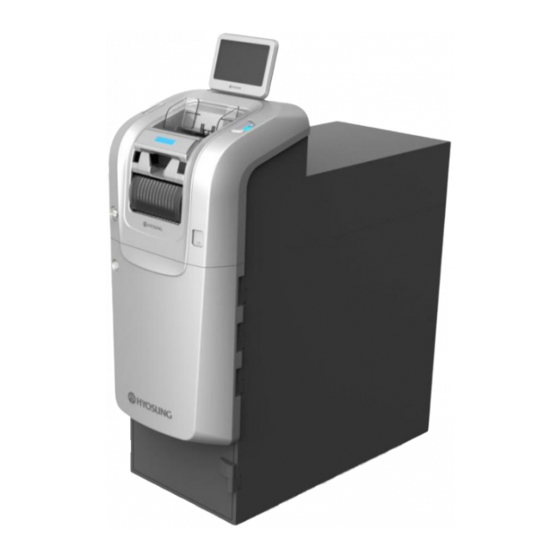
► Exterior View of MS500 Display Deposit Slot Reject Slot Withdrawal Slot Power Button Power Supply CE (Control Electronics, PC) ► Interior View of MS500 Upper Body Lower Body of BRM of BRM © 2017 Nautilus Hyosung Inc. All Rights Reserved. -
Page 12: Basic Features
Chapter2. Introduction Operator Manual Basic Features ► Important features of MS500 is highlighted in the following list: Main Controller Intel ATOM Baytrail QuadCore N2930 1.83GHz Memory DDR3L 4GB Up to 8GB 2.5”, SSD 128GB Storage SATA Type Operating System Windows 7 Embedded... -
Page 13: Devices Of Ms500
• Graphic: Intel Gen7 Intel Graphics DX 11, OGL3.2 • PCI Slot: Mini PCI-E 1EA • Serial Ports: 4 Ports • SATA: 2 Ports • USB Ports: 2 + 6 Ports • LAN: Gigabit LAN • Power: 24V © 2017 Nautilus Hyosung Inc. All Rights Reserved. -
Page 14: Power Supply
Basic Specification of Control Electronics • Main Power - Input Voltage / Current: 100~127Vac±10% 12A 200~240Vac±10% 7.5A - Frequency: 47~63Hz (NORMAL:50/60Hz) • Battery: N/A © 2017 Nautilus Hyosung, Inc. All Rights Reserved. -
Page 15: Bill Recycle Machine (Brm)
Basic Specification of Bill Recycle Machine • Interface Type: USB 1.1(Main), USB 2.0(BC) • Sutter type: Automatic Shutter (1 Shutter / 3 Slot) • Functional Architecture: 6 Recycle(3 smalls, 3 normals) /1 Reject /1 Utility Cassette © 2017 Nautilus Hyosung Inc. All Rights Reserved. -
Page 17: Chapter3. For The Beginning Operator
1. Open the front door with key. Then insert the key into the key hole under the upper front section and turn it clockwise. 2. Pull the upper front and bend the bezel back as the picture below. © 2017 Nautilus Hyosung Inc. All Rights Reserved. -
Page 18: Opening The Security Enclosure
1. Open the front door with key. 2. Unlock the security door, refer to the relevant instructions detailed under “Opening/ Closing The Security Enclosure (Security Door)” 3. Turn and pull the Handle. © 2017 Nautilus Hyosung Inc. All Rights Reserved. -
Page 19: Opening/Closing The Security Enclosure (Security Door)
Operator Manual Chapter3. For the beginning operator Opening/Closing the Security Enclosure (Security Door) ▶ The MS500 has locks for the Vault. Security Door with Cencon The Cencon lock is highly-secured, advanced-design lock. Even though the lock is electromechanical, they require no wiring or batteries for opening the lock because they are self-powered. - Page 20 4. Turn the dial right (CW) until it stops. The lock’s bolt is now retracted and the lock is open. 5. Turn the handle to the left (CCW) and open the security door. <Note!> Fix the security door using the stopper in the picture below. © 2017 Nautilus Hyosung Inc. All Rights Reserved.
- Page 21 The best thing to do in analyzing the lock level is to write down the entire string and then pick out the portions of it that are significant to you, or if you are experiencing a problem with the lock, report the entire string to the Tech Support group. © 2017 Nautilus Hyosung Inc. All Rights Reserved.
- Page 22 (the Change Key symbol along with Enter Combination) is displayed. Press #8 EcF Press the “#” button followed by the “8” button. EcF (Enter current Factory combination) will be displayed © 2017 Nautilus Hyosung Inc. All Rights Reserved.
- Page 23 15. OPr Retract Bolt Turn the Dial to the right (CW) to retract the bolt. 16. Close Door 17. Extend Bolt Turn the Dial to the left (CCW) to extend the bolt. © 2017 Nautilus Hyosung Inc. All Rights Reserved.
-
Page 24: Switching Power On
Chapter3. For the beginning operator Operator Manual Switching Power On ►The system turning-on process is as follows 1. Open the plastic cover and press the switch to “ON”. 2. The system will be turn on automatically © 2017 Nautilus Hyosung Inc. All Rights Reserved. -
Page 25: Chapter4. Bill Recycling Machine 30 (Brm30)
Operator Manual Chapter4. Bill Recycle Machine Chapter4. Bill Recycling Machine 30 (BRM30) Overall Configuration ► BRM30 Overall Configuration Diagram © 2017 Nautilus Hyosung Inc. All Rights Reserved. -
Page 26: Basic Specification
RC with bills in person. Item Specification Remarks ALTERA SocFPGA (Cortex-A9) Processor (32Bit RISC, 800MHz) Present : High Speed Higher Rank USB2.0(Full/High Speed) After this : Will be Interface changed to Full Speed © 2017 Nautilus Hyosung Inc. All Rights Reserved. - Page 27 Width: 230 ± 3 mm (9.06 ± 0.12inch) Recycle/Deposit Dimensions Length: 135 ± 3 mm (5.31 ± 0.12inch) Small-capacity Height: 213 ± 3 mm (8.39 ± 0.12inch) Cassette (RC3x) Weight 3.5 Kg (7.72Ib, except bill weight) © 2017 Nautilus Hyosung Inc. All Rights Reserved.
-
Page 28: Bill Conditions
2. Bill has sufficient life or sizing to be handled easily 3. Bill which can be manually held straightly when one end is held by a hand and the bill is slightly curved vertically © 2017 Nautilus Hyosung Inc. All Rights Reserved. - Page 29 Chapter4. Bill Recycle Machine ▶Unacceptable condition 1. Bill having serious wrinkles, torn or broken section wherein paper fiber is broken and separation begins. Wrinkle Wrinkle Torn Torn Broken section Broken Section © 2017 Nautilus Hyosung Inc. All Rights Reserved.
- Page 30 4. Bill ragged and cannot be held straightly when one end is supported by a hand 20mm (0.79inch) 35mm (1.38inch) When the bill is held by 20mm (0.79inch) and the straightness of the bill is 35mm (1.38inch) or less, it cannot be used © 2017 Nautilus Hyosung Inc. All Rights Reserved.
- Page 31 Operator Manual Chapter4. Bill Recycle Machine 5. Bill with cellophane tape, scotch tape, etc Tape 6. Bill with folds Fold 7. Gradually curved bill (bills tied by hand seal, etc) Band seal © 2017 Nautilus Hyosung Inc. All Rights Reserved.
- Page 32 Chapter4. Bill Recycle Machine Operator Manual 8. Bill with folded lines Case 1 Case 2 Case 3 ☞ Bill distortion should not exceed 10 mm (0.39inch) © 2017 Nautilus Hyosung Inc. All Rights Reserved.
-
Page 33: How To Open And To Close The Lower Unit
2. Unlock the security door, refer to the relevant instructions detailed under “Opening/ Closing The Security Enclosure (Security Door)” 3. Turn and pull the Handle. 4. Open the security enclosure and fix it using stopper. © 2017 Nautilus Hyosung Inc. All Rights Reserved. - Page 34 5. Push down the Lever C to release the Lock of lower unit from BRM30 frame and pull the lower unit until it is taken out completely holding the end of Lever C. 4-10 © 2017 Nautilus Hyosung Inc. All Rights Reserved.
- Page 35 Chapter4. Bill Recycle Machine ►Closing the Lower Unit 1. Push the Lower Unit into the BRM30 Frame until it is locked as the picture below. 2. Close the security enclosure and front door. © 2017 Nautilus Hyosung Inc. All Rights Reserved. 4-11...
- Page 36 1. Open the Drawer pulling the Lever A. ►How to Close the Lower Unit (Drawer) 1. Push the Drawer into the Lower Unit until it is locked as the picture below. 4-12 © 2017 Nautilus Hyosung Inc. All Rights Reserved.
-
Page 37: How To Replenish The Cassette With Bills
2. Hold the Cassette Handle A and separate the Cassette from the set guide completely. 3. Unfold the holder of the cassette and lay it on the flat surface as shown in picture below. 4. Turn the key clockwise and open the cassette door. © 2017 Nautilus Hyosung Inc. All Rights Reserved. 4-13... - Page 38 7. Replenish the cassette with the bill to the position of the red label and push the Push-Plate to the end in the arrow direction pressing the green lever B. (Lever D: Cassette Push-Plate Lever) Label 4-14 © 2017 Nautilus Hyosung Inc. All Rights Reserved.
- Page 39 Place the notes correctly. 8. Close the door with the key. After closing the door, remove the key from the cassette. (Please check that the top & bottom of door are completely locked.) © 2017 Nautilus Hyosung Inc. All Rights Reserved. 4-15...
- Page 40 9. Fold the holder of the cassette and mount the cassette into the set guide. 10. Mount the lower unit into the BRM30 Frame. (Refer to “ Closing the Lower Unit”) 4-16 © 2017 Nautilus Hyosung Inc. All Rights Reserved.
- Page 41 3. Place the Cassette on the flat surface as the picture below. 4. For the procedures of replenishing the small-capacity cassette (RC31~RC33) with bills, please refer to 4) ~ 8) of the procedures described in “High-Capacity Cassette (RC11~13)” © 2017 Nautilus Hyosung Inc. All Rights Reserved. 4-17...
- Page 42 5. Mount the cassette into the set guide. (Please check the direction of cassette entrance before mounting.) 6. Mount the lower unit into the BRM30 Frame. (Refer to “ Closing the Lower Unit”) 4-18 © 2017 Nautilus Hyosung Inc. All Rights Reserved.
-
Page 43: Extra Cassette (Cst)
1. Open the front door with key. 2. Lift up the hook and separate the holder of extra cassette from the door. 3. Push the handle until the hook B is locked. © 2017 Nautilus Hyosung Inc. All Rights Reserved. 4-19... - Page 44 6. For the procedures of replenishing the extra cassette (CST) with bills, please refer to 4) ~ 8) of the procedures described in “High-Capacity Cassette (RC11~13)” 7. Mount the cassette into the set guide. (Please check the direction of cassette entrance before mounting) 4-20 © 2017 Nautilus Hyosung Inc. All Rights Reserved.
- Page 45 Chapter4. Bill Recycle Machine 8. Push the Extra Cassette in the direction of arrow until it is locked. ► Demounting Extra Cassette 1. Press the button deeply with other hand holding the cassette. © 2017 Nautilus Hyosung Inc. All Rights Reserved. 4-21...
- Page 46 4. Push the holder in the direction of arrow holding the door until the hook F is locked. 5. Close the door. <Caution!> Close the door in the status that the key is turned to clockwise and then turn the key counter clockwise to close the door. 4-22 © 2017 Nautilus Hyosung Inc. All Rights Reserved.
-
Page 47: How To Open And To Close The Upper Unit
How to open and to close the upper unit ► Opening & Closing Upper Unit ► Opening the Upper Unit 1. Turn the key clockwise until hearing the sound that the lock is released © 2017 Nautilus Hyosung Inc. All Rights Reserved. 4-23... - Page 48 2. Hold the both sides of the bezel and pull it in the direction of arrow. ► Closing the Upper Unit 1. Hold the both sides of bezel and push it in the direction of arrow. 4-24 © 2017 Nautilus Hyosung Inc. All Rights Reserved.
- Page 49 Service Module holding the handle B and fix it in the safety lock C. ►Closing the Customer Service Module 1. Hold the handle B with one hand and push the safety lock C in the arrow direction with other hand to release the lock. © 2017 Nautilus Hyosung Inc. All Rights Reserved. 4-25...
- Page 50 ▶ Caution Do NOTtake your hands off the handle until the upper unit is completely closed because the safety lock is released! And also, do hold the other places except the handle! 4-26 © 2017 Nautilus Hyosung Inc. All Rights Reserved.
-
Page 51: How To Remove The Jam
2. Turn the Knob A clockwise until the bill can be removable. Then remove the bill with other hand completely. 3. Open the Customer Service Module. (Refer to “Opening the Customer Service Module” © 2017 Nautilus Hyosung Inc. All Rights Reserved. 4-27... - Page 52 7. After removing the jammed bill, close the Customer Service Module and Upper Unit in the reverse order of above. (Refer to “Closing the Customer Service Module” & “Closing the Upper Unit”) 4-28 © 2017 Nautilus Hyosung Inc. All Rights Reserved.
-
Page 53: Case 2: Removing Jam From Front Transport Path
4. Pull the Handle C in the arrow direction and remove the jammed bill with the other hand holding the transport guide with one hand © 2017 Nautilus Hyosung Inc. All Rights Reserved. 4-29... -
Page 54: Case 3: Removing Jam From Extra
4. After removing the jammed bill, close the Customer Service Module and Upper Unit in the reverse order of above. (Refer to “Closing the Customer Service Module” & “Closing the Upper Unit”) 4-30 © 2017 Nautilus Hyosung Inc. All Rights Reserved. -
Page 55: Case 4: Removing Jam From Bc
2. Lift up the Lever D in the diagonal direction and open the BC. Turn the Knob E counterclockwise holding the Lever D until the jammed bill can be removable. 3. Remove the jammed bill holding the Lever D. © 2017 Nautilus Hyosung Inc. All Rights Reserved. 4-31... - Page 56 5. After removing the jammed bill, close the Customer Service Module and Upper Unit in the reverse order of above. (Refer to “Closing the Customer Service Module” & “Closing the Upper Unit”) 4-32 © 2017 Nautilus Hyosung Inc. All Rights Reserved.
-
Page 57: Case 5: Removing Jam From Option
► Case 5: Removing Jam from Option 1. Open the Upper Unit. (Refer to “Opening Upper Unit”) 2. Lift up the Lever E in the diagonal direction and open the Option Transport Path. © 2017 Nautilus Hyosung Inc. All Rights Reserved. 4-33... - Page 58 3. Turn the Knob F counterclockwise holding the Lever E until the jammed bill show. Then remove the jammed bill. 4. Turn the Knob F counterclockwise until the jammed bill show. Then remove the jammed bill. 4-34 © 2017 Nautilus Hyosung Inc. All Rights Reserved.
- Page 59 6. After removing the jammed bill, close the Customer Service Module and Upper Unit in the reverse order of above. (Refer to “Closing the Customer Service Module” & “Closing the Upper Unit”) © 2017 Nautilus Hyosung Inc. All Rights Reserved. 4-35...
-
Page 60: Case 6: Removing Jam From Middle Transport Path
Case 6: Removing Jam from Middle Transport Path ► Case 6: Removing Jam from Middle Transport Path 1. Open the Upper Unit. (Refer to “Opening Upper Unit”) 2. Push the Lever J in the arrow direction. 4-36 © 2017 Nautilus Hyosung Inc. All Rights Reserved. - Page 61 5. After removing the jammed bill, close the Customer Service Module and Upper Unit in the reverse order of above. (Refer to “Closing the Customer Service Module” & “Closing the Upper Unit”) © 2017 Nautilus Hyosung Inc. All Rights Reserved. 4-37...
-
Page 62: Case 7: Removing Jam From Center Transport Path (Lower) Of Lower Unit
Case 8: Removing Jam from Center Transport Path (Upper) of Lower Unit ► Removing Jam from Center Transport Path (Upper) of Lower Unit 1. In case of the Center Transport Path (Upper), turn the Knob B counterclockwise and remove the jammed bill. 4-38 © 2017 Nautilus Hyosung Inc. All Rights Reserved. -
Page 63: Case 9: Removing Jam From Center Transport Path (Upper) Of Lower Unit
1. Separate the High-Capacity Cassette from BMD Frame. (Refer to “High-Capacity Cassette” of “How to replenish the cassette with bills”) 2. Press the Lever C to release lock and remove the jammed bill. © 2017 Nautilus Hyosung Inc. All Rights Reserved. 4-39... -
Page 64: Case 10: Removing Jam From Center Transport Path (Middle) Of Upper Unit
1. Separate the CST Unit from BMD Frame. (Refer to “High-Capacity Cassette” of “How to replenish the cassette with bills” 2. Press the Lever D to release lock, remove the jammed bill. 4-40 © 2017 Nautilus Hyosung Inc. All Rights Reserved. -
Page 65: Case 11: Removing Jam From Cassette (Rc11~Rc31, Rjc, Cst)
3. Pull the Push-Plate in the arrow direction of the picture below to remove the jammed bill. 4. Find the green knob A in the upper part of the internal of the cassette. © 2017 Nautilus Hyosung Inc. All Rights Reserved. 4-41... - Page 66 6. Close the cassette door and mount the cassette into the set guide. (Refer to “How to replenish the cassette with bills”) 7. Mount the lower unit into BRM30 Frame. (Refer to “Closing Lower Unit”) 4-42 © 2017 Nautilus Hyosung Inc. All Rights Reserved.
-
Page 67: Notes
If transit cassette is full during the first step(RC->Transit), the operation will be stopped and notes remains on he path will be stored in overflow/reject cassette. If the cassette is full during the second step(Transit->RC), notes will be stored in overflow/reject cassette. © 2017 Nautilus Hyosung Inc. All Rights Reserved. Notes-1...
Need help?
Do you have a question about the MS500 and is the answer not in the manual?
Questions and answers