
Related Manuals for Nautilus Hyosung MONiMAX7800I


Summary of Contents for Nautilus Hyosung MONiMAX7800I
- Page 1 Installation Manual MONiMAX7800I System V01.00.02 (2017.05.22) © 2017 Nautilus Hyosung Inc. All Rights Reserved.
- Page 2 2016/12/01 V01.00.02 2017/05/22 Updated CEN-1 installation cut sheet 3, 4 © 2017 Nautilus Hyosung All Rights Reserved. The content of this specification is protected by copyright laws. 2017. 05. 22. 3rd Release © 2017 Nautilus Hyosung Inc. All Rights Reserved.
-
Page 3: Table Of Contents
Installation Condition and Space ........................3-1 Exterior ................................3-2 Access for Device ............................3-4 Service Area ..............................3-5 Chapter4. System Installation ....................... 4-1 Unpacking the ATM ............................4-1 Installation Frame............................4-3 Notes ............................Notes-1 © 2017 Nautilus Hyosung Inc. All Rights Reserved. -
Page 4: Chapter1. Preface
Nautilus Hyosung. It Is the policy of Nautilus Hyosung to improve products as new technology, components, software, and firmware become available. Therefore Nautilus Hyosung reserves the right to change specifications without notice. -
Page 5: Terminologies
Camera Unit CASSETTE Cash & Check Cassette CCIM Cash & Check In Module Contactless Card Reader Cash Dispenser Unit Control Electronics Earphone Jack Voice Converter for Visually Disabled Persons (ADA) Europay, Mastercard, Visa © 2017 Nautilus Hyosung Inc. All Rights Reserved. - Page 6 Recognition Module REJECT Reject Module RT/A6 Retract & A6 Cassette Switch Separator Control Module Sensor and Indications Unit Service Provider Slip Printer (Receipt Printer) Text Terminal Unit (OPL or SPL) Vacuum Fluorescent Display © 2017 Nautilus Hyosung Inc. All Rights Reserved.
-
Page 7: Safety Precautions (English)
▪ Do not touch the equipment when it is running. ▪ The equipment can get extremely hot and may cause a burn. ▪ Make sure to close the cover before running the equipment. © 2017 Nautilus Hyosung Inc. All Rights Reserved. - Page 8 DISPOSED OF USED BATTERIES ACCORDING TO THE INSTRUCTIONS. 3. FOR PLUGGABLE EQUIPMENT, THE SOCKET-OUTLET SHALL BE INSTALLED NEAR THE EQUIPMENT AND SHALL BE EASILY ACCESSIBLE. 4. THE EQUIPMENT IS TO BE SECURED TO THE BUILDING STRUCTURE BEFORE OPERATION. © 2017 Nautilus Hyosung Inc. All Rights Reserved.
-
Page 9: Précautions Pour La Sécurité (French)
À haute temperature • Ne pas toucher l’équipement quand il est en marche. • L’équipement peut devenir extrêmement chaud et peut provoquer une brûlure. • Assurez-vous de fermer le couvercle avant de lancer l'équipement. © 2017 Nautilus Hyosung Inc. All Rights Reserved. - Page 10 INCORRECT. DISPOSER POUR UTILISATION DES BATTRIES SELON LES INSTRUCTIONS. 3. POUR LES APPAREILS RACCORDES, LA PRISE DOIT ETRE INSTALLEE PRES D’EQUIPEMENT POUR ÊTRE FACILEMENT ACCESSIBLE. 4. L’EQUIPEMENT DOIT ETRE SECURISE A LA STRUCTURE DU BATIMENT AVANT D'UTILISER. © 2017 Nautilus Hyosung Inc. All Rights Reserved.
-
Page 11: Related Document
▪ Operator Manual ▪ Service Manual ▪ VDM Manual (Diagnostic) ▶ For the contact of maintenance staffs of Nautilus Hyosung, see the E-mail addresses and telephone numbers provided separately. © 2017 Nautilus Hyosung Inc. All Rights Reserved. -
Page 12: Chapter2. Introduction
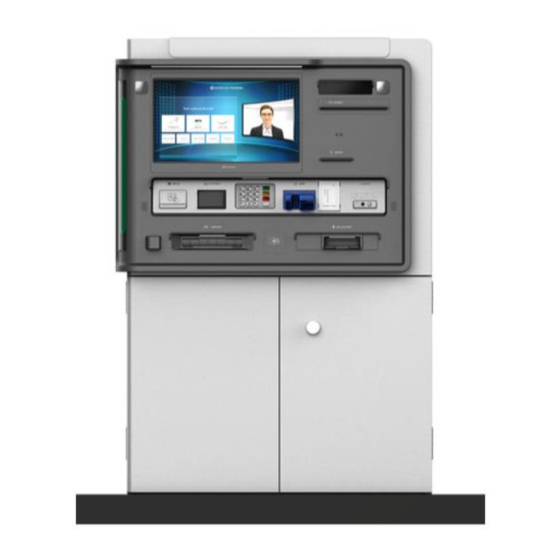
MX7800I ATM. The MONiMAX7800I ATM is installed on a new or existing concrete island. The terminal is weather- sealed to allow for exposure to the weather. The MX7800I is a versatile, easily maintained delivery system that can be modified to keep pace with the bank's changing needs. -
Page 13: System Identification Label
Chapter2.Introduction Installation Manual System Identification Label ▶ The System Label below shows the layout of the product identification label which is fixed inside the ATM. © 2017 Nautilus Hyosung Inc. All Rights Reserved. -
Page 14: Chapter3. Installation Information
3. The ATM should be mounted on concrete or other nonflammable surface only. 4. The floor must allow easy wheelchair access from the front or the side. 5. Space required for servicing the machine should be considered before installation. © 2017 Nautilus Hyosung Inc. All Rights Reserved. -
Page 15: Exterior
Chapter3. Installation Information Installation Manual Exterior ► Front Elevation ► Side Elevation © 2017 Nautilus Hyosung Inc. All Rights Reserved. - Page 16 Installation Manual Chapter3. Installation Information ► Plan View Weight: 2,420.7lbs (1,098Kg) ► ISO View © 2017 Nautilus Hyosung Inc. All Rights Reserved.
-
Page 17: Access For Device
[53.9mm] [205.6mm] 40.1 inch 1.5 inch 5.1 inch Barcode [1019.5mm] [38.9mm] [129.2mm] Touch 55.6 inch 2.1 inch 15.1 inch Screen [1412.5mm] [52.7mm] [383.5mm] 34.6 inch 1.2 inch 7.1 inch [877.6mm] [30.5mm] [179.8mm] © 2017 Nautilus Hyosung Inc. All Rights Reserved. -
Page 18: Service Area
Installation Manual Chapter3. Installation Information Service Area ► Side Elevation ► Minimum Installation © 2017 Nautilus Hyosung Inc. All Rights Reserved. - Page 19 Chapter3. Installation Information Installation Manual ► Recommended Installation <Note!> Nautilus Hyosung recommends it is more convenient for your service personnel to have enough maintenance space to service this ATM machine. © 2017 Nautilus Hyosung Inc. All Rights Reserved.
-
Page 20: Chapter4. System Installation
4. Verify the contents carefully with the packing list to be sure all items listed are included. Notify your distributor of any shortages. 5. If only the palette needs to be removed, lift the whole machine from the bottom and set it aside. © 2017 Nautilus Hyosung Inc. All Rights Reserved. - Page 21 ▪ Firmly close the vault door and lock the door by turning the handle completely. ▪ Only experienced staff members should move the heavy machine. ▪ Do not tilt the ATM when moving. © 2017 Nautilus Hyosung Inc. All Rights Reserved.
-
Page 22: Installation Frame
Installation Manual Chapter4. System Installation Installation Frame ► Bottom of ATM © 2017 Nautilus Hyosung Inc. All Rights Reserved. - Page 23 Chapter4. System Installation Installation Manual ► Anchor Point © 2017 Nautilus Hyosung Inc. All Rights Reserved.
- Page 24 ▪ The screw thread diameter of the anchor should be more than 0.67 in. (17.0mm) Washers ▪ Type-flat, steel (as per DIN7349 or equivalent) ▪ Size-5/8 in. (M16) ▪ Outer diameter-no greater than 1.58 in. (40mm) ▪ Minimum thickness-0.16 in. (4mm) © 2017 Nautilus Hyosung Inc. All Rights Reserved.
-
Page 25: Notes
Installation Manual Notes Notes © 2017 Nautilus Hyosung Inc. All Rights Reserved. Notes-1...
Need help?
Do you have a question about the MONiMAX7800I and is the answer not in the manual?
Questions and answers