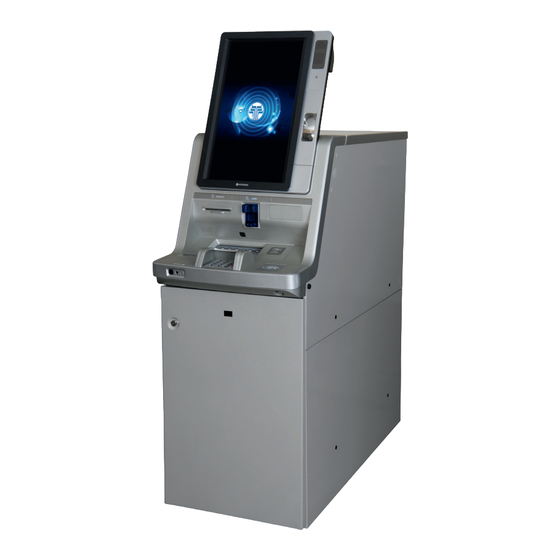
Summary of Contents for Nautilus Hyosung MONiMAX8200QT
- Page 1 Installation Manual MONiMAX8200QT System V01.00.00 (2016.06.15) © 2016 Nautilus Hyosung Inc. All Rights Reserved.
- Page 2 Installation Manual–MX8200QT System Version Date Description of Change Chapter V01.00.00 2016/06/15 New Publication © 2016 Nautilus Hyosung All Rights Reserved. The content of this specification is protected by copyright laws. 2016.06.15. 1st Release © 2016 Nautilus Hyosung Inc. All Rights Reserved.
-
Page 3: Table Of Contents
Chapter3. ATM Dimensions & Installation Information ..............3-1 Exterior ................................3-1 Access for Device ............................... 3-3 Service area ................................ 3-4 Installation Frame ..............................3-7 Bolting down the MX8200QT ..........................3-10 Notes ............................Notes-1 © 2016 Nautilus Hyosung Inc. All Rights Reserved. -
Page 4: Chapter1. Preface
▶ If any question or installation error occurs while preparing for and installing ATM in compliance with this manual, please contact maintenance staffs of Nautilus Hyosung. For the contact of maintenance staffs of Nautilus Hyosung, see the E-mail addresses and telephone numbers provided separately. -
Page 5: Terminologies
Body Module-Up (Upper Body of the Module) Bill Recycling Module Customer Service Module Deposit Cassette Recycling Box Unit Recycle Cassette Reject Cassette Tape Escrow 5-10 Utility Cassette 5-11 BATT S/W Battery Switch © 2016 Nautilus Hyosung Inc. All Rights Reserved. - Page 6 Power Supply Encryption PIN Pad Panel Control Board Printer (mainly Receipt Printer) Switch Sensor and Indications Unit Service Provider Slip Printer (Receipt Printer) Text Terminal Unit (OPL or SPL) Vacuum Fluorescent Display © 2016 Nautilus Hyosung Inc. All Rights Reserved.
-
Page 7: Safety Precautions
4. The equipment is to be secured to the building structure before operation 5. A security container shall be permitted to optionally be provided with a secondary lock, but improper use of the secondary lock feature will reduce the security level of the ATM. © 2016 Nautilus Hyosung Inc. All Rights Reserved. - Page 8 ▪ If the above-mentioned abnormalities occur, immediately turn off the power, unplug the equipment and contact the service center. ▪ If you ignore these symptoms, the equipment may catch on fire or cause electric shock. © 2016 Nautilus Hyosung Inc. All Rights Reserved.
-
Page 9: Related Document
▶ The related documents are listed as follows. If needed, please contact staffs of our technical support team and maintenance team. ▪ Operator Manual ▪ Service Manual ▶ For the contact of maintenance staffs of Nautilus Hyosung, see the E-mail addresses and telephone numbers provided separately. © 2016 Nautilus Hyosung Inc. All Rights Reserved. -
Page 10: Chapter2. Introduction
A bank customer and a teller can easily interact on a touch screen, just like talking, through Nautilus Hyosung’s intuitive and easy UI. Supports expanded options such as RF (NFC) as well as basic functions of deposit/withdrawal of cash/check. Allows easy and quick installation and maintenance. © 2016 Nautilus Hyosung Inc. All Rights Reserved. -
Page 11: System Identification Label
Chapter2.Introduction Installation Manual System Identification Label ► The System Label below shows the layout of the product identification label which is fixed inside the system. © 2016 Nautilus Hyosung Inc. All Rights Reserved. -
Page 12: Chapter3. Atm Dimensions & Installation Information
Installation Manual Chapter3. ATM Dimensions & Installation Information Chapter3. ATM Dimensions & Installation Information Exterior ► Front Elevation © 2016 Nautilus Hyosung Inc. All Rights Reserved. - Page 13 Chapter3. ATM Dimensions & Installation Information Installation Manual ► Side Elevation ► Plan View © 2016 Nautilus Hyosung Inc. All Rights Reserved.
-
Page 14: Access For Device
Installation Manual Chapter3. ATM Dimensions & Installation Information Access for Device © 2016 Nautilus Hyosung Inc. All Rights Reserved. -
Page 15: Service Area
Chapter3. ATM Dimensions & Installation Information Installation Manual Service area ► Minimum Installation © 2016 Nautilus Hyosung Inc. All Rights Reserved. - Page 16 Chapter3. ATM Dimensions & Installation Information ► Recommended Installation <Note!> Hyosung recommends it is more convenient for your service personnel to have enough maintenance space as described below to service this machine © 2016 Nautilus Hyosung Inc. All Rights Reserved.
- Page 17 Chapter3. ATM Dimensions & Installation Information Installation Manual ► Side Elevation © 2016 Nautilus Hyosung Inc. All Rights Reserved.
-
Page 18: Installation Frame
Installation Manual Chapter3. ATM Dimensions & Installation Information Installation Frame ► Bottom of ATM © 2016 Nautilus Hyosung Inc. All Rights Reserved. - Page 19 Chapter3. ATM Dimensions & Installation Information Installation Manual ► Anchor Point © 2016 Nautilus Hyosung Inc. All Rights Reserved.
- Page 20 Installation Manual Chapter3. ATM Dimensions & Installation Information ► Anchor Detail (Recommendation) © 2016 Nautilus Hyosung Inc. All Rights Reserved.
-
Page 21: Bolting Down The Mx8200Qt
4. With the groove of the anchor bolt facing up, drive the anchors into the holes drilled in step 3. 5. Place the MX8200QT on the bolt location sheet, matching the mounting holes of the unit with the anchors. 6. Firmly tighten the mounting bolts in the anchors. 3-10 © 2016 Nautilus Hyosung Inc. All Rights Reserved. -
Page 22: Notes
Notes Installation Manual Notes © 2016 Nautilus Hyosung Inc. All Rights Reserved. Notes-1...


Need help?
Do you have a question about the MONiMAX8200QT and is the answer not in the manual?
Questions and answers