Table of Contents

Related Manuals for B&G Network Series


Summary of Contents for B&G Network Series
-
Page 1: Table Of Contents
CONTENTS CONTENTS INSTALLATION GENERAL INTRODUCTION TO B&G NETWORK 2 SITING THE UNIT INTRODUCTION TO NETWORK WIND MOUNTING THE UNIT EXAMPLE SYSTEMS USING NETWORK WIND SPECIFICATION SELECTING THE DISPLAY MODE ABBREVIATIONS AND DEFINITIONS THE ANALOGUE DIAL AND POINTER THE WIND TRIANGLE USING THE APP. -
Page 2: General Introduction To B&G Network
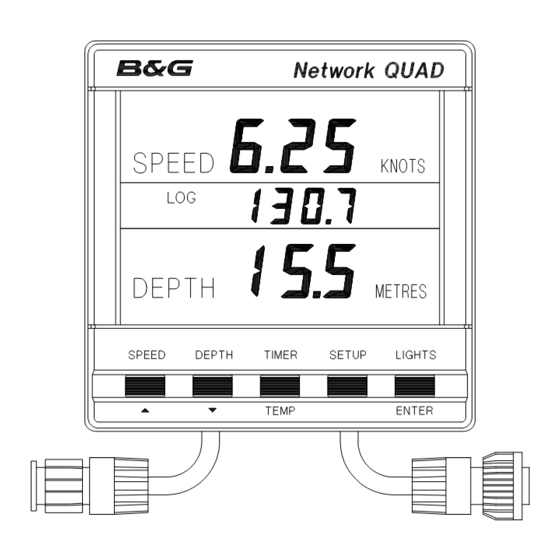
GENERAL INTRODUCTION TO B&G NETWORK The B&G Network range of instruments is designed to be used as individual units or connected together to form an integrated navigational system. A single network cable is used to carry data and power between units. The latest technology and screened cables throughout the Network System ensure the ultimate protection from interference between units and other systems. -
Page 3: Introduction To Network Wind
INTRODUCTION TO NETWORK WIND NETWORK WIND DISPLAY UNIT The Network WIND unit measures and displays wind information on an analogue 360 Apparent Wind Angle meter and a back-lit Liquid Crystal Display (LCD). The five keys allow selection of the information displayed on the LCD and setting of the units mode, Wind Sensor offset calibration and display damping. -
Page 4: Example Systems Using Network Wind
EXAMPLES SYSTEMS USING NETWORK WIND Network SPEED, Network DEPTH, Network WIND and Network TACK (magnified wind angle). Only one Network WIND unit should have a wind sensor connected to it and set to transducer mode. Up to three more Network WIND units can be connected on to the system network, these must be set to repeater mode. -
Page 5: Selecting The Display Mode
SELECTING THE DISPLAY MODE The Network WIND unit has three operating modes. The correct mode must be selected for your Network system to operate correctly. Unit mode, the unit uses and displays wind data from a wind sensor connected directly into the display unit. -
Page 6: The Analogue Dial And Pointer
USING THE APP. KEY THE ANALOGUE DIAL AND POINTER Press the APP. key to display Apparent Wind Speed on the The analogue pointer always indicates Apparent Wind Angle LCD. The LCD APP legend will be displayed. on the 360 dial. Each division marker is at 30 intervals. -
Page 7: Using The True Key
USING THE TRUE KEY USING THE VOLTS KEY Press the TRUE key to display True Wind Speed on the Press the VOLTS key to display Battery Volts on the LCD. LCD. The LCD TRUE legend will be displayed. The LCD V legend will be displayed. If boat speed data is not available the LCD digits will be blank and the TRUE legend will be displayed. -
Page 8: Using The Setup Key
USING THE SETUP KEY Press the SETUP key to cycle through the following options on the LCD. Damping Speed, this is the response time of the LCD wind speed display. Damping Analogue, this is the response time of the analogue pointer. Offset, this is the offset calibration value to correct for Wind Sensor misalignment. - Page 9 LCD WIND SPEED DAMPING The wind speed damping allows the response time of the LCD wind speed display to be slowed down if the values are to jumpy in gusty conditions. The damping works by averaging the wind speed over a set time period, the longer the time period the smoother the displayed values, however the longer it takes to see any change.
- Page 10 Use ! ! ! ! or " " " " key to Press SETUP key Press ENTER key to Press ENTER key to cycle through the once to display dS, display current memorise the new value. damping speed. The damping values. After 30 secs the display damping Speed.
- Page 11 ANALOGUE POINTER DAMPING The analogue pointer damping allows the response time of the analogue display to be slowed down if the values are to jumpy in gusty conditions. The damping works by averaging the wind angle over a set time period, the longer the time period the smoother the displayed values, however the longer it takes to see any change.
- Page 12 WIND SENSOR MISALIGNMENT CORRECTION 2 Turn the boat until close-hauled on a Starboard Tack, make sure the sails are set as for the Port Tack. For accurate wind angle readings the wind sensor should be pointing forward and aligned with the centreline of the boat. However, this is not always possible, so Network WIND allows a wind sensor offset value to be entered to compensate for the misalignment electronically.
-
Page 13: Adjusting The Wind Sensor Offset
ADJUSTING THE WIND SENSOR OFFSET If the value calculated is positive, the wind sensor is misaligned to Port. To correct this the analogue pointer must be offset clockwise (towards starboard) by the value calculated. Use the ! ! ! ! key (up) to change the value displayed on the LCD. -
Page 14: Using The Lights Key
USING THE LIGHTS KEY The Network WIND Display unit has 3 levels of illumination and off, controlled by the LIGHTS key. The level selected is for the whole Network system. • • High • Medium • The LIGHTS key also changes the illumination level of the key legends, it always remains illuminated so even in complete darkness the key can be located. -
Page 15: Installation
INSTALLATION MOUNTING THE UNIT The display heads are supplied with a clip-in mounting Use the cutting template supplied to mark the centres of the bracket which allows for easy installation, access from holes for the self-tapping screw, the fixing stud holes and the behind is not necessary to secure the unit in place. - Page 16 INSTALLATION HB-0502-03...
-
Page 17: Specification
SPECIFICATION ELECTRICAL PHYSICAL PARAMETERS Power Supply 12V DC nominal (10 to 16V) Construction High impact ABS plastic Operating Current 40mA typical, 100mA illuminated Window Acrylic Protection Connect via external 5A fuse or Display Analogue dial and pointer circuit breaker. Back-lit Liquid Crystal Display: Digits: 12mm 0.47"... -
Page 18: Abbreviations And Definitions
ABBREVIATIONS AND DEFINITIONS THE WIND TRIANGLE AWA Apparent Wind Angle - The angle between the boat's bow and the wind blowing across the deck (at mast height). AWS Apparent Wind Speed - The wind speed across the deck (at mast height). TWA True Wind Angle - The wind angle between the boat's heading and the true wind (at mast height).
Need help?
Do you have a question about the Network Series and is the answer not in the manual?
Questions and answers