
Related Manuals for powersoft IpalMod


Summary of Contents for powersoft IpalMod
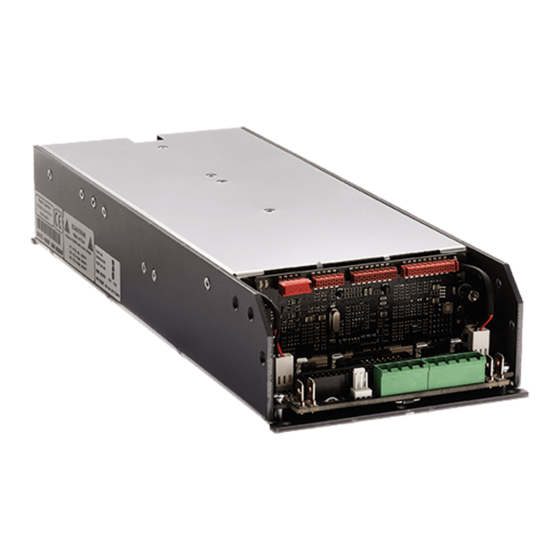
- Page 1 IpalMod Service Manual ©2017 Powersoft Keep this manual powersoft_IpalMod_servman_en_v3.1 for future reference...
- Page 2 Intentionally left blank...
- Page 3 9. LED charts identification. At the end of this guide you can find a detailed 10. Known Issues list with the description and the respective Powersoft internal Excessive Gain on the Output Stage reference code of the spare parts. Always use an anti-static wrist band while servicing the amplifier.
-
Page 4: Testing Equipment
1. Testing Equipment: CB000586.R PSU AUX VOLTAGE CABLE CB000589.R DIGIMOD DC MAINS CABLE CB000691.R DIGIMOD AMP AUX VOLTAGE CABLE SM000530 - IpalMod Pressure sensor KT000193 - IPALMOD INTERFACE BOARD Lamp (min.40W/230V, best 60W/230V) for discharging the amplifier’s capacitors bank NOT INCLUDED... -
Page 5: Removing The Cover
IPALMOD | SERVICE MANUAL 2. Discharging the Module’s Capacitors Bank: Connect a 60W light bulb to the points indicated on (Fig. 1). (Fig. 1) 3. Removing the cover: In order to access internal components and circuitry follow these instruction to remove the top cover. -
Page 6: Mainboard Layout
IPALMOD | SERVICE MANUAL 4. Main Board Layout: DC/DC CONV Remove Jumper to Remove Jumper to enable DSP insert external circuit Please note that the output 5x20 fuses are not mounted by default. 5. Disassembling the main board: Unscrew all 9 screws and nuts holding the components to the chassis sides and remove the 4 clips highlighted in (Fig. -
Page 7: Troubleshooting
IPALMOD | SERVICE MANUAL Unscrew all 13 M3 screws highlighted in (Fig. 8) from the main board. Gently lift the board from the chassis. (Fig. 8) 6. Troubleshooting: Ω Checking the output mosfets: With a Multimeter, check for any short circuit in the Output MOSFETS by probing the points highlighted on (Fig. - Page 8 IPALMOD | SERVICE MANUAL Checking the fuse and varistor Set the multimeter to Ohm Check the continuity of the fuse F1 Check for short circuit of the varistor RV1 As portrayed in (Fig. 11) Ω Ω (Fig. 11) Checking the PSU Stage...
- Page 9 IPALMOD | SERVICE MANUAL Switching the module on in DC 30 Vdc 3 mA 18 Vdc 31 mA Plug the DigiMod AMP AUX cable to the CN8 connector and feed +18 V Plug a second DC power supply to the mains connectors FA01 and FA02.
- Page 10 IPALMOD | SERVICE MANUAL Switch the module on in DC (18Vdc) With an oscilloscope, check the gates of the mosfets Q8 and Q9, as portrayed in (Fig. 15) (Fig. 15) Checking the output stage Remove any DC power supply that may be connected on the primary side.
- Page 11 IPALMOD | SERVICE MANUAL With the oscilloscope measure the signal at Q3 gate to GND Q4 gate to GND As indicated on (Fig. 17) DSP CONTROL BOARD (Fig. 17) In case of exceeding values, replace with the KT000842.R repair Kit and repeat the measurement.
- Page 12 IPALMOD | SERVICE MANUAL Check the output signal (200mV @ 96 kHz) by probing with an oscilloscope on the indicated points (Fig. 19) peak DSP CONTROL BOARD (Fig. 19)
- Page 13 IPALMOD | SERVICE MANUAL 7. Testing the module in AC Audio link Audio input (pass through) Remove all connections that may be present from previous testing. Input attenuator Plug the pressure sensor to the CN109 connector on the control board (Fig. 20)
- Page 14 IPALMOD | SERVICE MANUAL DPC interface board’s LED at start-up Color Label Condition PROTECT LIMIT SOLID ON GREEN SIGNAL SOLID ON GREEN E.SAVE YELLOW TEMP GREEN READY SOLID ON GREEN SOLID ON GREEN PRESET DPC interface board’s LED after 3 seconds...
- Page 15 IPALMOD | SERVICE MANUAL Checking the rails voltage in AC Switch the module on in AC. (100Vac) Wait 30 seconds without input signal. Check the positive rail bus from CH2: +133 V FA8 to F3 -133V +133V Check the negative rail bus from CH1: –133 V...
-
Page 16: Offset Calibration
IPALMOD | SERVICE MANUAL Audio Tests Connect a function generator to the inputs (CN11. By means of the DigiMod Mains DC Cable, connect a Variac to the CN4 Connector, and slowly increase the voltage to 100 VAC. Generate a 8/32 Burst Signal @ 0.5 Vrms - 100Hz... - Page 17 IPALMOD | SERVICE MANUAL 9. LED charts: Main PCB LED chart Right-hand LEDs: Left-hand LEDs: Color Code Signal Status Color Code Signal Status GREEN D1021 (RAIL) SOLID OFF GREEN –18V SOLID ON — — D303 — GREEN D1025 SOLID ON...
-
Page 18: Known Issues
IPALMOD | SERVICE MANUAL 10. Known Issues Excessive Gain on the Output Stage Symptom: low input signals yelding to +6dB gain on the output stage. Check R49, R50, highlighted on (Fig. 31), with a multimeter set to OHM. (Fig. 31) 11. - Page 19 IPALMOD | SERVICE MANUAL GAP_PAD 3000S30 GAP_PAD VO Ultra soft GAP_PAD HI-FLOW 300P 40x53 GAP_PAD HI-FLOW 300P 37x33 Stick the GAP_PAD VO Ultra soft on top of each thermal regulator (Fig. 33) (Fig. 33) Peel the gap pads 3000S30 and properly apply them as shown in (Fig 34) (Fig.
- Page 20 IPALMOD | SERVICE MANUAL Carefully insert the PCB into the chassis. (Fig. 36) (Fig. 36) Screw the board in place by tightening all 13 Phillips Head Screws highlighted on (Fig. 37) (Fig. 37) Peel the gap pad HI-FLOW 300P and properly apply them as indicated in the following pictures.
-
Page 21: Firmware Update Procedure
12. Firmware Update Procedure In order to update the Firmware, download the latest version of the Firmware Updater on the Powersoft Website. restricted area - service amp modules - ipalmod tools Install the RS485 driver. Connect the DPC Interface to the module. PC000096 Connect the module to the PC by means of the PC000096 adapter and the CB000214 cable. - Page 22 IPALMOD | SERVICE MANUAL Select the .bin file (available on the restricted area) Tick the “Use RS485” Box, and select the assigned COM Port Click on the right arrow, the LED on the RS485 should be blinking red. Select the module to be updated.
- Page 23 13. Initialization Procedure (restore to Factory Presets) Set up the working area in the same manner described in the FirmWare Update Procedure. The factory preset is available in: restricted area - service amp modules - ipalmod tools Switch the IpalMod On.
- Page 24 14. Repair Kit List: Kit Number Description KT000840.R Kit IpalMod PSU KT000842.R Kit IpalMod AMP 1 CH KT000842.R KT000840.R KIT IPALMOD AMP 1CH __FOR REPAIR KIT IPALMOD PSU __FOR REPAIR Part Number Description FU000032 Fuse 15A 250VDc (6x32mm) SM000516.R Control Board VN000020 Fan, 24V dc 0.13A...
-
Page 25: Safety Precautions
IPALMOD | SERVICE MANUAL IMPORTANT SAFETY ADDENDUM The aim of this addendum is to describe the safety precautions to be undertaken when servicing any Powersoft amplifier/module. WE RECOMMEND THAT ALL SERVICE OPERATIONS ARE CARRIED OUT BY A TRAINED TECHNICIAN IF NOT EXPLICITLY STATED OTHERWISE, DISCONNECT THE AMPLIFIER FROM THE MAINS. - Page 26 Tel: +39 055 735 0230 Fax: +39 055 735 6235 General inquiries: info@powersoft.it Sales: sales@powersoft.it Application & technical support: support@powersoft.it Service & maintenance: service@powersoft.it powersoft-audio.com Data are subject to change without notice. For latest update please refer to the online version available on www.powersoft-audio.com...
Need help?
Do you have a question about the IpalMod and is the answer not in the manual?
Questions and answers