
Related Manuals for powersoft DIGAM K series


Summary of Contents for powersoft DIGAM K series
- Page 1 Digital Audio Amplifier for Professional Applications User Manual v1.2 (24/11/2004)
- Page 3 Table of contents This page left intentionally blank...
-
Page 4: Important Safety Instructions
Important safety instructions CAUTION RISK OF ELECTRIC SHOCK DO NOT OPEN CAUTION: To reduce the risk of electric shock, do not remove the cover. No user-serviceable parts inside. Refer servicing to qualified service personnel. SAFEGUARDS: Electrical energy can perform many useful functions. This unit has been engineered and manufactured to assure your personal safety. -
Page 5: Safety Rules
"bottoming out" - harsh pops or cracking distortion that indicate that the speaker voice coil or diaphragm is striking the magnet assembly. Powersoft recommends that you use amplifiers of this power range for more headroom (cleaner sound) rather than for increased volume. -
Page 6: More Sound And Less Weight
1 Introduction Powersoft is a leading company in the field of high efficiency audio power management. The totally new Powersoft's DIGAM (DIGital AMplifier) technology has changed the way the world looks at professional audio amplification. No other amplifiers come close for applications demanding high power and long term reliability. Thanks to amazing... -
Page 7: Installation And Operation
Every Powersoft amplifier is completely tested and inspected before leaving the factory and should arrive in perfect condition. If you find any damage, notify the shipping company immediately. Be sure to save the carton and all packing materials for the carrier's inspection. -
Page 8: Operating Precautions
1.2 Mounting All DIGAM amplifiers will mount in a standard 19" rack. Four front panel mounting holes are provided. Your DIGAM amplifier uses a forced-air cooling system to maintain a low, even operating temperature. Drawn by an internal fan, air enters through the slots in the front panel and courses over and through components. -
Page 9: Connecting Inputs
1.5 Connecting Inputs . Input connections are made via the 3-pin XLR-female type or 1/4" phone Jack connectors on the rear side of the amplifier. The polarity is shown in figure 1.5.1. IN(+) OUT2 OUT1 LINK ON OFF IN(-) IN(-) IN(+) figure 1.5.1 The figure below shows the connection of analog input for balanced and unbalanced line. -
Page 10: Connecting Remote Control
1.7 Connecting Remote Control You can control the amplifier via a RS48; The figure 1.7.1 shows the connection of the data cable to the plug located to the rear panel of the amplifier. connection. The same figure shows also the ID selection for Remote Control (in this case ID= 28);... -
Page 11: Setup And Settings
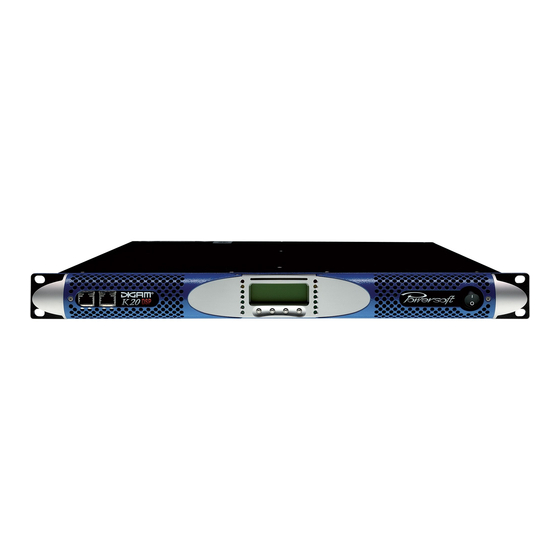
2.1 Introduction The figure below shows the front panel of DIGAM K Series. The front panel controls, in conjuction with the graphic LCD display above the buttons, give to the user the total control and detailed information about the status of the amplifier. - Page 12 The fourth line of the screen shows the functions of the buttons below. The "lock" function is activated if the corresponding button is pressed more than 1 second; in this case all the other buttons are locked. The same operation unlocks these buttons (unlock code is required - see par. 2.3.17 for more details). The "mute"...
- Page 13 2.3.1 Output attenuation The figure 2.3.3 shows the Output attenuation screen. You can choose to set CH1, CH2 or both by pushing the "C1+2" button. The "+" and "-" buttons change the value of the output attenuation in the range from 0 to -30dB. Note: for the best sonic performance it is preferred to set the 0db output attenuation (no attenuation), and select the proper gain/sensitivity by the following menu.
-
Page 14: Max Mains Current
2.3.5 Max mains current The figure 2.3.6 shows the Max mains current screen. The "+" and "-" buttons change the value of the max mains current input in the range from 15 to 32A. Max mains current 22 A rms back figure 2.3.6 2.3.6 Clip limiter CH1 - CH2... -
Page 15: Mains Meters
2.3.12 Temperature In the Temperature screen you can view the historic temperature diagram of the last four hours of the final current use in the range from 10 to 90°C; in the bottom-right side of the screen there is the present value (see figure 2.3.8). 38°C back figure 2.3.8... -
Page 16: Lcd Contrast
2.3.16 LCD contrast In this screen you can set the contrast of the LCD display by pushing the +/- buttons (see figure 2.3.10). Contrast back figure 2.3.10 2.3.17 Set unlock code In this screen you can insert the numeric key to unlock the settings; the same screen appears when the "unlock" button in the main screen is pressed. -
Page 17: The Smartcard Function
2.3.17 The Smartcard function The Smartcard operates as memory and can save the settings of the amplifier. These settings can be loaded into other amplifiers avoiding the manual setup of these. When you insert the smartcard in the slot over the LCD screen (see figure 2.3.11), the screen in the figure 2.3.12 appears. -
Page 18: Input/Output Protection
There are no user-serviceable parts in your DIGAM amplifier. Refer servicing to qualified technical personnel. In addition to having an in-house service department, Powersoft supports a network of authorized service centers. If your DIGAM amplifier needs repair, contact your Powersoft dealer or distributor, or contact the Powersoft Technical Service... - Page 19 4.3 Dust removal Especially in a dusty environment, the front side filters clog with dust after prolonged use, this will interfere with cooling. You may use compressed air to remove the dust from filters. To remove air filters see fig(3.4.1) , unscrew n° 2 M2,5X8 screw and rotate the covering grill;...
-
Page 20: Warranty And Disclaimers
5 Warranty and disclaimers 5.1 Disclaimer Powersoft is not liable for any damage to speakers, amplifier, or any other equipment that is caused by negligence or improper installation and/or use of the DIGAM amplifier. 5.2 Product warranty Powersoft guarantees the DIGAM to be free from defective material and/or workmanship for a period of two year from... -
Page 21: Technical Notes
7 Technical notes 7.1 Block diagram The figure 7.1.1 shows the the output stage block diagram, the figure 7.1.2 shows the power supply block diagram. ETHERNET POWER RAIL CONNECTION BUS +/- DC DETECTOR FUSES SHUTDOWN OPTION TO POWER OUTPUT OUTPUT MAX SUPPLY ATTENUATOR VOLTAGE SELECTOR... -
Page 22: Technical Specifications
7.2 Technical specifications POWER REQUIREMENTS Power supply........……………………..……........…... AC 95V ¸ 280V, 50/60Hz Power factor......................more than 0,95 from 500W to full power Operating temperature ........……………...……..............0° C, 45° C Weight .............………...………….…..……............12Kg External dimensions ......…………........ Standard rack 19” (W), 1 Units (H), 475mm (D) AUDIO SECTIONS Bandwith (1W, 8Ohm)..........................10Hz, 30Khz Damping factor (8Ohm)........................(20Hz, 20KHz) >...
Need help?
Do you have a question about the DIGAM K series and is the answer not in the manual?
Questions and answers