Cisco 8800 Series Hardware Installation Manual
Hide thumbs
Also See for 8800 Series:
- Manual (544 pages) ,
- Administration manual (406 pages) ,
- Hardware installation manual (228 pages)
Table of Contents
Advertisement
Quick Links
Advertisement
Table of Contents

Subscribe to Our Youtube Channel
Related Manuals for Cisco 8800 Series


Summary of Contents for Cisco 8800 Series
- Page 1 Hardware Installation Guide for Cisco 8800 Series Routers First Published: 2019-11-07 Last Modified: 2020-03-13 Americas Headquarters Cisco Systems, Inc. 170 West Tasman Drive San Jose, CA 95134-1706 http://www.cisco.com Tel: 408 526-4000 800 553-NETS (6387) Fax: 408 527-0883...
- Page 2 Cisco has more than 200 offices worldwide. Addresses and phone numbers are listed on the Cisco website at www.cisco.com/go/offices. Cisco and the Cisco logo are trademarks or registered trademarks of Cisco and/or its affiliates in the U.S. and other countries. To view a list of Cisco trademarks, go to this URL: www.cisco.com...
- Page 3 Preventing Electrostatic Discharge Damage Cautions and Regulatory Compliance Statements for NEBS Installation Guidelines Procure Tools and Equipment Rack Mount and Accessory Kits Prepare Your Location Prepare Yourself Prepare Rack for Chassis Installation Clearance Requirements Hardware Installation Guide for Cisco 8800 Series Routers...
-
Page 4: Table Of Contents
Removing the Transceiver Module Connect Interface Ports Connect a Fiber-Optic Port to the Network Disconnect Optical Ports from the Network Maintain Transceivers and Optical Cables Create the Initial Router Configuration Verify Chassis Installation Hardware Installation Guide for Cisco 8800 Series Routers... - Page 5 Install Fan Tray Replace Fabric Card Remove a Fabric Card Install a Fabric Card Replace Power Supply Components Replace DC Power Module Disconnect DC Power Reconnect DC Power Replace HVAC and HVDC Power Module Hardware Installation Guide for Cisco 8800 Series Routers...
- Page 6 Contents Hardware Installation Guide for Cisco 8800 Series Routers...
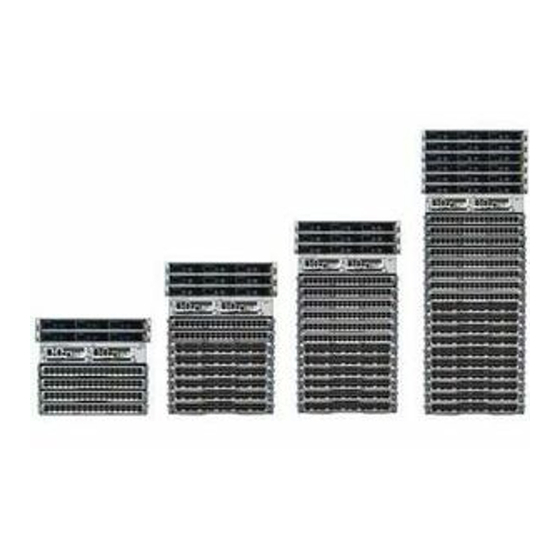
- Page 7 Cisco 8800 Series Routers Overview The Cisco 8800 series routers include: • The Cisco 8812 is a 21-RU router that supports distributed forwarding across multiple field replaceable units (FRUs). • The Cisco 8808 is a 16-RU router that supports distributed forwarding across multiple field replaceable units (FRUs).
- Page 8 Line Card Overview Component Quantity Power supplies HVAC/HVDC—9 (3 per tray) DC60—12 (4 per tray) The following table describes the Cisco 8812 router components, and the supported quantity. Table 2: Cisco 8812 Router Components Component Quantity Line cards Route Processors...
- Page 9 8800-LC-36FH—LC 36x400GE QSFPDD-56 line QSFPDD-56 / QSFP28 / QSFP+ card Route Processor Card Overview Route Processor cards (8800-RP) manage all routing operations on the Cisco 8800 Series Routers. Route Processor (1) Console RS-232 Serial Port RJ45 (5) SyncE BITS/DTI/J.211 (2) USB Port Type-A (2-ports). Port A gets detected (6) G.703 Time-of-Day (TOD)
- Page 10 Airflow Direction The airflow through the fan trays and power supplies on the Cisco 8818, Cisco 8812 and 8808 routers are from front to back (port side intake). There are four fan trays in the chassis with six fans per tray.
- Page 11 30,800 17,600 39,600 35,200 19,800 44,000 39,600 22,000 48,400 44,000 24,200 52,800 48,400 26,400 Power Values The following table lists the power values available for Cisco 8818, Cisco 8812 and 8808 routers. Hardware Installation Guide for Cisco 8800 Series Routers...
- Page 12 8812 FC12 (FC1-5) FT12 1072 1072 1072 1072 8808 LC36 1896 1896 8812 8808 LC48 1010 1010 8812 LC48 1065 1065 FC12 1075 1075 1075 FT12 1072 1072 1072 1072 Any fc Hardware Installation Guide for Cisco 8800 Series Routers...
- Page 13 Cisco 400G QSFP-DD Cable and Transceiver Modules Data Sheet. • For QSFP28 data sheets, refer to the Cisco 100GBASE QSFP-100G Modules Data Sheet. • For QSFP+ data sheets, refer to the Cisco 40GBASE QSFP Modules Data Sheet. Hardware Installation Guide for Cisco 8800 Series Routers...
- Page 14 Cisco 8800 Series Routers Overview Supported Optics Hardware Installation Guide for Cisco 8800 Series Routers...
- Page 15 Before you perform any procedure in this document, review the safety guidelines in this section to avoid injuring yourself or damaging the equipment. The following guidelines are for your safety and to protect the equipment. Because the guidelines do not include all hazards, be constantly alert. Hardware Installation Guide for Cisco 8800 Series Routers...
- Page 16 Failure to stabilize the rack may cause the rack to tip over. Compliance and Safety Information The Cisco 8000 Series Routers are designed to meet the regulatory compliance and safety approval requirements. For detailed safety information, see Regulatory Compliance and Safety Information Cisco 8000 Series Routers.
- Page 17 Check the resistance value of the ESD-preventive strap periodically. The measurement should be 1–10 megohms. Before you perform any of the procedures in this guide, attach an ESD-preventive strap to your wrist and connect the leash to the chassis. Hardware Installation Guide for Cisco 8800 Series Routers...
- Page 18 • Operating environment is within the ranges that are listed in Environment and Physical specifications. • Chassis is mounted at the bottom of the rack if it is the only unit in the rack. Hardware Installation Guide for Cisco 8800 Series Routers...
- Page 19 Note Cisco 8000 Series Routers function in operating temperatures of up to 40 degrees C at sea level. For every 300 meters (1000 feet) elevation, the maximum temperature is reduced by 1 degrees C. For more details on...
- Page 20 ESD wrist strap (disposable) More Hardware Components If you purchased this product through a Cisco reseller, you might receive more contents in your kit, such as documentation, hardware, and power cables. The shipped cables depend on your specification when placing an order. See the Power Supply Power Cord Specifications section for information on the available power cords.
- Page 21 This section illustrates how the building that houses the chassis must be properly grounded to the earth ground. Note Unless specified otherwise, the image is only for representational purposes. The rack's actual appearance and size may vary. Figure 1: Building with Rack Room Connected to Earth Ground Hardware Installation Guide for Cisco 8800 Series Routers...
- Page 22 Figure 2: Wearing the ESD Strap Prepare Rack for Chassis Installation Install the Cisco 8800 Series Routers on a standard 19 inch, Electronic Industries Alliance (EIA) rack with mounting rails that conform to English universal hole spacing according to Section 1 of the ANSI/EIA-310-D-1992 standard.
- Page 23 To ensure adequate airflow, we recommended that you maintain a minimum clearance distance always, as mentioned in the following figure. Following figure shows the clearances required for installation of Cisco 8800 Series Routers. Figure 3: Clearances Required Around the Chassis...
- Page 24 (7) Rear service area for the fan tray and fabric card replacement Following figure shows the clearances required for the cable management of Cisco 8800 Series Routers. Figure 4: Clearances Required Around the Chassis Door (1) Overall door width on side (in an open position)
-
Page 25: Unpack And Install The Chassis
Ensure that there is sufficient room around the chassis pallet for unpacking. For information about the chassis dimensions and clearance requirements see, Clearance Requirements. Carefully move the pallet containing the chassis to the staging area where you plan on unpacking it. Hardware Installation Guide for Cisco 8800 Series Routers... - Page 26 Unpack and Install the Chassis Unpack the Chassis Hardware Installation Guide for Cisco 8800 Series Routers...
- Page 27 Unpack and Install the Chassis Unpack the Chassis Figure 5: Remove Shipping Brackets from 8818 Chassis Hardware Installation Guide for Cisco 8800 Series Routers...
- Page 28 Remove the shipping brackets 20 x M4 screws from the 8812 chassis and 16 x M4 screws from the 8808 chassis. To make the chassis weigh less for moving, remove the following modules and place them where their connectors will not be damaged: Hardware Installation Guide for Cisco 8800 Series Routers...
-
Page 29: Install Bottom-Support Rails
(as shown in the following figure) and tighten each screw to 40 in-lbs (4.5 N-m) of torque. Figure 8: Attach Bottom-Support Rails to a Rack Hardware Installation Guide for Cisco 8800 Series Routers... -
Page 30: Transfer Chassis To A Mechanical Lifting Device
Prepare to use the mechanical lifting device by placing a piece of cardboard on the surface of the lift (to prevent scratching). Step 3 With at least two or three people move the chassis carefully from the pallet onto the lifting device as shown. Hardware Installation Guide for Cisco 8800 Series Routers... -
Page 31: Mount Chassis Into The Rack
To lift the chassis, use a mechanical lift. Do not use the handles on the side of the chassis. Use the side handles for only repositioning the chassis after it is already on the mechanical lift or in the rack or cabinet. Hardware Installation Guide for Cisco 8800 Series Routers... - Page 32 Use 30 M6 x 19 mm screws to attach each of the two chassis vertical mounting brackets to the two rack vertical mounting rails. You can also install the screws with the power supply bezel in place. Note Figure 11: Attach 8818 Chassis to Rack - Front Hardware Installation Guide for Cisco 8800 Series Routers...
- Page 33 Unpack and Install the Chassis Mount Chassis Into the Rack Figure 12: Attach 8812 Chassis to Rack - Front Hardware Installation Guide for Cisco 8800 Series Routers...
- Page 34 Mount Chassis Into the Rack Figure 13: Attach 8808 Chassis to Rack - Front Step 4 Use the screws provided with the rack to attach the chassis with minimum of 10 screws for each front rails. Hardware Installation Guide for Cisco 8800 Series Routers...
- Page 35 Unpack and Install the Chassis Mount Chassis Into the Rack Figure 14: Attach 8818 Chassis to Rack - Rear Hardware Installation Guide for Cisco 8800 Series Routers...
- Page 36 Unpack and Install the Chassis Mount Chassis Into the Rack Figure 15: Attach 8812 Chassis to Rack - Rear Hardware Installation Guide for Cisco 8800 Series Routers...
- Page 37 Unpack and Install the Chassis Mount Chassis Into the Rack Figure 16: Attach 8808 Chassis to Rack - Rear Hardware Installation Guide for Cisco 8800 Series Routers...
- Page 38 Unpack and Install the Chassis Mount Chassis Into the Rack Figure 17: Attach 8818 Chassis to Rack - Rear Mounting Bracket Hardware Installation Guide for Cisco 8800 Series Routers...
-
Page 39: Locate And Ground The Chassis
Locate the chassis grounding receptacles on your router chassis. You can locate them at either of the following positions: • At the lower or upper left side rear • At the left side panel, lower section towards the rear Hardware Installation Guide for Cisco 8800 Series Routers... - Page 40 Step 7 Connect the opposite end of the grounding wire to the appropriate grounding point at your site to ensure an adequate chassis ground. What to do next Attach the chassis doors. Hardware Installation Guide for Cisco 8800 Series Routers...
-
Page 41: Install Cable Management And Door Kit On A Chassis
• Door kit (8818-KIT, 8812-KIT or 8808-KIT) • Cable management brackets (8818-CBLMGMT,8812-CBLMGMT or 8808-CBLMGMT) Procedure Step 1 Position one of the cable management brackets on the vertical mounting bracket so that the screw holes are aligned. Hardware Installation Guide for Cisco 8800 Series Routers... - Page 42 Unpack and Install the Chassis Install Cable Management and Door Kit on a Chassis Figure 20: Cable Management Brackets for 8818 Chassis Hardware Installation Guide for Cisco 8800 Series Routers...
- Page 43 Secure the cable management bracket to the chassis vertical mounting bracket with M4 x 18-mm screws, flat-head Phillips screws (minimum of 9 screws for 8818 chassis, minimum of 6 screws for 8812 chassis and Hardware Installation Guide for Cisco 8800 Series Routers...
- Page 44 Step 4 Position the bottom cover, with its brackets pointing up, to the bottom of the two side cable management bracket screw holes. Figure 23: Bottom Cover for 8818 Chassis Hardware Installation Guide for Cisco 8800 Series Routers...
- Page 45 Unpack and Install the Chassis Install Cable Management and Door Kit on a Chassis Figure 24: Bottom Cover for 8812 Chassis Hardware Installation Guide for Cisco 8800 Series Routers...
- Page 46 Tighten each screw to 11.5 to 15 in-lb (1.3 to 1.7 N·m) of torque. Step 6 Before you install the top hood, remove the connector cap from the alarm cable. Figure 26: Remove Connector Cap Hardware Installation Guide for Cisco 8800 Series Routers...
- Page 47 Figure 27: Connect Alarm Cable Door open alarm is supported in the chassis. Note Step 8 Position the top hood, with its brackets pointing down, above the cable management bracket screw holes. Hardware Installation Guide for Cisco 8800 Series Routers...
- Page 48 Unpack and Install the Chassis Install Cable Management and Door Kit on a Chassis Figure 28: Top Hood for 8818 Chassis Hardware Installation Guide for Cisco 8800 Series Routers...
- Page 49 Unpack and Install the Chassis Install Cable Management and Door Kit on a Chassis Figure 29: Top Hood for 8812 Chassis Hardware Installation Guide for Cisco 8800 Series Routers...
-
Page 50: Attach Front Door To Chassis
Procedure Step 1 On the back side (open side) of one door, pull in on two protruding spring pins so that the pins are held inside the door frame. Hardware Installation Guide for Cisco 8800 Series Routers... - Page 51 Unpack and Install the Chassis Attach Front Door to Chassis Figure 31: Front Door Pins Hardware Installation Guide for Cisco 8800 Series Routers...
- Page 52 Unpack and Install the Chassis Attach Front Door to Chassis Figure 32: Attach Front Door to 8818 Chassis Hardware Installation Guide for Cisco 8800 Series Routers...
- Page 53 Now align the spring pin to hole in the top hood and release the spring pin. Step 4 Ensure the pins are properly inserted into the holes so that the door can freely swing on the spring pins. Hardware Installation Guide for Cisco 8800 Series Routers...
-
Page 54: Ground The Front Door
Step 4 Repeat Steps 1–3 to install the grounding cable to the other front door. Step 5 Close and lock the front door. What to do next Continue to power on the router. Hardware Installation Guide for Cisco 8800 Series Routers... -
Page 55: Powering On The Router
Connect the Power Modules The Cisco 8818 consists of six power trays; Cisco 8812 and 8808 routers consists of three power trays that fit into the power shelf assembly. There are two versions of the power modules to choose and insert. -
Page 56: Connect Dc Power Supply To Power Source
The length of the cables depends on the location of your router in relation to the source of DC power. These cables and the cable lugs that are used to attach the cables to the router chassis are not available from Cisco Systems. - Page 57 Verify that the power tray switch is set to the STANDBY (0) position. Figure 36: DC Power Tray Rear Front Step 2 Remove the clear plastic safety covers that fit over the DC power connection terminal studs. Hardware Installation Guide for Cisco 8800 Series Routers...
- Page 58 Powering on the Router Connect DC Power Supply to Power Source Figure 37: DC Power Connection Step 3 Connect the DC power cables in the following order. a) Positive cables first. b) Negative cables last. Hardware Installation Guide for Cisco 8800 Series Routers...
- Page 59 Do not overtighten the nuts that secure the DC power cables to the power tray terminals. Using the 7/16 hex socket and torque wrench the nuts should be tightened to a torque of 45–50 in-lb. Step 5 Replace the clear plastic safety covers over the connection terminal studs. Hardware Installation Guide for Cisco 8800 Series Routers...
-
Page 60: Connect Hvac/Hvdc Power Supply To Power Source
Choose your power supply (HVAC or HVDC) and use a Saf-D-Grid power cable to connect to the power supply tray. Step 2 For HVAC input, connect a Saf-D-Grid AC power cable to the Saf-D-Grid receptacle. Hardware Installation Guide for Cisco 8800 Series Routers... - Page 61 Step 4 Verify that the Saf-D-Grid plug is plugged in completely to secure the built-in retaining latch. Hardware Installation Guide for Cisco 8800 Series Routers...
-
Page 62: Power Supply Power Cord Specifications
Led Name Mode Color ================================================================================ 0/PT0-PM0 Attention OPERATIONAL BLINKING BLUE Fault OPERATIONAL Input OPERATIONAL GREEN Output OPERATIONAL GREEN Power Supply Power Cord Specifications Note Always use the Saf-D-Grid connector toward the router. Hardware Installation Guide for Cisco 8800 Series Routers... - Page 63 CAB-DC-30A-US1, 30A, 400VAC AMERICA CAB-DC-30A-US2 NORTH CAB-AC-30A-US3 30A, 277VAC AMERICA NORTH CAB-AC-30A-US4 30A, 300VAC AMERICA IEC/EU CAB-AC-32A-EU 32A, 300VAC IEC/EU CAB-DC-32A-EU1, 32A, 400VAC CAB-DC-32A-EU2 CHINA CAB-AC-32A-CHN 32A, 250VAC KOREA CAB-AC-32A-KOR 32A, 250VAC Hardware Installation Guide for Cisco 8800 Series Routers...
- Page 64 Powering on the Router Power Supply Power Cord Specifications Hardware Installation Guide for Cisco 8800 Series Routers...
-
Page 65: Connect Router To The Network
You also can use the console to perform the following functions, each of which can be performed through the management interface after you make that connection: • configure the router using the command-line interface (CLI) • monitor network statistics and errors Hardware Installation Guide for Cisco 8800 Series Routers... - Page 66 If the console or modem cannot use an RJ45 connection, use the DB9F/RJ45F PC terminal adapter. Alternatively, you can use an RJ45/DSUB F/F or RJ45/DSUB R/P adapter, but you must provide those adapters. What to do next You are ready to create the initial router configuration. Hardware Installation Guide for Cisco 8800 Series Routers...
-
Page 67: Connect The Management Interface
To determine which transceivers and cables are supported by this router, see Cisco Transceiver Modules Compatibility Information. To see the transceiver specifications and installation information, see Cisco Transceiver Modules Install and Upgrade Guides. Hardware Installation Guide for Cisco 8800 Series Routers... -
Page 68: Rj-45 Connectors
SFP+ modules. The QSFP-DD optical transceiver and 100-Gigabit QSFP28 optical transceiver are similar to the 40-Gigabit QSFP+ optical transceiver. Hardware Installation Guide for Cisco 8800 Series Routers... -
Page 69: Required Tools And Equipment
Step 6 Align the transceiver module in front of the module’s transceiver socket opening and carefully slide the transceiver into the socket until the transceiver makes contact with the socket electrical connector. Hardware Installation Guide for Cisco 8800 Series Routers... -
Page 70: Attach The Optical Network Cable
Remove the dust plugs from the optical network interface cable MPO connectors and from the transceiver module optical bores. Save the dust plugs for future use. Step 2 Attach the network interface cable MPO connectors immediately to the transceiver module (see figure below). Hardware Installation Guide for Cisco 8800 Series Routers... -
Page 71: Removing The Transceiver Module
Some transceivers work with fiber-optic cables that you attach to the transceivers and other transceivers work with pre-attached copper cables. You must install a transceiver in the port before installing the fiber-optic cable in the transceiver. Hardware Installation Guide for Cisco 8800 Series Routers... -
Page 72: Disconnect Optical Ports From The Network
Ctrl-O. To configure IP address for Ethernet port on BMC and other additional information related to BMC, please see the System Setup Guide for Cisco 8000 Series Routers. Before you begin • A console device must be connected with the router. - Page 73 Enter the IP address for the management interface. If using dual RPs, enter the IP address on both management interfaces. Step 7 Enter a network mask for the management interface. Step 8 The software asks whether you want to edit the configuration. Enter 'no' to decline. Hardware Installation Guide for Cisco 8800 Series Routers...
-
Page 74: Verify Chassis Installation
Displays the current state of the disk storage media. show inventory Displays information about the field replaceable units (FRUs), including product IDs, serial numbers, and version IDs. show environment Displays all the environment-related router information. Hardware Installation Guide for Cisco 8800 Series Routers... - Page 75 During this interval, the software monitors the temperature every 5 seconds and continuously sends system messages as configured. Note Cisco recommends that you install dual Route Processor cards. show environment power Displays the power usage information for the entire router.
- Page 76 1638 1710 1890 1962 P1_8V 1816 1638 1710 1890 1962 P1_0V_ALDRIN_SD 1006 1050 1090 P1_0V_ALDRIN_CRE 1030 1070 1006 1050 1090 P0_9V ============================================================================================================= Location CURRENT Value Sensor (mA) ------------------------------------------------------------------------------------------------------------- 0/RP0/CPU0 MB_VP54P0V_curr 1448 ============================================================================================================= Hardware Installation Guide for Cisco 8800 Series Routers...
- Page 77 8800-LC-48H 1365 0/FC0 1040 RESERVED 0/FC1 8812-FC 1040 0/FC2 8812-FC 1040 0/FC3 8812-FC 1040 0/FC4 8812-FC 1040 0/FC5 8812-FC 1040 0/FC6 1040 RESERVED 0/FC7 1040 RESERVED 0/FT0 8812-FAN 0/FT1 8812-FAN 0/FT2 8812-FAN Hardware Installation Guide for Cisco 8800 Series Routers...
- Page 78 (Hi) (Hi) (Hi) ------------------------------------------------------------------------------------------------------------- 0/RP0/CPU0 Inlet_Temp Pwr_Brick_Temp2 Mosfet_54v_Temp1 Mosfet_54v_Temp2 SSD_Temp Outlet_Temp Hot_Spot_1_Temp Hot_Spot_2_Temp TMP421_Temp PEX8725_Temp X86_PKG_TEMP Pwr_Brick_Temp1 ALDRIN_TEMP_0 Control_Sensor 0/FT0 Hotswap_Temp Low_vol_Temp 0/FT1 Hotswap_Temp Low_vol_Temp 0/FT2 Hotswap_Temp Low_vol_Temp 0/FT3 Hotswap_Temp Low_vol_Temp 0/PT0-PM0 Hardware Installation Guide for Cisco 8800 Series Routers...
- Page 79 ! LLC_B_Temp 10245 ! SR_B_Temp 10245 ! ORING_B_Temp 10245 ! PFC_A_Temp 10245 ! LLC_A_Temp 10245 ! SR_A_Temp 10245 ! ORING_A_Temp 10245 0/PT0-PM2 PFC_B_Temp Inlet_Temp HSNK_Temp Outlet_Temp LLC_B_Temp SR_B_Temp ORING_B_Temp ! PFC_A_Temp ! LLC_A_Temp Hardware Installation Guide for Cisco 8800 Series Routers...
- Page 80 RESERVED 0/2/CPU0 RESERVED 0/3/CPU0 RESERVED 0/4/CPU0 RESERVED 0/5/CPU0 8800-LC-48H 1065 0/6/CPU0 RESERVED 0/7/CPU0 RESERVED 0/8/CPU0 RESERVED 0/9/CPU0 RESERVED 0/10/CPU0 RESERVED 0/11/CPU0 RESERVED 0/12/CPU0 RESERVED 0/13/CPU0 RESERVED 0/14/CPU0 RESERVED 0/15/CPU0 RESERVED 0/16/CPU0 RESERVED Hardware Installation Guide for Cisco 8800 Series Routers...
-
Page 81: Set Fabric Bandwidth Threshold
Total Fabric Bandwidth x If is a calculated value as a function Bandwidth Threshold. of user-defined threshold. Network interfaces on line card are active only when “Available bandwidth” is more than “Total required bandwidth”. Hardware Installation Guide for Cisco 8800 Series Routers... - Page 82 If the available bandwidth goes above 20%, then the network interfaces of the line card are unshut. The following table provides threshold references. Table 11: Threshold Reference Threshold Percentage Bandwidth threshold Total required bandwidth Lower required bandwidth Hardware Installation Guide for Cisco 8800 Series Routers...
-
Page 83: Leds
(Attention) The chassis is not functional. Port Status LEDs Note The 8800-LC-48H does not have port LEDs. Each port on the 8800-LC-36FH has an LED. The following table describes port status LEDs. Hardware Installation Guide for Cisco 8800 Series Routers... -
Page 84: Power Supply Leds
Output OK ATTN (Attention) Table 14: Power Supply LED Descriptions Color Status Input OK Green Both input voltages are present. Flashing Green Only one input power is present. No input power is present. Hardware Installation Guide for Cisco 8800 Series Routers... -
Page 85: Fan Tray Leds
Sleep mode is not applicable for DC-60 power module. Fan Tray LEDs The fan tray LEDs are located on the top portion of the module. Figure 45: Fan Tray LEDs FC STS (Status) ATTN (Attention) FT STS (Status) Hardware Installation Guide for Cisco 8800 Series Routers... -
Page 86: Route Processor Card Leds
• Both fabric cards behind this fan tray are operational. If both the fabric modules behind this fan tray are plugged out (or not present). Route Processor Card LEDs The Route Processor LEDs are located on the front of the module. Hardware Installation Guide for Cisco 8800 Series Routers... - Page 87 Table 16: Route Processor Card LED Descriptions Color Status ATTN (Attention) Flashing blue The operator has activated this LED to identify this module in the chassis. This module is not being identified. Hardware Installation Guide for Cisco 8800 Series Routers...
-
Page 88: Fabric Card Leds
The system is running in holdover or free-run mode and it is not synchronized to an external interface. The centralized frequency or time and phase distribution is not enabled. Fabric Card LEDs The fabric cards are located behind the fan trays. Hardware Installation Guide for Cisco 8800 Series Routers... -
Page 89: Line Card Leds
The line card has LEDs located on the right of the front panel. Table 18: Line Card LED Descriptions Color Status ATTN Flashing blue The line card is activated. (Attention) The line card is not enabled. Hardware Installation Guide for Cisco 8800 Series Routers... - Page 90 Flashing amber The module has a minor alarm. Flashing red The module has active major or critical alarms. BIOS boot failure. Also, the ATTN LED remains blue. The module is not enabled. Hardware Installation Guide for Cisco 8800 Series Routers...
-
Page 91: Replace Chassis Components
The front doors come with pre-installed air filters (8818-FILTER, 8812-FILTER or 8808-FILTER). If air filters need a replacement, follow this procedure. Procedure Step 1 Remove the two quarter turn fasteners from the front door as shown. Hardware Installation Guide for Cisco 8800 Series Routers... -
Page 92: Replace A Route Processor Card
(EMI) that might disrupt other equipment; and they direct the flow of cooling air through the chassis. Do not operate the system unless all cards, faceplates, front covers, and rear covers are in place. Hardware Installation Guide for Cisco 8800 Series Routers... - Page 93 Use one hand to hold the front of the card, place your other hand under the card to support its weight, pull the card out of the chassis, and set the it on an antistatic surface or inside an antistatic bag. Hardware Installation Guide for Cisco 8800 Series Routers...
-
Page 94: Replace A Line Card
Hazardous voltage or energy is present on the backplane when the system is operating. Use caution when servicing Warning Statement 1051 Laser Radiation Invisible laser radiation may be emitted from disconnected fibers or connectors. Do not stare into beams or view directly with optical instruments. Hardware Installation Guide for Cisco 8800 Series Routers... - Page 95 The module stops when its front is about 0.25 inches (0.6 cm) outside the front of the chassis. Press the ejector buttons and the two levers move part way to the front of the chassis. Figure 49: Insert a Line Card into the Chassis Hardware Installation Guide for Cisco 8800 Series Routers...
-
Page 96: Replace A Fan Tray
To replace a fan tray, you must perform the following functions: 1. Remove the fan tray. 2. Install a fan tray. Hardware Installation Guide for Cisco 8800 Series Routers... -
Page 97: Remove Fan Tray
• If you are replacing a fabric card behind the open fan tray slot, ensure that the fabric card replacement operation is completed. Procedure Step 1 Use both of your hands to hold the two handles on the front of the fan tray that you are installing. Hardware Installation Guide for Cisco 8800 Series Routers... - Page 98 Screw in the four captive screws to secure the fan tray to the chassis. Tighten the screws to 8 in-lb (0.9 N·m) of torque. Step 6 Verify that the fan tray STATUS LED turns on and becomes green, approximately within 20 seconds. Hardware Installation Guide for Cisco 8800 Series Routers...
-
Page 99: Replace Fabric Card
If you are replacing a fabric card, open the packaging for the new module and inspect it for damage. If the module is damaged, alert the Technical Assistance Center (TAC) and stop this replacement process until you have an undamaged module to install. Hardware Installation Guide for Cisco 8800 Series Routers... - Page 100 Figure 51: Removing a Fabric Card from the Chassis Pull on both handles to partially remove the Two captive screws (one on each handle) fabric card from the chassis Rotate both ejector handles to the front of the module Hardware Installation Guide for Cisco 8800 Series Routers...
-
Page 101: Install A Fabric Card
Note The lower guide rail extends to the back of the chassis. The upper guide rail does not connect until the card is halfway into the chassis. Hardware Installation Guide for Cisco 8800 Series Routers... - Page 102 Install a Fabric Card Figure 52: Install Fabric Card Always install the fabric card in a vertical position Install fabric card into the track on chassis Install fabric card guide into the chassis rail Hardware Installation Guide for Cisco 8800 Series Routers...
- Page 103 Replace Chassis Components Install a Fabric Card Figure 53: Installing a Fabric Card Chassis top fabric card Insert fabric card top guide rail. guide rail into chassis top fabric card guide rail. Hardware Installation Guide for Cisco 8800 Series Routers...
- Page 104 Verify that the Fabric LED for the slot that you specified turns on. Also, you can verify that the card is in power on state by running the show platform command to verify the status of the card to be POWERED_ON. Hardware Installation Guide for Cisco 8800 Series Routers...
-
Page 105: Replace Power Supply Components
Replace Power Supply Components Replace Power Supply Components The Cisco 8818, 8812 and 8808 Routers support OIR of power modules. If you are replacing a redundant power module, you can replace the power module while the system remains powered on without any electrical hazard or damage to the system. - Page 106 Replace Chassis Components Replace Power Supply Components Figure 55: Power Supply Bezel for 8818 Chassis Hardware Installation Guide for Cisco 8800 Series Routers...
- Page 107 Replace Chassis Components Replace Power Supply Components Figure 56: Power Supply Bezel for 8812 Chassis Figure 57: Power Supply Bezel for 8808 Chassis Hardware Installation Guide for Cisco 8800 Series Routers...
-
Page 108: Replace Dc Power Module
To prevent injury and damage to the equipment, always remove the source DC power cables and Caution ground from the power tray terminals in the following order : (1) negative (–), (2) positive (+). Hardware Installation Guide for Cisco 8800 Series Routers... -
Page 109: Reconnect Dc Power
Use this procedure only when reconnecting power to all power modules in a system that is powered Caution down completely. Replace HVAC and HVDC Power Module Follow these steps to remove HVAC and HVDC power modules from the chassis. Hardware Installation Guide for Cisco 8800 Series Routers... - Page 110 Slide the power module out of its bay while supporting it with your other hand to remove it. Figure 60: HV Power Supply Step 3 Slide the new power module into the bay until it mates with its connector. Hardware Installation Guide for Cisco 8800 Series Routers...
- Page 111 Verify that the Saf-D-Grid plug is plugged in completely to secure the built-in retaining latch. Saf-D-Grid plug has a retaining latch that must be depressed and gently pulled to release the plug Note from the receptacle. Hardware Installation Guide for Cisco 8800 Series Routers...
- Page 112 Replace Chassis Components Replace HVAC and HVDC Power Module Figure 63: SAF-D-Grid Plug Step 5 Verify that the (green) power indicator on the front of the power module goes on. Hardware Installation Guide for Cisco 8800 Series Routers...
Need help?
Do you have a question about the 8800 Series and is the answer not in the manual?
Questions and answers