
Subscribe to Our Youtube Channel
Related Manuals for Nautilus Hyosung MoniMax 5600


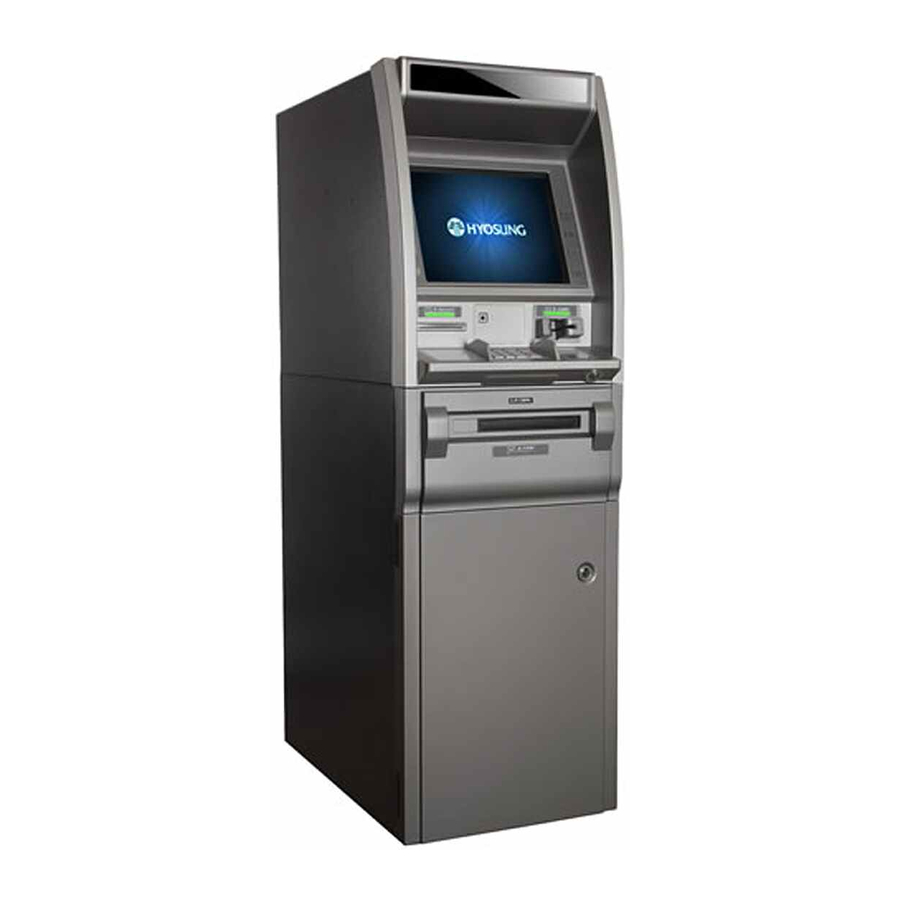
Summary of Contents for Nautilus Hyosung MoniMax 5600
- Page 1 MoniMax 5600 Operator Manual Copyrightⓒ Nautilus Hyosung Inc. 2009 All right reserved...
- Page 2 MoniMax 5600 Revision Record Date Page Version Description of Change April 2009 New Publication September Chapter3,4,6 Updating “Chapter 3, 4, 6”. 2009 1) Updating chapter 3. - Changing picture of Journal Printer. - Modifying “Operating Environment” in chapter 3. Chapter December 2009 2) Updating chapter 4.
-
Page 3: Table Of Contents
MoniMax 5600 Table of Contents 1. Introduction 1.1 About MoniMax 5600 ·····························································································1-2 1.2 What is in this Manual ·························································································1-2 1.3 Basic Features ·····································································································1-3 1.4 Terminologies ······································································································1-4 2. Safety Precautions 2.1 Overview ··············································································································2-2 2.2 Description of Precaution Symbols ···································································2-3 3. Hardware Specifications 3.1 Dimensions ············································································································3-2... - Page 4 MoniMax 5600 4.6 How to Clear Jamming in Cash Dispenser ·························································4-14 4.7 How to Load the Receipt Paper ···········································································4-16 4.8 How to Clear Jamming in Receipt Printer···························································4-19 4.9 How to Load the Journal Paper ···········································································4-20 5. Operator Functions 5.1 Entering OP MODE ····························································································5-2...
-
Page 5: Introduction
MoniMax 5600 1. Introduction Chapter 1. Introduction... -
Page 6: About Monimax 5600
This machine is connected to your bank to dispense cash, transfer funds and inquiry balance through the insertion of a customer’s card. The MoniMax 5600 is easy to use, easy to service and is able to support customer’s needs. -
Page 7: Basic Features
MoniMax 5600 1. Introduction 1.3 Basic Features Important features of the MoniMax 5600 ATM is highlighted in the following list: 15 inch TFT LCD Keypad (EPP keypad) 15.1” privacy filter (Optional) Dip type Card Reader - ISO Track 1, 2, Read... -
Page 8: Terminologies
MoniMax 5600 1. Introduction 1.4 Terminologies ◈ CE : Control Electronics ◈ PNC : Panel Control Board ◈ MCU : Magnetic Card Reader Unit ◈ VFD : Vacuum Fluorescent Display ◈ SPR : Slip Printer (=Receipt Printer) ◈ JPR : Journal Printer ◈... -
Page 9: Safety Precautions
MoniMax 5600 2. Safety Precautions Chapter 2. Safety Precautions... -
Page 10: Overview
MoniMax 5600 2. Safety Precautions 2. Safety Precautions 2.1 Overview Common Safety Precaution Safety Precautions in outlined this manual provide information on safe and proper handling of the product. Non-compliance of the safety precautions may result in injury or damage to the product. -
Page 11: Description Of Precaution Symbols
MoniMax 5600 2. Safety Precautions 2.2 Description of Precaution Symbols Description Symbol Electrical Shock Warning • Do not remove cover. Only a maintenance engineer is allowed to open the cover. • Do not touch. You may receive electric shock. • Make sure to turn off the power when servicing the equipment. -
Page 12: Hardware Specifications
MoniMax 5600 3. Hardware Specifications Chapter 3. Hardware Specifications 3 - 1... -
Page 13: Dimensions
MoniMax 5600 3. Hardware Specifications 3. Hardware Specifications 3.1 Dimensions Note : All the unit in the dimension is millimeter and [ ] is inch scale. Fig. 3.1 Dimensions of MoniMax 5600 3 - 2... - Page 14 Function Key Customer Display 15.1” TFT LCD Motor Driven Type Receipt Printer (Dip Type MCU is optional) Encrypted PIN Pad Camera-2 Mount Cash Dispensing Shutter Safety Body Fig. 3.2 Component Location of MoniMax 5600 without Barcode Reader 3 - 3...
- Page 15 VFD Signage Customer Display 15.1” TFT LCD Function Key Bar Code Reader Receipt Printer Dip Type Magnetic Card Reader Encrypted Pin Cash Dispensing Camera-2 Mount Shutter Safety Body Fig. 3.3 Component Location of MoniMax 5600 with Barcode Reader 3 - 4...
-
Page 16: Lcd & Customer Keypad
MoniMax 5600 3. Hardware Specifications 3.3 LCD & Customer Keypad Fig. 3.4 (a) LCD & customer keypad with bar code Fig. 3.4 (b) LCD & customer keypad without bar code reader reader 15.1 inch TFT LCD XGA Resolution : 1024X 768 pixels (XGA) ... -
Page 17: Cdu (Cash Dispensing Unit)
MoniMax 5600 3. Hardware Specifications 3.4 CDU (Cash Dispensing Unit) Fig. 3.5 CDU Features Automatic Shutter Supporting 4 types of denomination Number of cassette : 5 Cassette (4 Cash out + 1 Retract) Huge capacity of 12,000 new notes (3,000 notes X 4 cassette) ... -
Page 18: Spr (Slip Printer/Receipt Printer)
MoniMax 5600 3. Hardware Specifications 3.5 SPR (Slip Printer/Receipt Printer) Fig. 3.6 Receipt Printer Features • Thermal line printer with cutter • Setting roll paper semi-automatically • Supporting Black Mark Paper (Selectable by dip switch) • Refer to RECEIPT PAPER SEPECIFICATIONS in Chapter 6. -
Page 19: Motor Driven Type Card Reader
MoniMax 5600 3. Hardware Specifications 3.6 Motor Driven Type Card Reader Fig. 3.7 Motor Driven Type Magnetic Card Reader Features Motor Driven Type EMV level-1,2 compliance Having rejection capacity of 50ea Supporting card return function during power failure ... -
Page 20: Dip Type Card Reader : Type 1
MoniMax 5600 3. Hardware Specifications 3.7 Dip Type Card Reader : Type 1 Fig. 3.8 Dip Type Magnetic Card Reader : Type 1 Features ● Dip type Card Reader (ISO Track 1 & 2) ● Supporting magnetic card and IC card ●... -
Page 21: Dip Type Card Reader : Type 2
MoniMax 5600 3. Hardware Specifications 3.8 Dip Type Card Reader : Type 2 Fig. 3.9 Dip Type Magnetic Card Reader : Type 2 Features ● Dip type Card Reader ● ISO 1, 2, 3 Read ● Supporting EMV level-1,2 ● See “MAGNETIC CARD SPECIFICATIONS” of Appendix... -
Page 22: Ce (Control Electronics) : Iobp-945G
MoniMax 5600 3. Hardware Specifications 3.9 CE (Control Electronics) : IOBP-945G Fig. 3.10 Control Electronics (IOBP-945G) Features • LGA775 support Intel Pentium 4 / Celeron • 1 GB DDR Memory, 160GB HDD, DVD-RW • Expansion Slots : PCI-3 • Serial Ports : 8 Ports •... -
Page 23: Ce (Control Electronics) :Ecs Eg31M
MoniMax 5600 3. Hardware Specifications 3.10 CE (Control Electronics) : ECS EG31M Fig. 3.11 Control Electronics (ECS EG31M) Features • Intel Celeron 4xx / Pentium Dual Core E2xxx / Core2 Duo / Core2 Quad CPUs • 1 GB DDR Memory, 160GB HDD (1ea), DVD-RW •... -
Page 24: Journal Printer : Mdp-350
MoniMax 5600 3. Hardware Specifications 3.11 Journal Printer : MDP-350 Fig. 3.12 MDP 350 JPR (Journal Printer) Features • Dot impact Printing • High-speed printing through logic-seeking control • Flexible paper feed setting permits printing in accordance with any user-defined format •... -
Page 25: Journal Printer : T-Jpr
MoniMax 5600 3. Hardware Specifications 3.12 Journal Printer : T-JPR Fig. 3.13 T-JPR (Journal Printer) Features • Direct Thermal printing • Alpha numeric(95), graphics(128), international character(32) • Printing available within 80mm of paper width 3 - 14... -
Page 26: Power Supply
MoniMax 5600 3. Hardware Specifications 3.13 Power Supply Fig. 3.14 Power Supply Features 1. Main Power Switch 2. Standby Switch : 3. Power Selection Switch : Power Supply can be selected 110V or 230V by adjusting this switch as installation voltage can be changed 4. -
Page 27: Control Panel
MoniMax 5600 3. Hardware Specifications 3.14 Control Panel Control Panel Description 1) Mode Switch : Switching Mode from Normal to Supervisor via PNC B/D 2) Indicator : ON-Host Connection / OFF – HOST Disconnection 3) Stand-by Switch : Turn ON/OFF the System (Not for AC IN) -
Page 28: Operating Environment
MoniMax 5600 3. Hardware Specifications 3.15 Operating Environment Power Requirements 100~127 Vac ±10% 5.5A 60Hz , 250 W 200~240 Vac ±10% 2.8A 50Hz , 250 W Power Connections The machine must be connected to a dedicated power circuit. This circuit must consist of LINE, NEUTRAL and GROUND leads connected directly to the power circuit breaker panel. -
Page 29: Operating Instructions
MoniMax 5600 4. Operating Instructions Chapter 4. Operating Instructions 4 - 1... -
Page 30: Opening And Closing The Security Door
MoniMax 5600 4. Operating Instructions 4. Operating Instructions 4.1 Opening and Closing the Security Door 4.1.1 Electronic Lock Opening the Security Door 1) Insert a key for the security cover and turn it 90 degrees clockwise. Then the security cover will be opened. - Page 31 MoniMax 5600 4. Operating Instructions Enter password electronic combination lock. (Default setting value : 1-2-3-4-5-6) 4) Turn the external surface of the electronic lock 90 degrees clockwise as shown in picture 5) Turn the handle clockwise and open the security door.
- Page 32 MoniMax 5600 4. Operating Instructions Closing the Security Door 1) To close the security door, push the door completely while turning a handle clockwise. And then turn the handle counterclockwise to lock it. 2) Turn the external surface of the electronic lock...
- Page 33 MoniMax 5600 4. Operating Instructions 4.1.2 Cencon Lock 1) Turn the Dial left (CCW) until the letters "EC” (Enter Combination) appear on the LCD 2) Enter the factory combination of 50-25-50 by sequentially pressing those six buttons. The LCD will display these number as they are entered.
- Page 34 MoniMax 5600 4. Operating Instructions 5) Insert the setup key into the lock case and turn to the clockwise until it is stopped. 6) Turn the handle left (CCW) and open the door. 7) Turning the dial left (CCW) will extend the lock’s bolt to close the door.
-
Page 35: Opening And Closing The Front Panel
MoniMax 5600 4. Operating Instructions 4.2 Opening and Closing the Front Panel Opening the Front Panel 1) Insert a key for front panel and turn it clockwise. 2) Pull the front panel outward with hands carefully 3) If you want to pull the front panel back to much... - Page 36 MoniMax 5600 4. Operating Instructions Closing the Front Panel 1) To close the front panel, lift it up again until it reaches at top position so that two thumb screws is properly fixed.. At this moment, make sure that the entrance of receipt printer is fully inserted into the guide bracket on front panel.
-
Page 37: System Power On/Off
MoniMax 5600 4. Operating Instructions 4.3 System Power On/Off The Power Supply is located under the control electronics on the upper part of ATM. Main Switch Stand-by Battery Power Switch Switch Fig. 4.3 Power Supply System Power On 1) Turn on Battery Switch. -
Page 38: Replenishing The Cash Cassette
MoniMax 5600 4. Operating Instructions 4.4 Replenishing the Cash Cassette 1) Holding a cassette handle with one hand and supporting the cash cassette from bottom with the other hand, slightly lift it up and pull out carefully. 2) Place the cash cassette on a flat level platform and turn the cassette key clockwise to unlock a cassette cover. - Page 39 MoniMax 5600 4. Operating Instructions 4) Replenish cash into the cassette (Take note as below) [Precaution!] Don’t replenish more cash than recommended capacity. It means that it should be replenished less than 3,000 bills per cassette for new bills. Make sure that Cash Low Bracket in cassette will not be extruded outside cassette after replenishing cash.
- Page 40 MoniMax 5600 4. Operating Instructions 6) Close the cassette cover and turn the cassette key counter clock-wise until it is locked. Remove the key when it is locked. 7) Holding a cassette handle with one hand and supporting the cassette from the bottom with...
-
Page 41: Emptying The Reject And Retract Box
MoniMax 5600 4. Operating Instructions 4.5 Emptying the Reject and Retract Box 1) To empty the reject and retract box, first please take out the handle on the reject box carefully. 2) Insert the reject box key, turn it clockwise, and pull the box lid. -
Page 42: How To Clear Jamming In Cash Dispenser
MoniMax 5600 4. Operating Instructions 4) Take the reverse order of 1)~3) to put Reject Box together into cash dispenser again. Make sure that the cover of Reject box will completely be lifted down (this is ‘open status’) as shown in the left figure after inserting Reject box fully. - Page 43 MoniMax 5600 4. Operating Instructions 4) If there are no jammed notes on upper transport and inside temporary stacker, it would be better to take cassette out 5) Please check if there are jammed notes inside cassette feed module. 6) If there are jammed notes inside cassette feed module, remove them carefully.
-
Page 44: How To Load The Receipt Paper
MoniMax 5600 4. Operating Instructions 4.7 How to Load the Receipt Paper 1) Open the front panel by pulling it outward to load the receipt paper. Notes: Load a paper roll into the unit with the shape of the roll kept intact. (Deformed roll may cause jamming.) - Page 45 MoniMax 5600 4. Operating Instructions 2) Insert the paper axis into the center of receipt roll and mount it onto the charger. 3) Have receipt paper go down the white tension bar as shown the left picture and then pull it forward.
- Page 46 MoniMax 5600 4. Operating Instructions This is a diagram to explain the basic concept of receipt printer mechanism. The major role of tension bar is to reduce the stress of paper when the receipt printer suddenly starts moving and to maintain the paper tension at constant rate not to release it too much when stopping the operation.
-
Page 47: How To Clear Jamming In Receipt Printer
MoniMax 5600 4. Operating Instructions 4.8 How to Clear Jamming in receipt printer 1) First, check if there is a jammed paper around transparent guide. If so, after pressing the green lever, lift up the transparent guide and cut out the jammed paper with mechanical cutter carefully. -
Page 48: How To Load The Journal Paper
MoniMax 5600 4. Operating Instructions 4.9 How to Load the Journal Paper 4.9.1 MDP-350 Installing the Paper Roll 1) Open the rear door with key and pull the upper rail out as far as possible to manipulate the journal printer easily. - Page 49 MoniMax 5600 4. Operating Instructions 5) Put down Weight-roll-winder. 6) Hold the paper and insert it straight into the paper slot. The printer feeds the paper automatically. 7) If the printer doesn’t feed the paper automatically, press the FEED button until the paper comes out.
- Page 50 MoniMax 5600 4. Operating Instructions 9) Remove the side of the spool and insert the end of the paper roll into the groove on the spool Insert the paper into the paper charger 10) Then wrap the roll paper around the spool two or three times.
- Page 51 MoniMax 5600 4. Operating Instructions Removing the paper roll 1) Pull up the paper and cut the paper at the dotted line shown in the picture. Cutting 2) Remove the paper roll from the printer. 3) Press the FEED button to remove the remaining paper.
- Page 52 MoniMax 5600 4. Operating Instructions Running the Self Test Any time that you want to check the performance of your printer, you can run the self test described below. This shows whether your printer is working correctly. It is independent of any other equipment or software.
- Page 53 MoniMax 5600 4. Operating Instructions 4.9.2 T-JPR 1) Insert the shaft into the paper and mount it. 2) Turn the head-up lever clockwise. 3) Insert the edge of the paper under the damper. Note : Check the edge of the paper is clean-cut as shown below picture.
- Page 54 MoniMax 5600 4. Operating Instructions 4) Insert the paper between the paper guides until the edge of the paper is shown. 5) Turn the head-up lever counter-clockwise, and the paper will be fed. If the paper isn’t fed, check the power is on.
- Page 55 MoniMax 5600 4. Operating Instructions 8) Lastly press the feed button. 4 - 27...
-
Page 56: Operator Functions
MoniMax 5600 5. Operator Function Chapter 5. Operator Function 5 - 1... -
Page 57: Entering Op Mode
MoniMax 5600 5. Operator Function 5.1 Entering OP Mode You may press supervisor button in order to enter OP mode. ※ Precaution : When you are going to shut down after completing the specification changes, make sure that you should firstly exit to AP mode like transaction screen from OP mode and then turn off the power. -
Page 58: Select Password-Change
MoniMax 5600 5. Operator Function 5.4 Select Password-Change User can select to change the password or not Press number of choice (CHANGE, NOT CHANGE) 5.5 Each Password Change Each User can change the each password If you want to use the same password, Press the “CANCEL” button... -
Page 59: Supervisor Main Menu
MoniMax 5600 5. Operator Function 5.6 Supervisor Main Menu Supervisor use only menu – version info, configure, host connection, atm ip setting, reboot 5.7 CONFIGURE 5 - 4... - Page 60 MoniMax 5600 5. Operator Function 5.7.1 DISP CONFIG - Display the configuration 5.7.2 PRINT CONFIG - Print the configuration information 5.7.3 MACHINE NO - Enter 6 digit machine number. Use numeric key and ENTER 5 - 5...
- Page 61 MoniMax 5600 5. Operator Function 5.7.4 DATE/TIME - Set date and time. Use numeric key and ENTER 5.7.5 DENOMINATION - Set Denomination of each cassette. Use numeric key and ENTER 5 - 6...
-
Page 62: Version Info
MoniMax 5600 5. Operator Function 5.8 VERSION INFO You can confirm the SP/EP version. To print the information, press the ‘0’. 5.9 HOST CONNECTION This menu will be used later for TCP/IP. 5 - 7... -
Page 63: Atm Ip Setting
MoniMax 5600 5. Operator Function 5.10 ATM IP SETTING You can change the address for X.25 protocol and IP address for TCP/IP later. 5.10.1 LOCAL ADDRESS - Set X.25 Local address. Use numeric key and ENTER 5 - 8... -
Page 64: Reboot
MoniMax 5600 5. Operator Function 5.10.2 REMOTE ADDRESS - Set X.25 Remote address. Use numeric key and ENTER 5.11 REBOOT You can reboot the system. 5 - 9... -
Page 65: Operator Main Menu
MoniMax 5600 5. Operator Function 5.12 OPERATOR Main Menu Operator use only menu – replenish, EJ backup, EJ Viewer, VFD, reboot 5.13 REPLENISH 5 - 10... - Page 66 MoniMax 5600 5. Operator Function 5.13.1 DISP SPPLY - Displays receipt printer’s paper supply status and device status of card reader and cash dispenser. 5.13.2 PRNT SPPLY - Print supply status to the receipt printer. 5.13.3 DISP CASH - Display the Cash dispenser counters.
- Page 67 MoniMax 5600 5. Operator Function 5.13.4 PRINT CASH - Print the Cash dispenser counters. 5.13.5 CLR CARD - Clear the number of captured card. 5.13.6 CLR CIV/RES - Clear the Diverted Cash Count and Rejected Cash Count. 5.13.7 INIT RECPT - Reset the receipt printer.
-
Page 68: Ej Backup
MoniMax 5600 5. Operator Function 5.13.10 CLR CASH - Clear the Cash dispenser counters. 5.14 EJ BACKUP 5.14.1 Start Date Input - Input the start date to backup 5.14.2 End Date Input - Input the End date to backup. 5 - 13... -
Page 69: Ej Viewer
MoniMax 5600 5. Operator Function 5.15 EJ Viewer You can see EJ Log. 5.16 VFD 5.16.1 INPUT MESSAGE (LOCAL) - Input the message for VFD . 5 - 14... -
Page 70: Reboot
MoniMax 5600 5. Operator Function 5.17 REBOOT You can reboot the system. 5.18 TECHNICIAN Main Menu Technician use only menu – diagnostic, reboot 5.19 DIAGNOSTIC - You can test these devices - CashDispenser, ReceiptPrinter, CardReader, Pinpad, Camera, OTHERS 5.20 REBOOT You can reboot the system. - Page 71 MoniMax 5600 6. Appendix Chapter 6. Appendix 6 - 1...
-
Page 72: Appendix A. Bill Conditions
MoniMax 5600 6. Appendix 6. Appendix A. BILL CONDITIONS A.1 Acceptable condition ● Bill which is very clean and can readily be recognized as a true bill. ● Bill has sufficient life or sizing to be handled easily. ● Bill which can be manually held straightly when one end is held by a hand and the bill is slightly curved vertically. - Page 73 MoniMax 5600 6. Appendix A.2 Unacceptable condition ● Bill having serious wrinkles, torn or broken section wherein paper fiber is broken and separation begins. Wrinkle Torn Torn Broken section Broken Section 6 - 3...
- Page 74 MoniMax 5600 6. Appendix ● Bill having adequate life or sizing, but stained seriously. Stained ● Bill with holes (Perforated bill). Hole ● Bill ragged and cannot be held straightly when one end is supported by a hand. 20mm 35mm...
- Page 75 MoniMax 5600 6. Appendix ● Bill with cellophane tape, scotch tape, etc. Tape ● Bill with folds Fold ● Gradually curved bill (bills tied by hand seal, etc) Band seal 6 - 5...
- Page 76 MoniMax 5600 6. Appendix ● Bill with folded lines 6 - 6...
-
Page 77: Receipt Paper Specifications
MoniMax 5600 6. Appendix B. RECEIPT PAPER SPECIFICATIONS B.1 Applicable Product This purchase specification applies to the receipt paper of MoniMax 5600. B.2 Specification Paper type: Thermal roll paper Print color: Black B.3 Specification of the Receipt Paper Paper type: Thermal roll paper Print color: Black Specification: Paper detects heat. - Page 78 MoniMax 5600 6. Appendix B.4 Roll appearance 79.5 ± 0.5 Ø210 Ø22 Ø18 Fig. 6.2 External roll dimension Note 1) Store the paper roll separately to prevent damage to the paper. Note 2) Do not connect the papers with tape.
- Page 79 MoniMax 5600 6. Appendix B.4.1 Printing Position for One Sheet and Black Mark 2 (Character Pitch)) Paper Rolling Direction 12±0.5 60 (Max) 79.5±0.5 Fig. 6.3 Paper Length and Printing Position for a Transaction Note 1) Vertical margin is 0.6 x 10 mm.
- Page 80 MoniMax 5600 6. Appendix B.5 Paper Handling Precautions 1) Store it away from high temperature and humidity If the paper is stored in a place where temperature is above 50 ℃ or humidity is above 90% RH, the coloring capability may deteriorate or the paper surface may inflate.
-
Page 81: Magnetic Card Specifications
MoniMax 5600 6. Appendix C. MAGNETIC CARD SPECIFICATIONS Item ISO Card (Unit : Inch) Length Card Bending Magnetic Stripe Position Fig. 6.4 Magnetic Card Specifications 6 - 11... -
Page 82: Journal Paper And Ribbon Cassette
MoniMax 5600 6. Appendix Journal Paper and Ribbon Cassette D.1 Applicable Product This purchase specification applies to dot journal paper for MoniMax 5600ATM D.2 Roll Paper Specifications D.2.1 MDP-350 ITEM Specifications Remarks Paper Type Roll and Normal Paper Thickness 0.2mm (Maximum in Roll Type) Paper Width 76.2mm ±... - Page 83 MoniMax 5600 6. Appendix D.3 Ribbon Cassette D.3.1 Ribbon Cassette Specifications (MDP-350) ITEM Specifications Remarks Color Purple LIFE 3 Millions Characters, 7 x 9 font Martial Oil Ink Thickness 0.119 ± 0.0005MM Ribbon Cassette Tensile Strength 5kg, 1/2inch Ribbon Winding...
-
Page 84: Electronic Lock
MoniMax 5600 6. Appendix E. Electronic Lock User Code ● Open Lock ● Change Code Wrong Try Penalty ● Four (4) consecutive invalid codes initiates five minute delay period. Low Battery Warning ● Repeated audio and visual signal (LED flashing and repeated beeping) during opening indicates battery low. - Page 85 MoniMax 5600 6. Appendix 4. If a mistake is made wait thirty (30) seconds and repeat steps 1. - 3. 5. Test lock operation several times before closing the door. ● Valid Code Entry - Double signal after valid six (6) digit code is entered.
- Page 86 MoniMax 5600 6. Appendix Fig. 6.5 Changing Battery #1 6 - 16...
- Page 87 MoniMax 5600 6. Appendix Fig. 6.6 Changing Battery #2 6 - 17...
-
Page 88: Cencon Lock
MoniMax 5600 6. Appendix F. Cencon Lock Initial Operating Instructions Each lock is shipped from the factory in Shelved Mode, operating on a standard combination (50-25- 50). The “one time only” combination does not function when the lock is in this condition. The correct opening procedure for a new lock is : ... - Page 89 MoniMax 5600 6. Appendix Turn the Dial to the right (CW) to retract the bolt 4. Open Door 5. Insert Change Key Insert the change key into the change key socket on the back of the lock. 6. Extend Bolt Turn the Dial to the left (CCW) to extend the bolt.
-
Page 90: Error Codes Table
MoniMax 5600 6. Appendix G. ERROR CODE TABLE 1) Journal Printer (Option) Error Code Cause Handling 1910000 Undefined error 1.Reinitialized Journal printer and check again 1.After checking the head right position, try to 1910400 The error of head right position reinitialized Journal printer and check again 1.Check the Paper charger and status of supplied... - Page 91 MoniMax 5600 6. Appendix 2) Receipt Printer Error Code Cause Handling In case of detecting to be open lever of 20101 1.Close the lever of print head completely print head before printing receipt paper In case of detecting to be overheated in 1.Wait the time until the temperature of head...
- Page 92 MoniMax 5600 6. Appendix Error Code Cause Handling 1.Replenish receipt paper in paper charger 20807 Receipt paper runs out of after printing 2.Check the status of Near End sensor and its connctor It is detected that paper is not properly 1.Check the Cutter module...
- Page 93 MoniMax 5600 6. Appendix 3) Card Reader Error Code Cause Handling To shows that received command was 3000000 undefined 3000100 To show command parameter error The reception of the command that 3000200 impossible to implementation To show that error data was included in...
- Page 94 MoniMax 5600 6. Appendix Error Code Cause Handling To show that the card staying inside ICRW was moved up to the point where 3001600 status request information change. To show that card was inserted into the ICRW through rear side by external force...
- Page 95 MoniMax 5600 6. Appendix Error Code Cause Handling To show that the discordance of write 3002900 data has happened in write verify. To show that power down(or power cut in 3003000 short instant)is detected(or being detected). To show that DSR signal was turned to...
- Page 96 MoniMax 5600 6. Appendix Error Code Cause Handling In case T=1 cards, after ATR receiving, 3006300 IFS exchange is failed. ICRW detects time out. In case T=1 cards, after ATR receiving, 3006400 IFS exchange is failed. ICRW detects protocol error.
- Page 97 MoniMax 5600 6. Appendix Cash Dispenser Error Code Cause Handling 1. Check the CDU received command Received a command that the CDU does 40000 2. Check the CDU firmware version and refer to not have from the upper unit specifications.
- Page 98 MoniMax 5600 6. Appendix Error Code Cause Handling 1. Remove the remaining notes and foreign objects at the position of the CS4B sensor CS4B Dark detection during initializing or 40018 2. Check if the CS4B sensor cable is disconnected dispense reserved operation 3.
- Page 99 MoniMax 5600 6. Appendix Error Code Cause Handling 1. Remove the remaining notes and foreign objects at the position of the CS11B sensor CS11B Dark detection during initializing Check CS11B sensor cable 40022 or dispense reserved operation disconnected 3. Exchange a sensor after abnormal operating the...
- Page 100 MoniMax 5600 6. Appendix Error Code Cause Handling 1. Check CS5_1 Sensor Cable Error sheets detecting 40034 2. Check second Dip Switch in CDU B/D sensor(CS5_1) for initializing 3. Change CS5_1 Sensor 1. Check CS5_2 Sensor Cable Error sheets detecting 40035 2.
- Page 101 MoniMax 5600 6. Appendix Error Code Cause Handling 1. Remove notes or dust in existence CS21B Sensor CS21B DARK Detected (Initial recovery, 4003E 2. Check CS21B Sensor Cable Separated reject) 3. Exchange Sensor after abnormal operating CS21B Sensor 1. Remove notes or dust in existence CS21A ,...
- Page 102 MoniMax 5600 6. Appendix Error Code Cause Handling 1. Check notes dispensed and rejected CS13 > required sheet(Separated 2. Remove dust in CS13 Sensor 40045 rejection) 3. Exchange sensor after abnormal operating CS13 Sensor 1. Initialize after Reset Power 40046 Program error(Separated rejection) 2.
- Page 103 MoniMax 5600 6. Appendix Error Code Cause Handling 1. Remove the remaining notes at a sensor in front The remaining notes at the sensor in of the CST 40052 front of the CST after dispense operation 2. Realign notes in the cassette (CS11AB, CS21AB, CS31AB, CS41AB) 3.
- Page 104 MoniMax 5600 6. Appendix Error Code Cause Handling 1. Check notes’ status in 2 Cassette 2. Check 2 cassette specifications Mounting/demounting 2 Cassette during 4005A 2. Check if the CS17 sensor cable is disconnected dispense operation 4. Exchange a sensor after abnormal operating the CS17 sensor .
- Page 105 MoniMax 5600 6. Appendix Error Code Cause Handling 1. Remove foreign objects in the shutter unit. 2. Check the shutter motor connection cable. Failed to close the CDU shutter (failed 40084 3. Check a connection status of the TS004 and ten times retry) TS005 sensor.
- Page 106 MoniMax 5600 6. Appendix Error Code Cause Handling 1. Remove the remaining notes and foreign objects at the position of the CS41AB sensor CS41AB Dark detection on transport path 2. Check if the CS41AB sensor cable is 4008D before dispense operation disconnected 3.
- Page 107 MoniMax 5600 6. Appendix Error Code Cause Handling 1. Check a check’s status in the reject box 2. Remove a dust and foreign objects on the CS31AB or CS41AB sensors. Reject error due to abnormal check 3. Check the CIU Module Print Head.
- Page 108 MoniMax 5600 6. Appendix Error Code Cause Handling 1. Remove the remaining notes and foreign objects at the position of the CS31A and CS31B sensors. 2. Check settings of 3 Cassette FM Board Dip Detected the CS31A and CS31B Dark...
- Page 109 MoniMax 5600 6. Appendix Error Code Cause Handling 1. Check notes’ status in 3 Cassette 2. Check 3 cassette specifications 2. Check if the CDU Board CN6 and 3 Cassette FM Board CN1 are connected. Mounting/demounting 3 Cassette during 3. Check settings of 3 Cassette FM Board Dip...
- Page 110 MoniMax 5600 6. Appendix Error Code Cause Handling 1. Retry after initialization. 400AA Failed during writing EEPROM data 2. Replace the CDU Board. 1. Remove the remaining notes or foreign objects in the tray. Disable to drive due to the remaining 2.
- Page 111 MoniMax 5600 6. Appendix Error Code Cause Handling 1. Remove a jammed note in 1 Cassette. 2. Mount 1 cassette box after realigning notes in 1 cassette box. Cassette during dispense 400C1 3. Remove foreign objects on 1 Cassette Clutch operation (1 CST Encoder Error).
- Page 112 MoniMax 5600 6. Appendix Error Code Cause Handling 1. Remove the remaining notes and foreign objects CS 15 Dark detection during initializing or at the position of the CS 15 sensor 400C8 dispense reserved operation. error occurs after checking disconnection and operation, replace a sensor.
- Page 113 MoniMax 5600 6. Appendix Error Code Cause Handling 1. Remove a jammed note in the tray The remaining notes on the tray during 2. Check external light source of the CS14 sensor. 400D4 delivery operation (some notes remaining 3. If error occurs when checking CS14 sensor...
- Page 114 MoniMax 5600 6. Appendix Error Code Cause Handling 1. Check 4 Cassette specifications for CDU Version. 2. Remove the remaining notes and foreign objects at the position of the CS41A sensor. 3. Check if 3 Cassette FM B/D CN2 and 4 Cassette...
- Page 115 MoniMax 5600 6. Appendix Error Code Cause Handling 1. Check notes’ status in 4 Cassette 2. Check 4 cassette specifications 3. Check if 3 Cassette FM B/D CN2 and 4 Cassette FM B/D CN1 are connected. Mounting/demounting 4 Cassette during 400DE 4.
- Page 116 MoniMax 5600 6. Appendix Error Code Cause Handling 1. Check if each sensor is mounted. 2. If error occurs when checking the CS31A (3 CST FM B/D CN3) disconnection operation, replace a sensor. 3. If error occurs when checking the CS31B(3 CST...
- Page 117 MoniMax 5600 6. Appendix Error Code Cause Handling Dark light sensor test error 400EA (CS18,28,38,48).during initializing. Bill retracted during INITIALIZE 400EF COMMAND Disabled to drive due to throat jam during 1. Remove the remaining notes and foreign objects 400F0 forced initialization.
- Page 118 MoniMax 5600 6. Appendix Error Code Cause Handling Reject transaction happens again during 400FE bundle reject mode. Enforcedly remove cash during 400FF reserve/retract operation (subnormal exit) 97120 Unable to create INI file 97121 Unable to read file 97122 Unable to write file...
- Page 119 MoniMax 5600 6. Appendix Error Code Cause Handling 971A2 Unable to dispense bills case requested bill counts 971A3 exceeded the maximum count In case requested coin counts are 971A4 exceeded the maximum count 971A5 Unable to define Mix method 971B0 There isn’t any bills on stacker...
- Page 120 MoniMax 5600 6. Appendix Error Code Cause Handling Dark light sensor error (CS41A, CS41B) 974D8 during idle status of cash dispenser 9740020 Fail to produce file 9740025 Fail to copy file In case of being selected cassette not 9740101 dispensed...
- Page 121 MoniMax 5600 6. Appendix 5) Etc Error Code Cause Handling Failed connect communication 1.Check if communication cable or com port is not 9701010 between SP of PIN and EP of one connected 1.Check if communication cable or com port is not 9701012 Failed to deliver to data of EPP’s SP...
-
Page 122: Installation Guide
MoniMax 5600 6. Appendix H. Installation Guide H.1 Installation Requirements and Necessary Tools ● Installation condition Following conditions should be met before installing equipment. 1) Temperature while operating should be between 41°F - 104°F 2) Relative humidity while operating should be between 25% < RH < 85%, Non-Condensed 3) Avoid locations where intense direct light is reflected off the LCD screen. - Page 123 MoniMax 5600 6. Appendix ● Installation space Note : All the unit in the dimension is millimeter and [ ] is inch scale. [21.38] [18.84] [1.57] [59.06] Fig. 6.7 Installation space #1 (Plane view) 6 - 53...
- Page 124 MoniMax 5600 6. Appendix 1494.5 [58.84] [50.75] 30° [58.43] Fig. 6.8 Installation space #2 (Side view) 6 - 54...
- Page 125 If only the palette needs to be removed, lift the whole machine from the bottom and set it aside. ● Physical Installation To install the Model MoniMax 5600 ATM, perform the following steps. Place the “ Anchor bolts locate sheet ” at the place where the machine is to be installed. (refer to Fig.6.9)
- Page 126 MoniMax 5600 6. Appendix Fig. 6.9 Anchor diagram for MoniMax 5600 ATM 6 - 56...
- Page 127 MoniMax 5600 6. Appendix H.3 Adjusting the Height Adjust the height by turning the adjuster nut. 1) Lower the height as much as possible while making it as level as possible. 2) Keep the vault within 145.8mm (5.7 inch) from the floor since this ATM machine can fall if you turn the adjuster too much.
Need help?
Do you have a question about the MoniMax 5600 and is the answer not in the manual?
Questions and answers