
Related Manuals for Nautilus Hyosung Monimax 5300CE


Summary of Contents for Nautilus Hyosung Monimax 5300CE
- Page 1 Installation Manual MX5300CE System V01.00.02 (2013.3.21) © Nautilus Hyosung, Inc. All Rights Reserved.
- Page 2 Modified the incorrect words V01.00.02 2013/3/21 Changed the manual format Updated installation data © Nautilus Hyosung All Rights Reserved. The content of this specification is protected by copyright laws. 2013. 3. 21. 3rd Release © Nautilus Hyosung, Inc. All Rights Reserved.
-
Page 3: Table Of Contents
ATM Dimensions ............................3-4 Recommended Installation and Service Clearance ..................3-6 Chapter4. System Information ......................4-1 Unpacking the ATM ............................4-1 Physical Installation with Anchor Bolts Locate Sheet ................... 4-2 Memo ............................Memo-1 © Nautilus Hyosung, Inc. All Rights Reserved. -
Page 4: Chapter1. Preface
Nautilus Hyosung Inc. It is the policy of Nautilus Hyosung Inc to improve products as new technology, components, software, and firmware become available. Therefore Nautilus Hyosung Inc. -
Page 5: Conventions
Europay, Mastercard, Visa Elementary Program Encryption PIN Pad Hardware Interface International Standard Organization Journal Printer Liquid Crystal Display Magnetic Card Unit Operation Panel for Customers to Operate OSD board On Screen Display Board © Nautilus Hyosung, Inc. All Rights Reserved. - Page 6 Description Power Supply Personal Identification Number Panel Control Board Printer (mainly Receipt Printer) Switch Sensor and Indications Unit Service Provider Slip Printer (Receipt Printer) Text Terminal Unit (OPL or SPL) Vacuum Fluorescent Display © Nautilus Hyosung, Inc. All Rights Reserved.
-
Page 7: Safety Precautions (English)
▪ Do not touch the equipment when it is running. ▪ The equipment can get extremely hot and may cause a burn. ▪ Make sure to close the cover before running the equipment. © Nautilus Hyosung, Inc. All Rights Reserved. - Page 8 TYPE. DISPOSED OF USED BATTERIES ACCORDING TO THE INSTRUCTIONS 3. FOR PLUGGABLE EQUIPMENT, THE SOCKET-OUTLET SHALL BE INSTALLED NEAR THE EQUIPMENT AN SHALL BE EASILY ACCESSIBLE 4. THE EQUIPMENT IS TO BE SECURED TO THE BUILDING STRUCTURE BEFORE OPERATION © Nautilus Hyosung, Inc. All Rights Reserved.
-
Page 9: Précautions Pour La Sécurité (French)
• Ne pas retirer le couvercle. Seul le technicien d'entretien est autorisé à ouvrir le couvercle. • Ne pas toucher. Vous pouvez avoir un choc électrique. • Assurez-vous d'éteindre l'appareil lors de l'entretien de l'équipement. © Nautilus Hyosung, Inc. All Rights Reserved. - Page 10 2. RISQUE D'EXPLOSION SI LA BATTERIE EST REMPLACEE PAR UN TYPE INCORRECT. DISPOSER POUR UTILISATION DES BATTRIES SELON LES INSTRUCTIONS 3. POUR LES APPAREILS RACCORDES, LA PRISE DOIT ETRE INSTALLEE PRES D’EQUIPEMENT POUR ÊTRE FACILEMENT ACCESSIBLE © Nautilus Hyosung, Inc. All Rights Reserved.
-
Page 11: Related Document
▪ Operator Manual ▪ Operator Function Manual ▪ Service Manual ▶ For the contact of maintenance staffs of Nautilus Hyosung, see the E-mail addresses and telephone numbers provided separately. © Nautilus Hyosung, Inc. All Rights Reserved. -
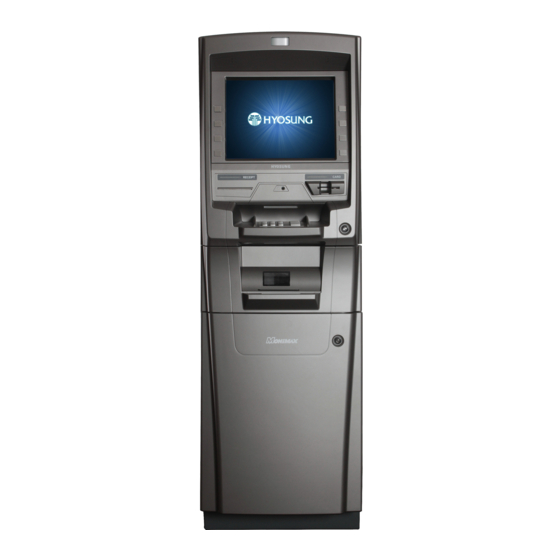
Page 12: Chapter2. Introduction
Allows tellers to calculate and close amount on hand faster than the existing manual calculation. Allows easy and quick installation and maintenance. © Nautilus Hyosung, Inc. All Rights Reserved. -
Page 13: System Identification Label
Installation Manual Chapter2.Introduction System Identification Label figure below shows the layout of the product identification label which is fixed ▶ inside the side box of the ATM © Nautilus Hyosung, Inc. All Rights Reserved. -
Page 14: Chapter3. Installation Information
► Packaging Dimensions of MX5300CE In some cases it may be necessary to store the ATM (in its box) before it is installed. See figure below for information on the dimensions of a boxed MX5300CE ATM © Nautilus Hyosung, Inc. All Rights Reserved. - Page 15 Installation Manual Chapter3. Installation Information ► Packaging Dimensions of MX5300CE with 4 CST CDU © Nautilus Hyosung, Inc. All Rights Reserved.
- Page 16 Installation Manual Chapter3. Installation Information ► Packaging Dimensions of MX5300CE (UL291 Level-1 Safety) © Nautilus Hyosung, Inc. All Rights Reserved.
-
Page 17: Atm Dimensions
► Figure below show the overall physical dimensions of MX5300CE with 1-3 CST CDU (UL291 Business Hour Safety). ► Figure below show the overall physical dimensions of MX5300CE with 4 CST CDU (UL291 Business Hour Safety). © Nautilus Hyosung, Inc. All Rights Reserved. - Page 18 Installation Manual Chapter3. Installation Information ► Figure below show the overall physical dimensions of MX5300CE (UL291 Level-1 Safety). © Nautilus Hyosung, Inc. All Rights Reserved.
-
Page 19: Recommended Installation And Service Clearance
MX5300CE with 1-3 CST CDU. (UL291 Business Hour Safety, Plan View) Nautilus Hyousng recommends it is more convenient for your service personnel to have enough maintenance space as described below to service this ATM. © Nautilus Hyosung, Inc. All Rights Reserved. - Page 20 ► Following diagram is describing the recommended areas required for installing and servicing the MX5300CE with 4 CST CDU. (UL291 Business Hour Safety, Plan View) ► Following diagram is describing the recommended areas required for installing and servicing the MX5300CE. (UL291 Level-1 Safety, Plan View) © Nautilus Hyosung, Inc. All Rights Reserved.
- Page 21 Installation Manual Chapter3. Installation Information ► Following diagram is describing the recommended areas required for installing and servicing the MX5300CE with 1-3 CST CDU. (UL291 Business Hour Safety, Side View) © Nautilus Hyosung, Inc. All Rights Reserved.
- Page 22 Installation Manual Chapter3. Installation Information ► Following diagram is describing the recommended areas required for installing and servicing the MX5300CE with 4 CST CDU. (UL291 Business Hour Safety, Side View) © Nautilus Hyosung, Inc. All Rights Reserved.
- Page 23 Installation Manual Chapter3. Installation Information ► Following diagram is describing the recommended areas required for installing and servicing the MX5300CE with 4 CST CDU. (UL291 Level-1 Safety, Side View) © Nautilus Hyosung, Inc. All Rights Reserved. 3-10...
-
Page 24: Unpacking The Atm
▪ Firmly close the vault door and lock the door by turning the knob completely. ▪ Only experienced staff members should move the heavy machine. ▪ Do not tilt the ATM when moving. © Nautilus Hyosung, Inc. All Rights Reserved. -
Page 25: Physical Installation With Anchor Bolts Locate Sheet
7. After the anchor nuts are in place according to the anchor holes on the bottom of MX5300CE, tighten the anchor bolts tightly. ► Anchor Bolts Locate Sheet of MX5300CE (UL291 Business Hour Safety) © Nautilus Hyosung, Inc. All Rights Reserved. - Page 26 Installation Manual Chapter4. System Installation ► Anchor Bolts Locate Sheet of MX5300CE with 4CST CDU (UL291 Business Hour Safety) © Nautilus Hyosung, Inc. All Rights Reserved.
- Page 27 Installation Manual Chapter4. System Installation ► Anchor Bolts Locate Sheet of MX5300CE with 4CST CDU (UL291 Level-1 Safety) © Nautilus Hyosung, Inc. All Rights Reserved.
-
Page 28: Memo
Installation Manual Memo Memo © Nautilus Hyosung, Inc. All Rights Reserved. Memo-1...
Need help?
Do you have a question about the Monimax 5300CE and is the answer not in the manual?
Questions and answers