Advertisement
Available languages
Available languages
Quick Links
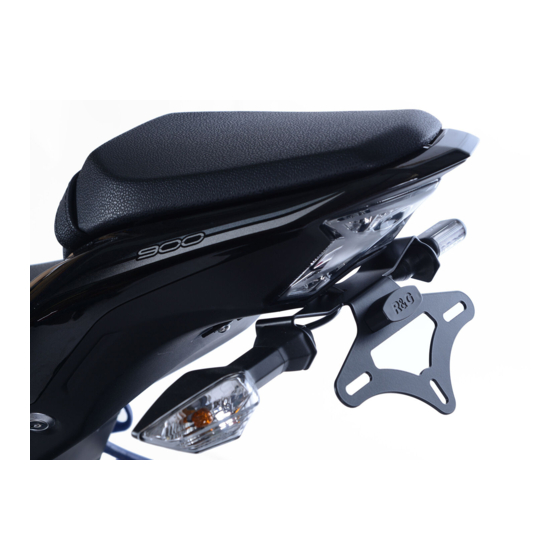
FITTING INSTRUCTIONS FOR LP0192BK LICENCE PLATE BRACKET
Page | 1
THIS KIT CONTAINS THE ITEMS PICTURED AND LABELLED BELOW.
DO NOT PROCEED UNTIL YOU ARE SURE ALL PARTS ARE PRESENT.
Please note that the way the kit is packed does not necessarily represent the way of
T
HE PARTS SHOWN MAY BE REPRESENTATIVE ONLY
5
4
3
2
Unit 1, Shelley's Lane, East Worldham, Alton, Hampshire, GU34 3AQ
Tel: +44 (0)1420 89007 Fax: +44 (0)1420 87301
KAWASAKI Z1000SX TOURER '14-
mounting to the bike
6
7
8
21
1
R&G Racing
(
FOR CLARITY OF INSTRUCTIONS ONLY
10
9
19
20
www.rg-racing.com
Email:
1
LP0192
)
12
11
13
14
15
16
18
18
info@rg-racing.com
17
22
Advertisement

Summary of Contents for R&G LP0192BK
- Page 1 LP0192 FITTING INSTRUCTIONS FOR LP0192BK LICENCE PLATE BRACKET KAWASAKI Z1000SX TOURER ‘14- Page | 1 THIS KIT CONTAINS THE ITEMS PICTURED AND LABELLED BELOW. DO NOT PROCEED UNTIL YOU ARE SURE ALL PARTS ARE PRESENT. Please note that the way the kit is packed does not necessarily represent the way of...
-
Page 2: Tools Required
LP0192 LEGEND ITEM 1 = MAIN MOUNTING BRACKET (TB0192BK-PART 1) (x1). ITEM 2 = MINI INDICATOR ADAPTORS (I0026) (x4). ITEM 3 = SMALL CABLE TIES (x6). ITEM 4 = INDICATOR CONNECTORS (CON0032) (x2). ITEM 5 = LICENCE PLATE ILLUMINATOR CONNECTOR (CON0007) (x1). FOR ’14-’16 BIKES Page | 2 ITEM 6 = M6x12mm WASHERS (x4). - Page 3 LP0192 Page | 3 PICTURE 3 PICTURE 4 PICTURE 5 PICTURE 6 PICTURE 7 PICTURE 8 R&G Racing Unit 1, Shelley’s Lane, East Worldham, Alton, Hampshire, GU34 3AQ Tel: +44 (0)1420 89007 Fax: +44 (0)1420 87301 www.rg-racing.com Email: info@rg-racing.com...
- Page 4 LP0192 Page | 4 PICTURE 9 PICTURE 10 PICTURE 11 PICTURE 12 PICTURE 13 PICTURE 14 R&G Racing Unit 1, Shelley’s Lane, East Worldham, Alton, Hampshire, GU34 3AQ Tel: +44 (0)1420 89007 Fax: +44 (0)1420 87301 www.rg-racing.com Email: info@rg-racing.com...
- Page 5 LP0192 Page | 5 PICTURE 15 PICTURE 16 PICTURE 17 PICTURE 18 PICTURE 19 PICTURE 20 R&G Racing Unit 1, Shelley’s Lane, East Worldham, Alton, Hampshire, GU34 3AQ Tel: +44 (0)1420 89007 Fax: +44 (0)1420 87301 www.rg-racing.com Email: info@rg-racing.com...
- Page 6 LP0192 Page | 6 PICTURE 21 PICTURE 22 PICTURE 23 PICTURE 24 PICTURE 25 PICTURE 26 R&G Racing Unit 1, Shelley’s Lane, East Worldham, Alton, Hampshire, GU34 3AQ Tel: +44 (0)1420 89007 Fax: +44 (0)1420 87301 www.rg-racing.com Email: info@rg-racing.com...
- Page 7 LP0192 Page | 7 PICTURE 27 PICTURE 28 PICTURE 29 PICTURE 30 PICTURE 31 PICTURE 32 R&G Racing Unit 1, Shelley’s Lane, East Worldham, Alton, Hampshire, GU34 3AQ Tel: +44 (0)1420 89007 Fax: +44 (0)1420 87301 www.rg-racing.com Email: info@rg-racing.com...
- Page 8 LP0192 Page | 8 PICTURE 33 PICTURE 34 PICTURE 35 PICTURE 36 FITTING INSTRUCTIONS PLEASE NOTE TO FIT THIS PRODUCT YOU WILL HAVE TO REMOVE A TAMPER-PROOF BOLT FOR WHICH A TOOL AND KEY IS SUPPLIED IN KIT (ITEMS 11 AND 12). ...
- Page 9 LP0192 Gently unclip the plastic under-tray from the location tabs shown in pictures 11 and 12 and gently lower the under-tray (you will have to feed the tool kit bungee through the slot in the rear sub-frame) until it rests on the rear wheel. ...
- Page 10 LP0192 Using the three short M6 button head bolts (item 19) with the larger washers (item 20) mount the main mounting bracket (item 1) to the indicator/licence plate bracket assembly as shown in picture 27 (position as far backwards as possible and do not tighten at this stage.
- Page 11 LP0192 IMPORTANT: IF FITTING A FULL-SIZE LICENCE PLATE AND PLACING IT FAR DOWN ON THE LICENCE PLATE HANGER, THERE IS A SMALL CHANCE OF THE LICENCE PLATE HITTING THE BACK WHEEL UNDER HEAVY LOAD AND OVER LARGE BUMPS IN THE ROAD. IT IS YOUR RESPONSIBILITY TO CHECK FOR THIS POSSIBILITY AND TAKE AVOIDING ACTION.
-
Page 12: Instructions De Montage
LP0192 NOTICE DE MONTAGE POUR LP0192BK SUPPORT DE PLAQUE KAWASAKI Z1000SX TOURER ‘14- Page | 12 Assurez vous que toutes les pièces soient présentes avant de procéder au montage. La façon dont le kit est emballé ne correspond pas forcément à la façon de monter les pièces sur la moto. -
Page 13: Outils Requis
LP0192 LEGENDE ARTICLE 1 = SUPPORT DE FIXATION PRINCIPAL (TB0192BK-PART 1) (x1). ARTICLE 2 = ADAPTATEURS CLIGNOTANTS (I0026) (x4). ARTICLE 3 = PETITS COLLIERS DE SERRAGE (x6). ARTICLE 4 = CONNECTEURS CLIGNOTANT (CON0032) (x2). ARTICLE 5 = CONNECTEUR DE FEU DE PLAQUE (CON0007) (x1). POUR MODELES ’14-’16 Page | 13 ARTICLE 6 = M6x12mm RONNDELLES (x4). - Page 14 LP0192 Utiliser l’outil fourni pour enlever le boulon inviolable (article 11), placer l’outil sur la tête du boulon en veillant à ce que les vis de blocage soient alignées avec la section la plus mince de la tête du boulon et serrer les vis de blocage en utilisant la clé Allen fournie (article 12).
- Page 15 LP0192 VOUS DEVREZ COLLER LE LINCEUL AU FEU DE PLAQUE LED EN UTILISANT LA SUPER GLUE. Utiliser les colliers et clips (articles 3 et 14) pour organiser et serrer les fils ensemble, voir photo 25 en veillant à laisser l’espace autour de la fente pour les boulons et rondelles lorsqu’ils seront assemblés.
-
Page 16: Couples De Serrage Recommandés
LP0192 IMPORTANT: Si vous installez une grosse plaque, il y a un risque que la plaque entre en contact avec la roue arrière en cas de choc sur la route (bosse, grosse charge etc...). Il est de votre responsabilité de vérifier que cela ne puisse pas se produire. Ne pas effectuer ces vérifications peut entrainer des dommages ainsi que des blessures graves pour le pilote ...


