Table of Contents
Advertisement
Quick Links
DREAMOC DIAMOND 4K - ASSEMBLY GUIDE
VERSION 1.2 - ORIGINAL ASSEMBLY GUIDE
It is important to read this assembly guide before using the Dreamoc Diamond, and to follow advices and
instructions on safety, operation and general use to get the best possible experience with your Dreamoc.
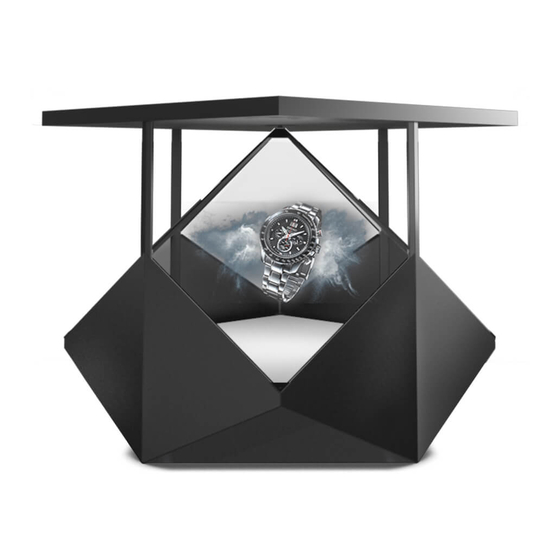
The Dreamoc Diamond is designed to showcase products and other objects in combination with free floating
3D video animations. Realfiction and Dreamoc are registered trademarks owned by Realfiction ApS.
Advertisement
Table of Contents

Subscribe to Our Youtube Channel
Related Manuals for Realfiction Dreamoc Diamond 4K


Summary of Contents for Realfiction Dreamoc Diamond 4K
- Page 1 Dreamoc. The Dreamoc Diamond is designed to showcase products and other objects in combination with free floating 3D video animations. Realfiction and Dreamoc are registered trademarks owned by Realfiction ApS.
-
Page 2: Table Of Contents
Content: When receiving the Dreamoc Diamond Setup time and persons needed Assembling the Dreamoc Diamond Assembling the chassis Attaching the light bars Connecting the picture engine modules Grounding the chassis Assembling the center stage platform and side plates Mounting the optics... -
Page 3: When Receiving The Dreamoc Diamond
When receiving the Dreamoc Diamond The Dreamoc Diamond comes in a sturdy transport case (plywood) that holds all the different parts. Please note that we cannot be hold responsible for any damage or failure that has occurred due to the use of third party constructed flight case or packaging. -
Page 4: Setup Time And Persons Needed
Setup time and persons needed Setting up the display can be done by 2 persons in around 1 hour. -
Page 5: Assembling The Dreamoc Diamond
ASSEMBLING THE DREAMOC DIAMOND Unpacking the display 1. Open the hinges on the transport case, and remove the lid. Then open each side and finish by removing the front of the case (the side with logo on) 2. Take out the 4 brown boxes (numbered 1, 2, 3 and 4) and set them aside for now. 3. -
Page 6: Assembling The Chassis
Assembling the chassis 1. Take out the bottom frame and place it on the floor. 2. Use the spirit level and umbraco key to adjust the feet on the frame in order to make the display correctly levelled. 3. Cut the 2 black strips to unbundle the grounding cable. 4. - Page 7 5.Locate the 4 corner profiles in the plywood box. Mount each of them by sliding them into place. Then fasten the 2 screws on each profile with the umbraco key. Make sure that the corner profiles and bottom frame are both mounted so they rest at the same level.
- Page 8 7. Finish by tightening the screws completely by using the angled umbraco key. 8. Rotate the transport case to access the items on the other side. 9. Locate the 2 picture engine modules. 10. Locate the corner profile that holds the power cable and match it with the corner of the picture engine that holds the power cable (screen 1).
- Page 9 11. Gently lift the first picture engine module (screen 1) and place it on top of the corner profiles. Make sure that the power cable in the corner profile matches the power cable on the picture engine module, so they can be connected later.
- Page 10 14. Now connect the 2 power cables. 15. Fasten 2 long bolts in the third corner. 16. Attach the light bar holder, by first pulling out the black power cable from underneath the picture engine module. Then attach it with 1 screw and connect the black power cable.
-
Page 11: Attaching The Light Bars
17. Take out the second picture engine module (screen 2) from the transport case, and lift it in place. Temporarily secure it with umbraco keys or screwdrivers in the same way as with the previous picture engine module (screen 1). 18. - Page 12 20. When all the light bars have been mounted, connect all the red cables and twist the exposed ends together. Then attach them to the terminal block side with the brown wire. Afterward, connect all the white cables in the same way by twisting the exposed ends together and attach them to the remaining side of the terminal block.
-
Page 13: Connecting The Picture Engine Modules
21. Complete by attaching the magnetic cable cover. Connect the picture engine modules 22. Connect the power cable from screen 2 to the power outlet located at screen 1. Then connect the HDMI cable from screen 2 to the HDMI splitter located at screen 1. Screen 2 HDMI-splitter... -
Page 14: Grounding The Chassis
Grounding the chassis 23. Install the grounding cable to your appropriate electrical installation. 24. Unbundle the power cable and connect to the power outlet. Both picture engine modules and all 4 light bars will now automatically turn on. Assembling the center stage platform and side plates 25. - Page 15 28. Attach each of the lower side plates by hinging them in place. 29. Locate brown box no. 2, containing the left-side plates. Attach these by hinging them in place. 30. Locate brown box no. 3, containing the right-side plates. Attach these by hinging them in place. 31.
-
Page 16: Mounting The Optics
32. Locate brown box no. 4, holding the 4 high-level center stage platform pieces. Mounting the optics 34. Locate the optics in the transport case. Use the supplied suction cups to safely lift the optics one by one out of the transport case, and gently mount them to the display. We recommend being two persons for this task. Important: Make sure that the red spot on each of the optics is pointing downwards. - Page 17 35. Complete the assembling by locking the optics in place using the 4 plastic corners and fastening the screw on each of them. Assembly is now finished. Please see the user manual for how to operate the display.
- Page 18 Realfiction and Dreamoc are registered trademarks owned by Realfiction ApS. Other marks may be mentioned here in that belong to other companies. © 2018 Realfcition Aps. All rights reserved. Realfiction Aps | Øster Alle 42, 7th floor | DK-2100 Copenhagen Ø Denmark | Phone: +45 70 20 64 90...
Need help?
Do you have a question about the Dreamoc Diamond 4K and is the answer not in the manual?
Questions and answers