Table of Contents
Advertisement
Quick Links
DREAMOC XL4 - USER MANUAL
VERSION 1.1 - ORIGINAL USER MANUAL
It is important to read this manual before using the Dreamoc, and to follow advices and instructions on safety, opera-
tion and general use to get the best possible experience with your Dreamoc.
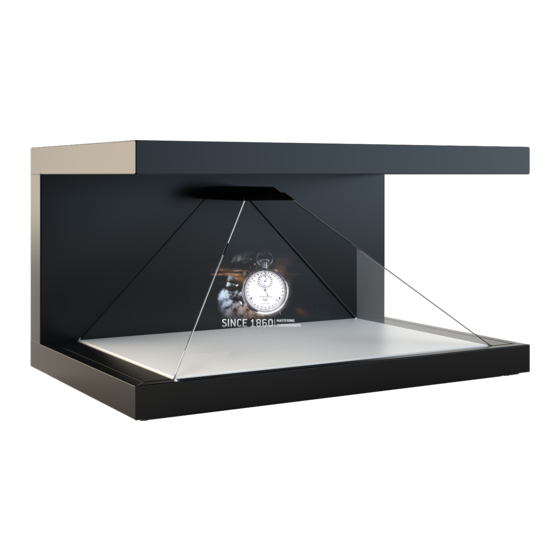
The Dreamoc is designed to showcase products and other objects in combination with free floating 3D video anima-
tions. If the Dreamoc is used for purposes other than described, the CE marking and guarantee will only be valid after
a written approval from Realfiction.
The Dreamoc is design protected in shape and form. Realfiction and Dreamoc are registered trademarks
owned by Realfiction ApS.
1
Advertisement
Table of Contents

Related Manuals for Realfiction DREAMOC XL4


Summary of Contents for Realfiction DREAMOC XL4
- Page 1 If the Dreamoc is used for purposes other than described, the CE marking and guarantee will only be valid after a written approval from Realfiction. The Dreamoc is design protected in shape and form. Realfiction and Dreamoc are registered trademarks owned by Realfiction ApS.
-
Page 2: Table Of Contents
EU-declaration of conformity Security precautions Product guarantee Package contents How to start using the Dreamoc XL4 How to place an object in the Dreamoc How to change the film content on the Dreamoc Supported file formats and use of file names... -
Page 3: Eu-Declaration Of Conformity
2014 on the approximation of Member States relating to electromagnetic compatibility. Dreamoc XL4 is designed to display and promote products along with an electronic produced and animated colour show. Content and scope of the colour show is designed in an interchangeable memory card, and worked with the client’s wishes. -
Page 4: Security Precautions
Security precautions • Installation of the Dreamoc must be done according to this manual, and must be performed by an adult (Over 21 years). • The Dreamoc must be placed on a horizontal, stable and plane surface. • Do not install the Dreamoc in narrow passageways or other places where a lot of people and equipment has to pass close by, thereby risking collisions that might cause the Dreamoc to tip over causing human injuries and damage to property. -
Page 5: Product Guarantee
Product guarantee The manufacturers guarantee includes production, materials and function of the supplied equipment. The guarantee is valid only if the supplied material is used as described in this man- ual, and to the purpose to which it has been designed. The guarantee includes repair or replacement of malfunctioning components. -
Page 6: Package Contents
When receiving the Dreamoc Please be careful when unpacking the Dreamoc. Especially the optic is a highly precise component. Package contents 1. Dreamoc XL4 display with European Schuko plug (C13 PC type cable) 2. Transport brackets 3. User manual 4. Remote control / 2 pcs AAA battery 5. -
Page 7: How To Start Using The Dreamoc Xl4
How to start using the Dreamoc XL4 The Dreamoc XL4 comes in a sturdy box or a flightcase if this has been purchased with the display. 1. Start by cutting the strips and remove the wood around the box to unpack the Dreamoc XL4. - Page 8 4. Open the hidden compartment in the left side of the display. Locate the hidden button as shown, and push the button with a finger from the outside and in (NOT up). 5. The hatch will release. Press the front part of the hatch, and the back part lifts so you can grab it.
-
Page 9: How To Place An Object In The Dreamoc
7. Finally mount the left side optic. This is the one with the piano hinge as shown. Again carefully secure it with 2 fingerscrews in the top. 8. With the optics mounted you can reposition the hatch, by inserting the front part first, and close the hidden compartment by pressing down on the back to lock it. -
Page 10: How To Change The Film Content On The Dreamoc
How to change the film content on the Dreamoc The movies are stored on a USB stick located in the top of the display. For easier access, it is located below a small sliding hatch (top-panel) on the top plate. Simply use your finger to slide the top-panel backwards, to reveal the USB stick below. -
Page 11: Supported File Formats And Use Of File Names
How to solve playback issues using Mac tutorial video (https://vimeo. com/108581691) This tutorial shows you how to delete the hidden files and make your movie work on Dreamoc XL4 when copied from Mac. Download Delete Hidden Files program on Realfiction’s Support page: support.realfiction.com/hd3... -
Page 12: How To Adjust The Led Spotlight
LCD display. How to add graphics and custom colors Since the entire chasis of the Dreamoc XL4 is made in steel, it is easy to add custom graphics and colouring using magnetic foils. -
Page 13: Cleaning The Dreamoc
NOTE: Make sure not to cover the ventilation holes on the display! Stand An ideal way to use the Dreamoc XL4 is together with any of the Dreamoc XL4 stand versions. These are designed specifically for this display, has the perfect viewing height, matches the dis- play perfectly in material, and offers different functions as well. -
Page 14: Optional Accessories For The Dreamoc Xl4
OPTIONAL ACCESSORIES FOR THE DREAMOC XL4 A range of accessories are available for the Dreamoc XL4 to enhance the ease of use and value of your Dreamoc XL4, providing elegant placement options, transport safety and even interactivity. Basic stand The Basic Stand is a great choice if you have the need to dis- play products or samples at your event or tradeshow space. -
Page 15: Why Interactivity
Why interactivity? By adding a touchscreen to your Dreamoc XL4 you can give your audience and sales staff the power to explore your entire product portfolio and select more info on specific details, parts or functions. You can also choose to create a series of interesting stories and chapters about your company that visitors can explore and learn about. - Page 16 1. First make sure all optic glasses are removed and stoved safely away. 2. Then remove the hatch for the hidden compartment on the left side of the display (as shown on page 8). 3. Now remove the white center stage by loosening the fingerscrew in the left side and gently pulling the center stage to the left to remove it completely.
- Page 17 6. Mount the Brightsign player to the bracket making sure that it is mounted upside down as shown. Mount the bracket back into the compartment with the 4 bolts. 7. The mediaplayer can now be accessed through the second sliding door on the top lid, making it easy to change content by replacing the Micro SD card.
- Page 18 9. Remove the screws holding the top lid and remove the top lid completely. Now guide the HDMI and the USB power cable up through the hole next to the player. 10. Connect the HDMI cable to the screens HDMI input 1 and the USB power cable into the screens USB input as shown.
- Page 19 Connect the power supply for the touchscreen to the power-extension cable where space is convinient. Guide the cables through the holes in the chasis. Now guide both the power cable from the powersupply and the ethernet cable out through the hole to the right of the three holes in the front part of the bottom chasis.
- Page 20 14. In this case we will place the Dreamoc XL4 on the optional SmartFrame Stand. In such a case it is more convinient to mount the touchscreen onto the stand. Loosen the top bar of the SmartFrame in one side only. Lift the top bar just enough so you can slide the two silver metal brackets supplied into the grove of the top bar.
-
Page 21: Before Transporting The Dreamoc
It important to follow the following safety precautions and methods, as failing to do so may cause irreparable damage to the display. If the display has not been packed in the same way as you received it, Realfiction cannot be held accountable for any damages that might occur. -
Page 22: Troubleshooting
• Replace driver. Film is lacking or not • Boot the Dreamoc XL4 by turning the power switch off and on again. playing at all. • If the movies have been copied to the USB stick with a Mac comput- er, you need to read: “How to solve the playback issue when using... - Page 24 Realfiction and Dreamoc are registered trademarks owned by Realfiction ApS. Other marks may be mentioned here in that belong to other companies. © 2020 Realfcition Aps. All rights reserved. Realfiction Aps | Øster Alle 42, 7th floor | DK-2100 Copenhagen Ø Denmark | Phone: +45 70 20 64 90...
Need help?
Do you have a question about the DREAMOC XL4 and is the answer not in the manual?
Questions and answers