Table of Contents
Advertisement
Quick Links
DREAMOC POP3 - USER MANUAL
VERSION 1.3
It is important to read this manual before using the Dreamoc, and to follow advices and instructions on safety, operation and
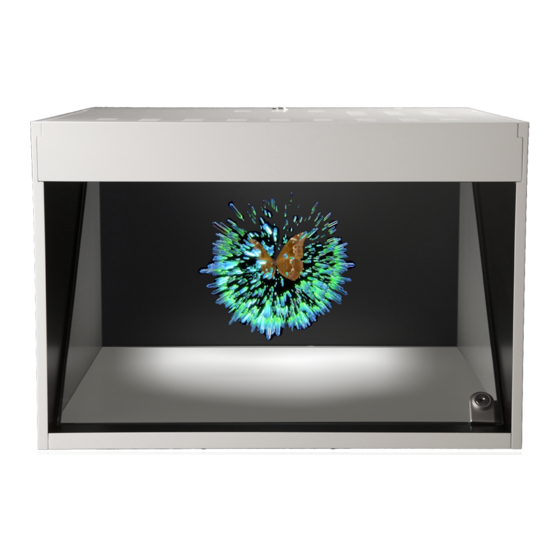
general use to get the best possible experience with your Dreamoc. The Dreamoc POP3 is a 1 sided holographic display - de-
signed to showcase products and other objects in combination with free floating 3D video animations. If the Dreamoc is used for
purposes other than described, the Compliance markings and guarantee will only be valid after a written approval from Realfic-
tion.
Advertisement
Table of Contents

Related Manuals for Realfiction DREAMOC POP3


Summary of Contents for Realfiction DREAMOC POP3
- Page 1 It is important to read this manual before using the Dreamoc, and to follow advices and instructions on safety, operation and general use to get the best possible experience with your Dreamoc. The Dreamoc POP3 is a 1 sided holographic display - de- signed to showcase products and other objects in combination with free floating 3D video animations.
-
Page 2: Table Of Contents
Product features Specifications Package content Dimensions Optional Accessories CHAPTER 5: How to start using the Dreamoc POP3 1. Remove the top 2. How to connect the power supply 3. Switch on power 4. Put back the top door 5. How to place an object in the Dreamoc 6. - Page 3 10. Content A. Dreamoc POP3 content Manual and Template B. How to change the content in Dreamoc POP3 C. How to solve playback issues when using Mac D. File names - playing order E. File formats F. Looping CHAPTER 6: Trouble shooting 1.
-
Page 4: Chapter 1: Eu-Declaration Of Conformity
2014 on the approximation of Member States relating to electromagnetic compatibility. Dreamoc POP3 is designed to display and promote products along with an electronic produced and an- imated colour show. Content and scope of the colour show is designed in an interchangeable memory card, and worked with the client’s wishes. -
Page 5: Chapter 2: Important Safety Instructions
CHAPTER 2 Important Safety Instructions Before getting started • Read this user manual and follow the instructions. • Installation of the Dreamoc must be done according to this user manual, and must be performed by an adult (Over 21 years). Placement •... -
Page 6: Cleaning
• Keep the memory card, keys, screws and all accessories out of reach of children to prevent swallow- ing. • Only use attachments/accessories specified by the Realfiction • Refer all servicing to qualified service personnel. Servicing is required when the unit has been... -
Page 7: Chapter 3: Product Guarantee
CHAPTER 3: Product guarantee The manufacturers guarantee includes production, materials and function of the supplied equipment. The guarantee is valid only if the supplied material is used as described in this manual, and to the purpose to which it has been designed. The guarantee includes repair or replacement of malfunctioning components. -
Page 8: Chapter 4: Dreamoc Pop3 Factsheet
• Power adapter ( LITEON / Adapter 65W/19V / PA-1650-64 / Power DC Jack19V ) • Euro power cable 1,5 m • Set with two keys for the Dreamoc POP3 (same code for all Dreamoc POP3 locks) • Cleaning cloth... -
Page 9: Dimensions
Dreamoc POP3 Optional Accessories Stand If you wish to build your own stand use the “Dreamoc POP3 - bottom view” drawing dimensions (above). The Dreamoc POP3 bottom surface is flat with no indentations. Dreamoc Play App With the Dreamoc Play App your Dreamoc easily becomes an interactive selling or presentation tool. -
Page 10: Chapter 5: How To Start Using The Dreamoc Pop3
NOTE: Once opened the top door should be taken completely off to avoid damage! 2. How to connect the power supply? Dreamoc POP3 uses a separate power supply making it easy to change it to different country vari- ations. The power adapter is packed and sticked to the LCD screen as shown. Remove the foil and... -
Page 11: Switch On Power
The LCD screen power input is located next to the I/O switch. Insert the power cable and connect it to a main outlet. AC 100-240V, 50 - 60 Hz, 240W. Make sure the cable is positioned like this. 3. Switch on power Check that the I/O switch is set to I (on/off: I = ON, O = OFF). -
Page 12: How To Place An Object In The Dreamoc
5. How to place an object in the Dreamoc? To place a physical object inside the display you need to do the following: To access the chamber open the lock with the included key. Lift up the optic a few cm. by holding the key. -
Page 13: Internet
The Dreamoc POP3 can be connected to the Internet via a RJ45 cable - see RJ45 input below the picture. (The internet input is placed on the top of the Dreamoc POP3 - to get access you need to remove the top lid of the Dreamoc.) B. -
Page 14: Hdmi Input
Connect the HDMI cable to the Dreamoc and make sure the cable leaves the housing as shown. (The HDMI input is placed on the top of the Dreamoc POP3 - to get access you need to remove the top lid of the Dreamoc.) With an HDMI cable you can connect any external device which has an HDMI output: the external device can be an iPad, Tablet –... -
Page 15: How To Operate The Dreamoc Pop3 - Buttons
8. How to operate the Dreamoc POP3 - Buttons The buttons are placed next to the power input. The buttons have been slightly retracted to avoid hitting them by mistake. This means you need to use a slim device to operate the buttons (it can be an umbraco key, a pencil etc.) -
Page 16: Lightcontrol
9. Lightcontrol One of the features in the Dreamoc POP3, is the ability to control and synchronize the light inside the chamber with a 1kHz sound. We call this feature Lightcontrol. To activate the Lightcontrol press both up and down light buttons in the same time. -
Page 17: Content
B. How to insert/change the content on the Dreamoc The SD card input is placed on the top of the Dreamoc POP3 (next to the I/O button) - to get access you need to remove the top lid of the Dreamoc. -
Page 18: File Names - Playing Order
F. File names - Playing order The Dreamoc will play all supported movies on the card in numerical and alphabetical order - Number order first and after that alphabetical order ( See Below the order table) Once the last movie has finished playing, it will start playing from the top again. -
Page 19: File Formats
A filename cannot contain any of the following characters: < (less than) > (greater than) : (colon) “ (double quote) / (forward slash) \ (backslash) | (vertical bar or pipe) ? (question mark) * (asterisk) Naming files include any combination of letters (A-Z) and numbers (0-9), plus the following special charac- ters ^ Accent circumflex (caret) ! Exclamation point... -
Page 20: Chapter 6: Trouble Shooting
Check that the power switch on the correctly. Dreamoc POP3 are ON, check if the green c. Power supply de- LED is on, if green LED light change the fect. -
Page 21: No Picture From Hdmi Input
PROBLEM POSSIBLE CAUSE ACTION No picture from HDMI a. SD card are not a. Remove SD card and boot the Dreamoc input removed. POP3. b. Defect HDMI source b. Try to correct the HDMI source to anoth- or HDMI cable. er LCD monitor. - Page 22 Realfiction and Dreamoc are registered trademarks owned by Realfiction ApS. Other marks may be mentioned here in that belong to other companies. © 2015 Realfcition Aps. All rights reserved. Realfiction Aps | Øster Alle 42, 7th floor | DK-2100 Copenhagen Ø Denmark | Phone: +45 70 20 64 90...
Need help?
Do you have a question about the DREAMOC POP3 and is the answer not in the manual?
Questions and answers