Table of Contents
Advertisement
Quick Links
www.leeandplumpton.co.uk
RANGE
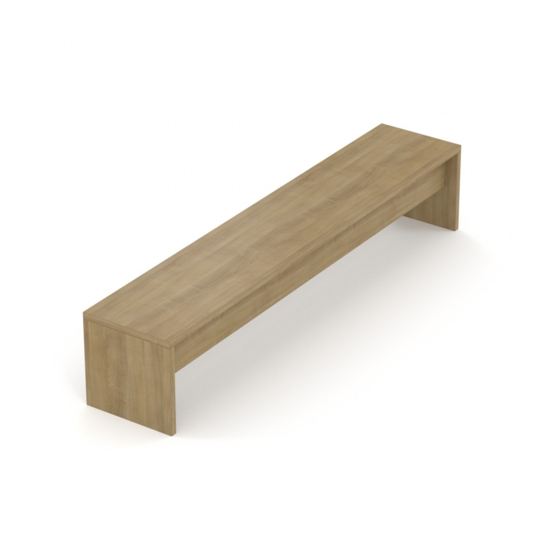
Planar Bench
REF:
1600mm and 1800mm Wide
Read this leaflet before
assembly
COMPONENT PARTS
Item 1
Top Panel
Qty 1
Item 2
Modesty Panel
Qty 2
Item 4
Item 5
Wood Dowels
Minifix Bolt Chipfast 34x11mm
F.0431
F.0532
Qty 4
Qty 14
Item 9
Item 10
F.0551
Angle Bracket
Foot
Qty 4
Qty 4
1600mm
2 People
Required
Item 6
F.0414
5/8" x 8g Pan Pozi BZP
Qty 32
1800mm
Item 3
Side Panel
Qty 2
Item 7
Item 8
F.0434
F.0467
Minifix Alloy Cams 18mm
Minifix Alloy Cams 25mm
Qty 10
Qty 4
No. 134 A/2257 Revision A 17/01/2020
1
Advertisement
Table of Contents

Related Manuals for Lee & Plumpton Planar Bench


Summary of Contents for Lee & Plumpton Planar Bench
- Page 1 ASSEMBLY INSTRUCTIONS RANGE Planar Bench REF: 1600mm and 1800mm Wide 1600mm 1800mm 2 People Read this leaflet before Required assembly COMPONENT PARTS Item 1 Top Panel Item 3 Qty 1 Side Panel Qty 2 Item 2 Modesty Panel Qty 2...
- Page 2 TOOLS REQUIRED BEFORE YOU BEGIN... • Short Pozi head screwdriver • Check you have all the tools and components required • Keep children and animals away from small parts • Ensure you have adequate space • Assemble product on a flat, clean surface •...
- Page 3 ASSEMBLY INSTRUCTIONS STEP 4 Place the Side Panels (3) into position onto the Modesty (2) Panels. Lock the Cams (7) with a half turn. STEP 5 Attach the Angle Brackets (10) to the Side Panels (3), using 4 Screws (6) per Bracket.
- Page 4 ASSEMBLY INSTRUCTIONS STEP 7 Place Sides (3) and Modesty Panels (2) into position on the Top Panel (1). Lock the Cams with a half turn. STEP 8 Attach the Feet (9) by screwing them into the insert in the Side Panels. STEP 9 Carefully stand the bench upright.
Need help?
Do you have a question about the Planar Bench and is the answer not in the manual?
Questions and answers