IBM Storwize V7000 Unified Quick Installation Manual
Hide thumbs
Also See for Storwize V7000 Unified:
- Introduction and implementation manual (670 pages) ,
- Problem determination manual (474 pages) ,
- Troubleshooting and maintenance manual (189 pages)
Table of Contents
Advertisement
Quick Links
Advertisement
Table of Contents

Related Manuals for IBM Storwize V7000 Unified


Summary of Contents for IBM Storwize V7000 Unified
- Page 1 IBM Storwize V7000 Unified Quick Installation Guide GA32-1056-07...
- Page 2 Before using this information and the product it supports, read the general information in “Notices” on page 77, the information in the “Safety and environmental notices” on page ix, as well as the information in the IBM Environmental Notices and User Guide , which is provided on a DVD.
-
Page 3: Table Of Contents
Sending your comments . . xxi Appendix. Accessibility features for IBM Storwize V7000 Unified ..75 Chapter 1. Before you begin the installation ... . . 1 Notices . - Page 4 Storwize V7000 Unified: Quick Installation Guide...
-
Page 5: Figures
Install the front end of the slide rails. . . 38 LEDs on the power supply units of the control Install the front end of the slide rails. . . 38 enclosure . . 59 © Copyright IBM Corp. 2011, 2012... - Page 6 Storwize V7000 Unified: Quick Installation Guide...
-
Page 7: Tables
Tables Storwize V7000 Unified library . . xviii LDAP CONFIGURATION INFORMATION Other IBM publications . xx NIS configuration information . . 25 IBM documentation and related websites Use this table to identify the file module, The following IP address information is control enclosure, and expansion unit port required before initializing your system. - Page 8 Storwize V7000 Unified: Quick Installation Guide...
-
Page 9: Safety And Environmental Notices
DANGER A danger notice indicates the presence of a hazard that has the potential of causing death or serious personal injury. (D002) 2. Locate IBM Systems Safety Notices with the user publications that were provided ® with the Storwize V7000 Unified hardware. - Page 10 Les sikkerhetsinformasjonen (Safety Information) før du installerer dette produktet. Antes de instalar este produto, leia as Informações sobre Segurança. Antes de instalar este producto, lea la información de seguridad. Läs säkerhetsinformationen innan du installerar den här produkten. Storwize V7000 Unified: Quick Installation Guide...
-
Page 11: Safety Statements
Safety statements Each caution and danger statement in this document is labeled with a number. This number is used to cross reference an English-language caution or danger statement with translated versions of the caution or danger statement in the Safety Information document. - Page 12 Statement 2 CAUTION: When replacing the lithium battery, use only IBM Part Number 33F8354 or an equivalent type battery recommended by the manufacturer. If your system has a module containing a lithium battery, replace it only with the same module type made by the same manufacturer.
- Page 13 DANGER Some laser products contain an embedded Class 3A or Class 3B laser diode. Note the following. Laser radiation when open. Do not stare into the beam, do not view directly with optical instruments, and avoid direct exposure to the beam. Class 1 Laser Product Laser Klasse 1 Laser Klass 1...
- Page 14 240 V under any distribution fault condition. Important: This product is not suitable for use with visual display workplace devices according to Clause 2 of the German Ordinance for Work with Visual Display Units. Storwize V7000 Unified: Quick Installation Guide...
-
Page 15: Sound Pressure
Sound pressure Attention: Depending on local conditions, the sound pressure can exceed 85 dB(A) during service operations. In such cases, wear appropriate hearing protection. Safety and environmental notices... - Page 16 Storwize V7000 Unified: Quick Installation Guide...
-
Page 17: About This Guide
About this guide This guide describes how to install the IBM Storwize V7000 Unified system. The chapters that follow introduce you to the hardware components and requirements needed for installing the Storwize V7000 Unified system. Who should use this guide This guide is intended for users installing the Storwize V7000 Unified system. -
Page 18: Storwize V7000 Unified Library And Related Publications
Storwize V7000 Unified library Unless otherwise noted, the publications in the Storwize V7000 Unified library are available in Adobe portable document format (PDF) from the following website: www.ibm.com/storage/support/storwize/v7000/unified Each of the PDF publications in Table 1 is available in this information center by clicking the number in the “Order number”... - Page 19 SC28-6872 (contains Machine Code contains the License Z125-5468) Agreement for Machine Code for the Storwize V7000 Unified product. Other IBM publications Table 2 on page xx lists IBM publications that contain information related to the Storwize V7000 Unified. About this guide...
-
Page 20: How To Order Ibm Publications
Some publications are available for you to view or download at no charge. You can also order publications. The publications center displays prices in your local currency. You can access the IBM Publications Center through the following website: www.ibm.com/e-business/linkweb/publications/servlet/pbi.wss... -
Page 21: Sending Your Comments
To submit any comments about this book or any other Storwize V7000 Unified documentation: v Go to the feedback page on the website for the Storwize V7000 Unified Information Center at publib.boulder.ibm.com/infocenter/storwize/unified_ic/ index.jsp?topic=/com.ibm.storwize.v7000.unified.doc/feedback_ifs.htm. There you can use the feedback page to enter and submit comments or browse to the topic and use the feedback link in the running footer of that page to identify the topic for which you have a comment. - Page 22 Storwize V7000 Unified: Quick Installation Guide...
-
Page 23: Chapter 1. Before You Begin The Installation
It ends with enabling the Tivoli Assist On-site support program. Occasionally you are referred to topics in the Storwize V7000 Unified Information Center. A copy of the Storwize V7000 Unified Information Center is on the CD that is included in your shipping order. Important information: 1. - Page 24 __ v Environmental flyers __ v Safety notices __ v Limited Warranty information __ v Documentation DVD that contains the publication PDFs, and the IBM Storwize V7000 Unified Information Center content. __ v License information __ v License Function authorization document...
-
Page 25: Step 2. Identifying The Hardware Components
__ – Cable ties __ – Two sets of four M6 screws per rail (two rails) __ – Two sets of two 10-32 screws per chassis __ – Cable management support arm __ – Cable management arm mounting bracket __ – Cable management arm stop bracket __ –... -
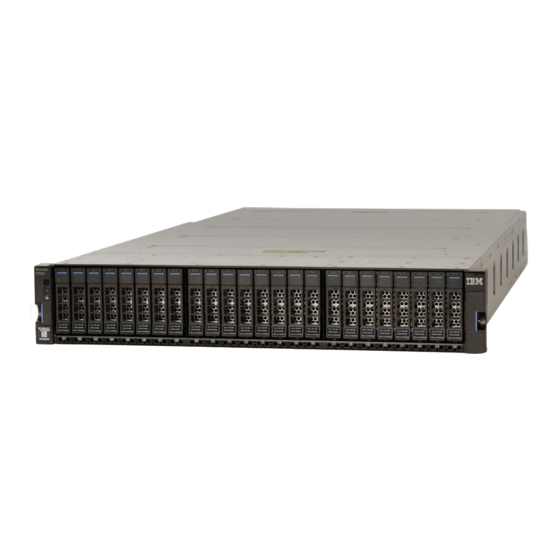
Page 26: This Figure Shows 24 Drives And Two End Caps (Model 2076-124)
4 . Canister 3 is top side up, and canister 4 is inverted, or top side down. Figure 4 on page 5 shows the rear view of a model 2076-112 or a model 2076-124 control enclosure and identifies the location of the ports. Storwize V7000 Unified: Quick Installation Guide... -
Page 27: This Figure Shows The Data Ports In The Rear Of The Control Enclosure
Figure 4. This figure shows the data ports in the rear of the control enclosure. 1 Fibre Channel ports. Each canister has four Fibre Channel ports. They are in a block of four in two rows of two connectors. The ports are numbered 1 - 4 from left to right, top to bottom. -
Page 28: Gbps Ethernet Ports On The Rear Of The
3 , and the lower canister is canister 4 . Canister 3 is top side up, and canister 4 is inverted, or top side down. Figure 7 on page 7 shows the rear view of an expansion enclosure and identifies the SAS port locations. Storwize V7000 Unified: Quick Installation Guide... -
Page 29: Sas Ports And Leds In Rear Of Expansion
Figure 7. SAS ports and LEDs in rear of expansion enclosure Each canister has two SAS ports that are numbered 1 on the left 1 and 2 on the right 2 . Port 1 must be connected if you are adding one expansion enclosure. Port 2 must be connected if you are adding a second expansion enclosure. -
Page 30: Step 3. Verifying Environmental Requirements
This step includes verifying that adequate space in a suitable rack is available and that requirements for power and environmental conditions are met. This documentation assumes that you have completed the physical planning for the environment of your system. Storwize V7000 Unified: Quick Installation Guide... -
Page 31: Step 4. Reviewing Enclosure Location Guidelines
If you have not done the environmental planning for your system, see the Storwize V7000 Unified physical installation planning topic in the Storwize V7000 Unified Information Center. You must use a supported web browser. Verify that you are using a supported web browser from the following website: http://publib.boulder.ibm.com/infocenter/storwize/unified_ic/topic/... -
Page 32: Enclosure
Expansion Enclosure 8 Expansion Enclosure 6 Expansion Enclosure 4 Expansion Enclosure 2 Control Enclosure Expansion Enclosure 1 Expansion Enclosure 3 Expansion Enclosure 5 Expansion Enclosure 7 Expansion Enclosure 9 Figure 10. Recommended rack locations File modules: Storwize V7000 Unified: Quick Installation Guide... -
Page 33: Step 5. Gather Information
A reliable way to check that an IP address is not already in use is to logon to a machine that is in the same subnet as the Storwize V7000 Unified system uses for management communications. Then ping the new IP addresses. For example, ping each of the IP addresses that you intend to use in the InitTool.exe. -
Page 34: Information Required Before Initializing Your System
Storwize V7000 node canister 2 service IP address ( if you intend to set this ) v Storwize V7000 Unified management IP address v File module 1 IP address v File module 2 IP address v The four IP addresses in the internal IP address range that you intend to chose for management communication between the file modules. -
Page 35: Examples Of The Ip Addresses And Network Services Needed For The System. The Expansion Enclosures Are Not Shown
EE Fibre Channel direct connection from file modules to node canisters Note: You cannot use VLAN-based subnets to configure the system network. To configure the Storwize V7000 Unified management IP address, file module 1 and 2 IP addresses, subnet mask, and gateway address, you must provide non-VLAN based network information. - Page 36 Subnet mask for the network subnet in which the management IP addresses for the system will all reside. (such as 255.255.255.0) Network gateway IP address The network gateway IP address for this subnet (such as 123.123.123.1) Storwize V7000 Unified: Quick Installation Guide...
-
Page 37: Information Required Before Starting Initial Configuration Of Your System
11. Storwize V7000 Unified Management IP address for the management IP address Storwize V7000 Unified system. This gives access to the management GUI and CLI running on which ever file module is currently the active management node (such as 123.123.123.10) -
Page 38: Here Are Examples Of Ip Addresses And
AA 1 Gbps Ethernet direct connection between the file modules BB 10 Gbps Ethernet network CC Fibre Channel network DD 1 Gbps Ethernet EE Fibre Channel direct connection from file module to node canisters Required information: Storwize V7000 Unified: Quick Installation Guide... -
Page 39: This Table Can Be Used For Recording The
Field Value Notes System name The name of the Storwize V7000 Unified system. It is best if this is also the IP name for the management IP address (For example : myfilesystem1) NetBIOS name Name used for NetBIOS access to the system. -
Page 40: Information That The System Will Provide To Ibm Remote Technical Support
Email server IP The IP address of your email server for outgoing mail address (for example, 123.123.123.104) Table 6. Information that the system will provide to IBM Remote Technical Support Field Value Note Company Name The name of your company... -
Page 41: Information
Table 6. Information that the system will provide to IBM Remote Technical Support (continued) Field Value Note Userid For Proxy Optional. If a proxy server is needed, and the Server (For Call proxy server requires a user ID and password, Home) record the user ID here. - Page 42 The Storwize V7000 Unified systems require one, and only one, authentication system to allow network users to access file systems or file sets exported (shared) by the Storwize V7000 Unified system. The authentication system may also be used to provide User ID mapping. Several authentication methods are supported.
- Page 43 ID mapping is preferred, internal mapping can be done using a table local to the Storwize V7000 Unified to map Windows user and group objects to arbitrary Unix UIDs and GIDs. That table is not accessible externally, even to another Storwize V7000 Unified system for asynchronous file system replication.
-
Page 44: Authentication Method Information. Refer To The Notes Above
The following user ID and the password are used to authenticate to the Active Directory server. Active Directory This is the password that must be provided Password when communicating with the remote Active Directory server. Storwize V7000 Unified: Quick Installation Guide... - Page 45 Table 10. Active Directory Configuration Information (continued) Field Value Note SFU DOMAIN NAME If you checked Services For Unix (SFU) in the Options field of Table 9 on page 22, then you must complete this field. If you did not check SFU, leave this field blank.
-
Page 46: Ldap Configuration Information
SSL or TLS. Note: When SSL or TLS is used, a security certificate file must be copied from your LDAP server to the Storwize V7000 Unified Management Node. Certificate Path If the SSL method is Off, leave this field blank. -
Page 47: Nis Configuration Information
Table 12. NIS configuration information Field Value Note NIS MODE NIS is typically used for one of the following [ ] Basic - NIS is used (to provide NFS purposes: NetGroup support) in an environment v NIS can be used to provide NFS Netgroup without Active Directory (AD), LDAP, or support in an environment without AD, Samba Primary Domain Controller... - Page 48 To specify rules for multiple AD or PDC domains, separate the rules with a semicolon. Example: ad_domain1:DENY_ACCESS; ad_domain2:AUTO; ad_domain3:DEFAULT:ad_domain3\guest NIS DOMAIN This field must be used to specify the NIS Domain that is stored in the registry. Storwize V7000 Unified: Quick Installation Guide...
- Page 49 Table 12. NIS configuration information (continued) Field Value Note Use Id Map [ ] Use ID Map - NIS is used to map If the NIS Mode is Basic, leave this field blank. UNIX IDs to Windows IDs for an If you checked NIS - NFS NetGroup support environment where Active Directory without User ID Mapping in the Options field...
- Page 50 Storwize V7000 Unified: Quick Installation Guide...
-
Page 51: Chapter 2. Performing The Hardware Installation
– Minimum depth of 70 mm (2.76 inch) between the front mounting flange and inside of the front door. – Minimum depth of 157 mm (6.18 inch) between the rear mounting flange and inside of the rear door. © Copyright IBM Corp. 2011, 2012... -
Page 52: Securing An Enclosure To A Rack Cabinet
2. Working at the front of the rack cabinet, identify the two standard rack units of space in the rack into which you want to install the support rails. Figure 14 on page 31 shows two rack units with the front mounting holes identified. Storwize V7000 Unified: Quick Installation Guide... -
Page 53: Hole Locations In The Front Of The Rack
2 Units Figure 14. Hole locations in the front of the rack 1 Bottom rail location pin hole 2 Enclosure mounting screw hole. Do not insert the screw until the enclosure is installed. 3 Rack mounting screw hole 4 Top rail location pin hole 3. -
Page 54: Step 7. Installing The Enclosures
Following your enclosure location plan, install the correct type of enclosure starting from the bottom. 1. On either side of the drive assemblies, remove the enclosure end caps by squeezing the middle of the cap and pulling it away from the front of the enclosure. Storwize V7000 Unified: Quick Installation Guide... -
Page 55: Removing The Enclosure End Cap
Figure 16. Removing the enclosure end cap 2. Align the enclosure with the front of the rack cabinet. 3. Carefully slide the enclosure into the rack along the rails until the enclosure is fully inserted. Notes: a. The preinstalled rails on the sides of the enclosure must fit into the rack-mounted rails that you previously installed. -
Page 56: Step 8. Installing The Support Rails For File Module Slides
Remove the rack doors and side panels to provide easier access during installation. v Do not overload the power outlet when you install multiple devices in the rack cabinet. v Install the file module in a rack that meets the following requirements: Storwize V7000 Unified: Quick Installation Guide... -
Page 57: Cable Management Arm Box Contents
– Minimum depth of 70 mm (2.76 inch) between the front mounting flange and inside of the front door. – Minimum depth of 157 mm (6.18 inch) between the rear mounting flange and inside of the rear door. – Minimum depth of 718 mm (28.27 inch) and maximum depth of 762 mm (30 inch) between the front and rear mounting flanges to support the use of the cable management arm. -
Page 58: Friction Rail Box Contents
2. Each slide rail is marked with either an R (right) or an L (left). Select one of the slide rails and pull the rear bracket all the way back. If a thumbscrew is installed in the slide rail, remove it. Storwize V7000 Unified: Quick Installation Guide... -
Page 59: Open The Rear Slide Rail Hooks
Figure 21. Open the rear slide rail hooks. Note: If you are installing the slide rails into a 1U space with devices already installed directly above and below this 1U space, you need to extend the slide rails to slide the rear of the slide rails into the rear of the rack. When installing a 2U device, be sure to install the slide rails in the bottom positon of the 2U area in the rack. -
Page 60: Step 9. Installing The File Modules
3 until the other nail heads slip into the other slots on the slide rails. Storwize V7000 Unified: Quick Installation Guide... -
Page 61: Install The File Module On The Slide Rails
Figure 25. Install the file module on the slide rails. 2. Lift the locking levers 1 on the slide rails and push the file module 2 all the way into the rack until it clicks into place. Figure 26. Slide the file module into the rack. 3. -
Page 62: Install The Cable Management Support Arm. It
Push the tabs until they snap into place. Arm junctions Figure 28. Install the cable management arm. 5. Make sure that the support rail is located between the 2 nail head features. Storwize V7000 Unified: Quick Installation Guide... -
Page 63: Adjust The Location Of The Cable Management Arm
Figure 29. Adjust the location of the cable management arm. 6. Attach the power cords and other cables to the rear of the file module (including keyboard, monitor, and mouse cables, if required). Route the cables and power cords on the cable management arm 1 and secure them with cable ties or hook-and-loop fasteners. -
Page 64: Step 10. Connecting The Sas Cables To The Expansion Enclosures
Note: The enclosure terminology that is used in this topic is described fully in “Step 2. Identifying the hardware components” on page 3. Be aware of these guidelines when you begin to attach the cables to the SAS ports: Storwize V7000 Unified: Quick Installation Guide... -
Page 65: Use This Table To Identify The File Module
2 of canister 2. v Ensure that cables are installed in a tidy manner to reduce the risk of cable damage when Storwize V7000 Unified replaceable units are removed or inserted. v Arrange your cables to provide access to: –... -
Page 66: Internal Cabling Connections Between The Control Enclosure (A) And The Expansion Enclosures (B & C)
Expansion 6 6 Expansions Upper canister port 2 Upper canister port 1 Lower canister port 2 Lower canister port 1 Expansion 5 Expansion 7 7 Expansions Upper canister port 2 Upper canister port 1 Storwize V7000 Unified: Quick Installation Guide... -
Page 67: Attaching An Expansion Enclosure To The Control Enclosure
Table 14. How to connect SAS cables to expansion units. (continued) SAS Connections: How the first unit connects to the second unit First Unit Second Unit Number of Expansions Lower canister port 2 Lower canister port 1 Expansion 6 Expansion 8 8 Expansions Upper canister port 2 Upper canister port 1... -
Page 68: Adding A Second Expansion Enclosure
1 on the upper canister. Note: The connecting sequence from port 2 of the node canister is called chain 2. 4. Attach the SAS cables from the first expansion enclosure to the third expansion enclosure. Storwize V7000 Unified: Quick Installation Guide... -
Page 69: Step 11. Attaching The Ethernet Cables
Expansion enclosure 2 Control enclosure Expansion enclosure 1 Expansion enclosure 3 Figure 36. Attaching SAS cables to the enclosures a. Port 2 9 of the upper canister, expansion enclosure 1, attaches to Port 1 10 of the upper canister, expansion enclosure 3. b. -
Page 70: Control Enclosure Ethernet Network Connections
This task assumes that your initial planning has determined where the Ethernet cables are to be located. The Storwize V7000 Unified control enclosure requires at least one and a maximum of two 1 Gbps Ethernet connections. Refer to Figure 37, Figure 38 on page 49, and Table 15 on page 49. -
Page 71: Gbps Ethernet Ports On The Rear Of The
Figure 38. 10 Gbps Ethernet ports on the rear of the Storwize V7000 enclosure 1 10 Gbps Ethernet port 3 which is the left port. 2 10 Gbps Ethernet port 4 which is the right port. Table 15. Ethernet connections available with the control enclosure IP address is assigned by Item... -
Page 72: File Module Ethernet Direct Connections
(The file modules must be able to communicate over the network with the Storwize V7000 control enclosure.) Built-in Ethernet 1 Gbps external Optional port 4 network management, connection optional service, optional file access Storwize V7000 Unified: Quick Installation Guide... - Page 73 If you encounter that situation, change the service IP addresses on the new nodes before connecting the Ethernet cables. For details, see Figure 39 on page 50 or see the Storwize V7000 Unified Problem Determination Guide PDF on the DVD for further information about setting service IP addresses using a USB flash drive.
-
Page 74: Step 12. Attaching The Fibre Channel Cables
Route the Fibre Channel cables through the Cable Management Arms. Note: Fibre Channel cables are provided by IBM with the file modules. v Repeat the previous step for the other file module. -
Page 75: Diagram Showing How To Connect The File Modules To The Control Enclosure Using Fibre Channel Cables. Refer To Previous Table
2 = 3 = 4 = 5 = 6 = 7 = 8 = Note: If you want this control enclosure to communicate with other Storwize V7000 control enclosures, storage controllers, the Storwize V7000 Unified or block Chapter 2. Performing the hardware installation... -
Page 76: Step 13. Connecting The Power Cords
Perform the following steps when you attach the power cord to each power supply unit: 1. Straighten the cable tie on the cable retention bracket. The cable retention bracket is attached to the power supply unit. 2. Open the cable retention bracket. Storwize V7000 Unified: Quick Installation Guide... -
Page 77: Unlocking The Cable Retention Bracket
4. Attach a power cord to each of the two power supply units in each enclosure. Ensure that cables are installed in a tidy manner to reduce the risk of cable damage when Storwize V7000 Unified replaceable units are removed or inserted. -
Page 78: Step 14. Powering The System On And Off
Attention: Do not operate the system when the drive assemblies are missing. Drive assemblies that are missing disrupt the airflow; the drives do not receive sufficient cooling. You must insert blank carriers into unused drive bays. Storwize V7000 Unified: Quick Installation Guide... -
Page 79: Drives And Two End Caps
2. Use the information in Table 18 on page 58 to verify the state of the light emitting diodes (LEDs) on the system. Verify that no faults are detected. See the Storwize V7000 Unified Problem Determination Guide PDF on the CD if problems are encountered. -
Page 80: Leds On The Power Supply Units Of The Expansion Enclosure
The LED dc power failure LED is off. locations are inverted for ac power failure LED is off. power supply unit 2, which is the right power supply. Powering on a control enclosure: Storwize V7000 Unified: Quick Installation Guide... -
Page 81: Leds On The Power Supply Units Of The Control
1. Power on the control enclosure, if it is not already powered on and configured. Use the power switch on each of the two power supply units, located in the back of the enclosure. 2. Use Table 19 to verify the state of the LEDs on the system. Verify that no faults are detected. - Page 82 LED is on or flashing. Attention: Do not go to the next section until the LEDs are in the required states. If any error lights are displayed, see the Storwize V7000 Unified Problem Determination Guide documentation CD for more information about light path issues.
- Page 83 File module power features: When the file module is connected to a power source but is not turned on, the operating system does not run, and all core logic except for the integrated management module is shut down. However, the file module can respond to requests from the integrated management module, such as a remote request to turn on the file module.
- Page 84 Storwize V7000 Unified: Quick Installation Guide...
-
Page 85: Chapter 3. Initializing The System
InitTool.exe. Note: If you are running a non-Windows operating system, skip to 4 on page 3. Select the Initialize a new Storwize V7000 Unified option from the Welcome panel of the initialization tool. Click Next. Use the initialization tool to complete the following steps: Note: See 4 on page 64 for details on IP addresses that are used in these steps. -
Page 86: Step 16. Initialize The Storwize V7000
LED is blinking green on each of the node canisters. 2. Insert the USB flash drive into either USB connector (located at the back of the Storwize V7000 control enclosure) on the upper canister (node 1). While the Storwize V7000 Unified: Quick Installation Guide... -
Page 87: Step 17. Initializing The File Modules
This should only take a few minutes, but it might take more than one hour if the Storwize V7000 Unified software level is older than 1.3.2. 4. Insert the USB flash drive into a Windows PC and run the initialization tool executable program that is on the USB flash drive. - Page 88 Storwize V7000 Unified: Quick Installation Guide...
-
Page 89: Chapter 4. Configuring The System
Step 18. Configuring the system using the management GUI Use the management GUI to configure your system. About this task Use the management GUI to configure your Storwize V7000 Unified system What to do next Note: For each window, complete the required information, then select Next, verify that there is a green check mark when the task results are presented, and select Close. -
Page 90: Step 19. Change Default Passwords
The 2 in the command can range from 0 (midnight) to 23 (11 p.m.). Press Enter. 4. Exit the ssh session. Step 19. Change default passwords Use the ssh connection to set the superuser, root, and admin passwords. Storwize V7000 Unified: Quick Installation Guide... -
Page 91: Step 20. Check The Storwize V7000 Unified System Status
Step 21. Upgrade the Storwize V7000 Unified software Upgrade the system software if necessary. About this task Use the management GUI to install the latest Storwize V7000 Unified software. Procedure Select Settings and then General from the management GUI. From the General menu select Upgrade Software. -
Page 92: Step 22. Problems With Initial Configuration
– Product Group: Storage Systems – Product Family: Disk Systems – Product: IBM Storwize V7000 Unified – Release: All – Platform: All Before loading the USB flash drive verify it has a FAT32 formatted file system. - Page 93 Navigate to the satask_results.html file and scan for errors and follow the service action recommendation. Take that action and retry installation. An error is posted in the satask_results html: Take the recommended service action given by sainfo lsservicerecommendation in the satask_results html file, reboot the node, and restart the initial setup procedure. If satask_results.html contains node error code 835 or node error code 550 then this can indicate that the node canisters were not able to communicate with each other at some time during the creation of the block cluster.
- Page 94 SONAS_results.txt file and open it. Check for errors and corrective actions (refer to Storwize V7000 Unified Problem Determination Guide PDF on the CD). If no errors are listed, reboot both file modules, allow file modules to boot completely, reinsert the USB flash drive as originally instructed and try again.
-
Page 95: Step 23. Enable Ibm Tivoli Assist On-Site (Aos)
3. Click the Edit button at the bottom. 4. Click Enable Assist on Site (AOS) 5. Select either Lights On or Lights Out. For Storwize V7000 Unified it is recommend to select Lights Out. Lights On establishes a connection through... -
Page 96: Step 25. Next Steps
Problem solving information v Product information and publications Procedure To register for My Notifications: 1. Establish an IBM ID and password at https://www.ibm.com/account/myibm/ profile.do?cc=us&lc=en&page=reg. 2. Then go to https://www.ibm.com/support/mynotifications to set up your notification preferences. Step 25. Next steps After you have completed the initialization and initial configuration of your system here are some pointers to the next configuration steps. -
Page 97: Appendix. Accessibility Features For Ibm Storwize V7000 Unified
Accessibility features help a user who has a physical disability, such as restricted mobility or limited vision, to use software products successfully. Accessibility features These are the major accessibility features associated with the Storwize V7000 Unified Information Center: v You can use screen-reader software and a digital speech synthesizer to hear what is displayed on the screen. - Page 98 Storwize V7000 Unified: Quick Installation Guide...
-
Page 99: Notices
Web sites. The materials at those Web sites are not part of the materials for this IBM product and use of those Web sites is at your own risk. - Page 100 IBM may use or distribute any of the information you supply in any way it believes appropriate without incurring any obligation to you. Licensees of this program who wish to have information about it for the purpose of enabling: (i) the exchange of information between independently created...
-
Page 101: Trademarks
IBM, therefore, cannot guarantee or imply reliability, serviceability, or function of these programs. The sample programs are provided "AS IS", without warranty of any kind. IBM shall not be liable for any damages arising out of your use of the sample programs. -
Page 102: Industry Canada Compliance Statement
Properly shielded and grounded cables and connectors must be used in order to meet FCC emission limits. IBM is not responsible for any radio or television interference caused by using other than recommended cables and connectors, or by unauthorized changes or modifications to this equipment. -
Page 103: Germany Electromagnetic Compatibility Directive
Klasse A ein. Um dieses sicherzustellen, sind die Geräte wie in den Handbüchern beschrieben zu installieren und zu betreiben. Des Weiteren dürfen auch nur von der IBM empfohlene Kabel angeschlossen werden. IBM übernimmt keine Verantwortung für die Einhaltung der Schutzanforderungen, wenn das Produkt ohne Zustimmung der IBM verändert bzw. -
Page 104: Japan Vcci Council Class A Statement
This apparatus is manufactured to the International Safety Standard EN60950 and as such is approved in the U.K. under approval number NS/G/1234/J/100003 for indirect connection to public telecommunications systems in the United Kingdom. Korean Communications Commission (KCC) Class A Statement Storwize V7000 Unified: Quick Installation Guide... -
Page 105: Russia Electromagnetic Interference (Emi) Class A Statement
Fax: 0049 (0)711 785 1283 Email: mailto: tjahn @ de.ibm.com Taiwan Contact Information This topic contains the product service contact information for Taiwan. IBM Taiwan Product Service Contact Information: IBM Taiwan Corporation 3F, No 7, Song Ren Rd., Taipei Taiwan Tel: 0800-016-888... - Page 106 Storwize V7000 Unified: Quick Installation Guide...
- Page 108 Part Number: 00AR049 Printed in USA GA32-1056-07...
Need help?
Do you have a question about the Storwize V7000 Unified and is the answer not in the manual?
Questions and answers