Table of Contents
Advertisement
Quick Links
Advertisement
Table of Contents

Related Manuals for IBM Storwize V7000 Gen2


Summary of Contents for IBM Storwize V7000 Gen2
- Page 1 IBM Storwize V7000 Gen2 Quick Installation Guide GC27-6500-02...
- Page 2 The information in the “Safety and environmental notices” on page ix v The information in the IBM Environmental Notices and User Guide (provided on a DVD) This edition applies to IBM Storwize V7000 and is valid until replaced by new editions.
-
Page 3: Table Of Contents
Appendix A. Accessibility features for Environmental notices . . xvii IBM Storwize V7000 ..35 About this guide ..xix Appendix B. Where to find the Who should use this guide . - Page 4 Storwize V7000 Gen2: Quick Installation Guide...
-
Page 5: Figures
Hole locations in the front of the rack . . 17 Node canister LEDs . . 28 Opening the hinge brackets . . 18 Storwize V7000 technician port . . 32 Closing the hinge brackets . 18 © Copyright IBM Corp. 2014... - Page 6 Storwize V7000 Gen2: Quick Installation Guide...
-
Page 7: Tables
Tables IBM websites for help, services, and Steps for different installation scenarios information . . xix Storwize V7000 model numbers . Storwize V7000 library . . xx Selecting bracket pins for your rack . 13 IBM documentation and related websites Selecting bracket pins for your rack . - Page 8 Storwize V7000 Gen2: Quick Installation Guide...
-
Page 9: Safety And Environmental Notices
In the preceding examples, the numbers (C001) and (D002) are the identification numbers. 2. Locate the IBM Storwize V7000 Safety Notices with the user publications that were provided with the Storwize V7000 hardware. 3. Find the matching identification number in the IBM Storwize V7000 Safety Notices. -
Page 10: Caution Notices For The Storwize V7000
“Labels” section. The following notices and statements are used in IBM documents. They are listed in order of decreasing severity of potential hazards. Danger notice definition A special note that emphasizes a situation that is potentially lethal or extremely hazardous to people. - Page 11 CAUTION: The battery contains lithium. To avoid possible explosion, do not burn or charge the battery. Do not: Throw or immerse into water, heat to more than 100°C (212°F), repair or disassemble. (C003) CAUTION: Electrical current from power, telephone, and communication cables can be hazardous.
- Page 12 It is intended that equipment installed within this rack will have its own enclosure. (R005). CAUTION: Tighten the stabilizer brackets until they are flush against the rack. (R006) CAUTION: Use safe practices when lifting. (R007) Storwize V7000 Gen2: Quick Installation Guide...
-
Page 13: Danger Notices For Storwize V7000
Ensure that you are familiar with the danger notices for Storwize V7000. Use the reference numbers in parentheses at the end of each notice, such as (C003) for example, to find the matching translated notice in IBM Storwize V7000 Safety Notices. - Page 14 Electrical voltage and current from power, telephone, and communication cables are hazardous. To avoid a shock hazard: v If IBM supplied a power cord(s), connect power to this unit only with the IBM provided power cord. Do not use the IBM provided power cord for any other product.
- Page 15 Observe the following precautions when working on or around your IT rack system: v Heavy equipment–personal injury or equipment damage might result if mishandled. v Always lower the leveling pads on the rack cabinet. v Always install stabilizer brackets on the rack cabinet. v To avoid hazardous conditions due to uneven mechanical loading, always install the heaviest devices in the bottom of the rack cabinet.
-
Page 16: Special Caution And Safety Notices
Do not wear loose clothing that can be trapped in the moving parts of a device. Ensure that your sleeves are fastened or rolled up above your elbows. If your hair is long, fasten it. Storwize V7000 Gen2: Quick Installation Guide... -
Page 17: Handling Static-Sensitive Devices
The IBM Systems Environmental Notices and User Guide (ftp:// public.dhe.ibm.com/systems/support/warranty/envnotices/ environmental_notices_and_user_guide.pdf), Z125-5823 document contains all the required environmental notices for IBM Systems products in English and other languages. It includes statements on limitations, product information, product recycling and disposal, battery information, flat panel display, refrigeration, and water-cooling systems, external power supplies, and safety data sheets. - Page 18 To view a PDF file, you need Adobe Reader. You can download it at no charge from the Adobe web site (get.adobe.com/reader/). xviii Storwize V7000 Gen2: Quick Installation Guide...
-
Page 19: About This Guide
Storwize V7000. Storwize V7000 Information Center The IBM Information Center contains all of the information that is required to install, configure, and manage the system. The information center is updated between product releases to provide the most current documentation. The information center is available at the following website: publib.boulder.ibm.com/infocenter/storwize/ic/index.jsp... -
Page 20: Storwize V7000 Library
Maintenance Guide troubleshoot the Storwize V7000 system. Storwize V7000 Gen2 The installation poster GC27-6608 Installation Poster provides an illustrated sequence of steps for installing the enclosure in a rack and beginning the setup process. Storwize V7000 Gen2: Quick Installation Guide... - Page 21 Table 3 lists websites that provide publications and other information about the ® Storwize V7000 or related products or technologies. The IBM Redbooks publications provide positioning and value guidance, installation and implementation experiences, solution scenarios, and step-by-step procedures for a variety of products.
-
Page 22: How To Order Ibm Publications
Some publications are available for you to view or download at no charge. You can also order publications. The publications center displays prices in your local currency. You can access the IBM Publications Center through the following website: www.ibm.com/e-business/linkweb/publications/servlet/pbi.wss... -
Page 23: Sending Your Comments
Before calling for support, be sure to have your IBM Customer Number available. If you are in the US or Canada, you can call 1 (800) IBM SERV for help and service. From other parts of the world, see http://www.ibm.com/planetwide for the number that you can call. - Page 24 Getting help online You can find information about products, solutions, partners, and support on the IBM website. To find up-to-date information about products, services, and partners, visit the IBM website at www.ibm.com/storage/support/storwize/v7000. Before you call Make sure that you have taken steps to try to solve the problem yourself before you call.
- Page 25 At times, you might need expert advice about using a function provided by the system or about how to configure the system. Purchasing the IBM Support Line offering gives you access to this professional advice while deploying your system, and in the future.
- Page 26 Storwize V7000 Gen2: Quick Installation Guide...
-
Page 27: Chapter 1. Before You Begin The Installation
Install the first control enclosure and then the required expansion enclosures. For each additional control enclosure, complete the setup as if you were adding it to an existing system. Table 5 on page 2 lists the steps for each scenario. © Copyright IBM Corp. 2014... -
Page 28: Enclosure
“Powering on the “Configuring the system” on page 27 system” on page 27 system,” on page 29 Chapter 3, “Adding a control “Configuring the enclosure to an system,” on page 29 existing system” on page 33 Storwize V7000 Gen2: Quick Installation Guide... - Page 29 Table 5. Steps for different installation scenarios (continued) New system (control Adding control enclosure and one or Adding expansion enclosures and New system (control more expansion enclosures to an expansion enclosures enclosure only) enclosures) existing system to an existing system Complete these steps for each expansion enclosure that you add.
- Page 30 Electrical voltage and current from power, telephone, and communication cables are hazardous. To avoid a shock hazard: – If IBM supplied a power cord(s), connect power to this unit only with the IBM provided power cord. Do not use the IBM provided power cord for any other product.
-
Page 31: Reviewing Your Packing Slip
Warranty Description 2076-524 3 years IBM Storwize V7000 Control Enclosure 2076-12F 3 years IBM Storwize V7000 12-slot Expansion Enclosure for 3.5-inch drives 2076-24F 3 years IBM Storwize V7000 24-slot Expansion Enclosure for 2.5-inch drives __ v Rack-mounting hardware kit, including: __ –... -
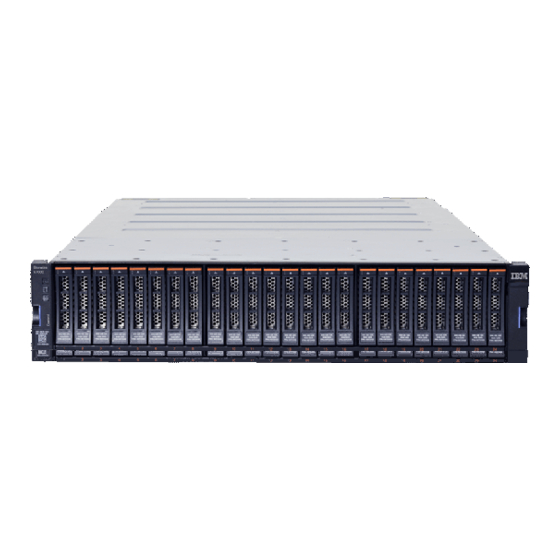
Page 32: Identifying The Hardware Components
Port 2 Optional. Can be used for iSCSI host connectivity or to provide an alternative (redundant) management address. Port 3 Optional. Can be used for iSCSI host connectivity. Port T Technician port. Can be connected directly to a computer for service access and system initialization. Storwize V7000 Gen2: Quick Installation Guide... -
Page 33: Control Enclosure Support Rails
3 Serial-attached SCSI (SAS) ports. Each canister has two SAS ports for connecting to optional expansion enclosures. Control enclosure support rails The left and right control enclosure support rails (Figure 3) are designed specifically for installation of a control enclosure. v The ledge on the inside of the rails supports the entire length of a control enclosure. -
Page 34: Rear View Of A Storwize V7000 Expansion
The expansion enclosure support rails adjust to fit racks from 595 mm to 755 mm deep, measured between the front and rear rack rails. Storwize V7000 Gen2: Quick Installation Guide... -
Page 35: Verifying Environmental Requirements
Figure 6. Expansion enclosure support rails Verifying environmental requirements The environmental and electrical requirements for the physical site must be met to ensure that your system works reliably. Before installing Storwize V7000, you must verify that adequate space in a suitable rack is available and that requirements for power and environmental conditions are met. - Page 36 Add the first expansion enclosure directly below the control enclosure. v Add the second expansion enclosure directly above the control enclosure. v Add the third expansion enclosure directly below the first. v Add the fourth expansion directly above the second, and so on. Storwize V7000 Gen2: Quick Installation Guide...
-
Page 37: Chapter 2. Installing The Hardware
Note: Some models of rail have the studs on the outside of the rail. c. Stretch the spring slightly and push the other looped end of the spring onto the other stud on the inside of the rail. © Copyright IBM Corp. 2014... -
Page 38: Installing The Rail Spring
3. Working at the front of the rack cabinet, identify the two standard rack units (2U) of space in the rack into which you want to install the support rails. Figure 9 on page 13 shows two rack units with the front mounting holes identified. Storwize V7000 Gen2: Quick Installation Guide... -
Page 39: Hole Locations In The Front Of The Rack
Figure 9. Hole locations in the front of the rack 1 Upper rail-mounting bracket pin 2 Lower rail-mounting bracket pin 3 Rack mounting screw hole 4. Ensure that the appropriate bracket pins are installed in the front and rear bracket of each rail. Each rail comes with four medium pins preinstalled (two in the front bracket and two in the rear bracket). -
Page 40: Opening The Hinge Brackets
11. Secure the rear of the rail to the rear rack flange with an M5 screw. 12. Repeat the steps to secure the opposite rail to the rack cabinet. 13. Repeat the procedure to install rails for each additional control enclosure. Storwize V7000 Gen2: Quick Installation Guide... -
Page 41: Installing Support Rails For Expansion Enclosures
Installing support rails for expansion enclosures Before installing expansion enclosures, you must first install support rails. Procedure To install the support rails, complete the following steps. 1. Locate the expansion enclosure rails (Figure 12). The rail assembly consists of two rails that must be installed in the rack cabinet. Figure 12. -
Page 42: Installing The Rail Spring
3. Working at the front of the rack cabinet, identify the two standard rack units (2U) of space in the rack into which you want to install the support rails. Figure 14 on page 17 shows two rack units with the front mounting holes identified. Storwize V7000 Gen2: Quick Installation Guide... -
Page 43: Hole Locations In The Front Of The Rack
Figure 14. Hole locations in the front of the rack 1 Upper rail mounting bracket pin 2 Lower rail mounting bracket pin 3 Rack mounting screw hole 4. Ensure that the appropriate bracket pins are installed in the front and rear bracket of each rail. -
Page 44: Opening The Hinge Brackets
11. Secure the rear of the rail to the rear rack flange with an M5 screw. 12. Repeat the steps to secure the opposite rail to the rack cabinet. 13. Repeat the procedure to install rails for each additional expansion enclosure. Storwize V7000 Gen2: Quick Installation Guide... -
Page 45: Installing The Enclosures
Installing the enclosures Following your enclosure location plan, install each control enclosure and, optionally, one or more expansion enclosures. About this task The installation procedure applies equally to control enclosures and expansion enclosures, but there are some important differences to note. v Lifting a control enclosure requires at least three people. -
Page 46: Inserting The Enclosure
Fit the slot on the top of the end cap over the tab on the chassis flange. c. Rotate the end cap down until it snaps into place. d. Ensure that the inside surface of the end cap is flush with the chassis. Storwize V7000 Gen2: Quick Installation Guide... -
Page 47: Connecting Sas Cables To Expansion Enclosures
Figure 19. Reinstalling enclosure end caps Connecting SAS cables to expansion enclosures If you have installed expansion enclosures, you must connect them to a control enclosure. About this task This task applies if you are installing one or more expansion enclosures.Each control enclosure in the system can manage two sets of expansion enclosures, with each set consisting of a maximum of 10 expansion enclosures. -
Page 48: Connecting The Sas Cables
Note: A control enclosure can support up to 20 expansion enclosures (10 above the control enclosure and 10 below). 4. If additional control enclosures are installed, repeat this cabling procedure on each control enclosure and its expansion enclosures. Storwize V7000 Gen2: Quick Installation Guide... -
Page 49: Sas Cabling Guidelines
SAS cabling guidelines When connecting SAS cables between enclosures, you must follow a list of guidelines to ensure that your configuration is valid. Orienting the connector When inserting SAS cables, make sure the connector (Figure 21) is oriented correctly. v The orientation of the connector must match the orientation of the port before you push the connector into the port. -
Page 50: Connecting Ethernet Cables To Node Canisters
1. Connect Ethernet port 1 of each node canister in the system to the IP network that will provide connection to the system management interfaces, as shown in Figure 23 on page 25. This port can also be used for iSCSI connectivity to the Storwize V7000 Gen2: Quick Installation Guide... -
Page 51: Connecting Fibre Channel Cables To A 10 Gbps Iscsi-Fcoe 4-Port Host Interface Card
system by hosts on the network. Where more than one control enclosure is present in the system, ensure port 1 of every node canister is connected to the same network to provide access in the event of configuration node fail-over. Figure 23. -
Page 52: Connecting Fibre Channel Cables To An 8 Gbps Fibre Channel 4-Port Host Interface Card
2. If you want to connect additional Fibre Channel cables, make sure to connect the same number of cables to each canister. Figure 26 on page 27 shows an example configuration with four Fibre Channel cables connected to each canister. Storwize V7000 Gen2: Quick Installation Guide... -
Page 53: Powering On The System
Figure 26. Example configuration with four Fibre Channel cables per canister 3. If a control enclosure is already installed, you can optionally add fibre channel connections between all the control enclosures. v This involves both the physical installation of the cables and configuring the correct zoning on the Fibre Channel switches. -
Page 54: Expansion Canister Leds
The canister is ready with no critical errors when Power is illuminated, Status is blinking, and Fault is off. If a canister is not ready, refer to the “Procedure: Understanding the system status using the LEDs” topic in “Troubleshooting”. Storwize V7000 Gen2: Quick Installation Guide... -
Page 55: Chapter 3. Configuring The System
Microsoft Internet Explorer (IE) 10 and 11 v Google Chrome 37 IBM supports higher versions of the browsers if the vendors do not remove or disable function that the product relies upon. For browser levels higher than the versions that are certified with the product, customer support accepts usage-related and defect-related service requests. - Page 56 In Internet Explorer, click Tools > Internet Options. b. Click Privacy. Under Settings, move the slider to the bottom to allow all cookies. c. Click OK. d. Refresh your browser. For Google Chrome: Storwize V7000 Gen2: Quick Installation Guide...
-
Page 57: User Name And Password For System Initialization
a. On the menu bar in the Google Chrome browser window, click Settings. b. Click Show advanced settings. c. In the Privacy section, click Content settings. d. In the Cookies section, select Allow local data to be set. e. Click OK. f. -
Page 58: Storwize V7000 Technician Port
8. After you complete the initialization process, disconnect the cable between the personal computer and the technician port. What to do next The system can now be reached by opening a supported web browser and pointing it to http://management_IP_address. Storwize V7000 Gen2: Quick Installation Guide... -
Page 59: Adding An Expansion Enclosure To An Existing System
Adding an expansion enclosure to an existing system When adding an expansion enclosure to an existing system, you must use the Storwize management GUI to update the system configuration. About this task The management GUI requires a supported web browser (see “Checking your web browser settings for the management GUI”... - Page 60 7. On the System page, select Actions > Add Enclosures. 8. Continue to follow the on-screen instructions. Storwize V7000 Gen2: Quick Installation Guide...
-
Page 61: Appendix A. Accessibility Features For Ibm Storwize V7000
See your browser or screen-reader software Help for a list of shortcut keys that it supports. IBM and accessibility See the IBM Human Ability and Accessibility Center for more information about the commitment that IBM has to accessibility. © Copyright IBM Corp. 2014... - Page 62 Storwize V7000 Gen2: Quick Installation Guide...
-
Page 63: Appendix B. Where To Find The Statement Of Limited Warranty
The Statement of Limited Warranty is available in both hardcopy format and in the Storwize V7000 information center. The Statement of Limited Warranty is shipped (in hardcopy form) with your product. It can also be ordered from IBM (see Table 2 on page xx for the part number). © Copyright IBM Corp. 2014... - Page 64 Storwize V7000 Gen2: Quick Installation Guide...
-
Page 65: Notices
Web sites. The materials at those Web sites are not part of the materials for this IBM product and use of those Web sites is at your own risk. - Page 66 IBM may use or distribute any of the information you supply in any way it believes appropriate without incurring any obligation to you. Licensees of this program who wish to have information about it for the purpose of enabling: (i) the exchange of information between independently created...
-
Page 67: Trademarks
IBM, therefore, cannot guarantee or imply reliability, serviceability, or function of these programs. The sample programs are provided "AS IS", without warranty of any kind. IBM shall not be liable for any damages arising out of your use of the sample programs. -
Page 68: Industry Canada Compliance Statement
Properly shielded and grounded cables and connectors must be used in order to meet FCC emission limits. IBM is not responsible for any radio or television interference caused by using other than recommended cables and connectors, or by unauthorized changes or modifications to this equipment. -
Page 69: Germany Electromagnetic Compatibility Directive
Klasse A ein. Um dieses sicherzustellen, sind die Geräte wie in den Handbüchern beschrieben zu installieren und zu betreiben. Des Weiteren dürfen auch nur von der IBM empfohlene Kabel angeschlossen werden. IBM übernimmt keine Verantwortung für die Einhaltung der Schutzanforderungen, wenn das Produkt ohne Zustimmung der IBM verändert bzw. -
Page 70: People's Republic Of China Class A Statement
This explains the Japan Voluntary Control Council for Interference (VCCI) statement. Japan Electronics and Information Technology Industries Association Statement This explains the Japan Electronics and Information Technology Industries Association (JEITA) statement for less than or equal to 20 A per phase. Storwize V7000 Gen2: Quick Installation Guide... -
Page 71: Korean Communications Commission Class A Statement
This explains the JEITA statement for greater than 20 A per phase. Korean Communications Commission Class A Statement This explains the Korean Communications Commission (KCC) statement. Russia Electromagnetic Interference Class A Statement This statement explains the Russia Electromagnetic Interference (EMI) statement. Notices... - Page 72 Storwize V7000 Gen2: Quick Installation Guide...
-
Page 73: Index
Deutschsprachiger EU Hinweis 43 host interface card power cords 27, 28 European Union (EU) 42 8 Gbps Fibre Channel 4-port 26 powering on the system 27 Federal Communications Commission publications (FCC) 41 accessing 35 Germany 43 © Copyright IBM Corp. 2014... - Page 74 Storwize V7000 library related publications xix Taiwan contact information 44 electronic emission notice 44 technical assistance xxiii trademarks 41 user name 31 web browsers configuring 29 requirements 29 websites xxii Storwize V7000 Gen2: Quick Installation Guide...
- Page 76 Part Number: 00RY225 Printed in USA GC27-6500-02...
Need help?
Do you have a question about the Storwize V7000 Gen2 and is the answer not in the manual?
Questions and answers