Table of Contents
Advertisement
Quick Links
Part Number
0000-8G-L12
U-Nut (Qty. 8)
Washer (Qty. 8)
Snap Head Screw (Qty. 8)
0
Before Installation
A. Area to be covered by mask must be clean. It is recommended that you wash and wax vehicle prior to installation.
B. Both vehicle and mask must be completely dry prior to installation. If moisture under mask is allowed to dry on
vehicle, paint may cloud.
C. Any repainted surfaces in contact with mask must be allowed to cure completely. Consult paint manufacturer or
repair facility if you are not sure.
D. Dealers should provide all customers with a copy of these installation instructions for future reference.
1
Cut out license plate flap on front end cover
A. If state or provincial law requires
use of front license plate, cut
hole out in license plate cutout
area (A) using scissors. Slip
opening around bracket.
Caution: Cut out section
previous to mask installation,
making sure to not cut elastic
straps.
Genuine Accessories
Installation Instructions
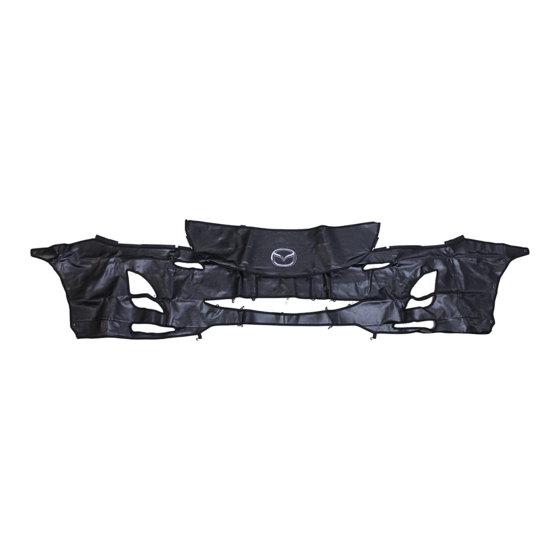
Front Mask
Package Contents
Front End Cover (Qty. 1)
A
Applicable Models:
2010 > Mazda 3 s-model w/o Air Dam
Tools Required
Scissors
AS 090-M11411cma0709
Page 1 of 8
Stubby Phillips
Screwdriver
Advertisement
Table of Contents

Related Manuals for Mazda 0000-8G-L12


Summary of Contents for Mazda 0000-8G-L12
- Page 1 Page 1 of 8 Genuine Accessories Installation Instructions Applicable Models: Part Number Front Mask 2010 > Mazda 3 s-model w/o Air Dam 0000-8G-L12 Tools Required Package Contents Stubby Phillips Screwdriver U-Nut (Qty. 8) Washer (Qty. 8) Front End Cover (Qty. 1) Snap Head Screw (Qty.
- Page 2 Page 2 of 8 Remove wheel well fasteners Install wheel well hardware A. Using stubby phillips screwdriver, remove the four plastic A. In both front wheel wells, lift wheel well liner to reveal holes. fasteners illustrated below along front edge of both front wheel wells.
- Page 3 Page 3 of 8 Install wheel well attachments Install pads at headlights A. Press 4 snaps (G) onto snap head screws (D) in both front wheel wells. Assistance may be A. On driver’s side, insert pads (H) in slots around headlights. required to evenly pull mask to snaps.
- Page 4 B. Hand clean mask using mild soap, rinse thoroughly with clean water and line dry completely. Do not machine dry! C. Use Mazda Vinyl/Leather Protectant (or equivalent) to preserve color and finish. D. If mask is left on vehicle in rain, dirt can potentially be washed under the mask and could scratch the vehicle.
Need help?
Do you have a question about the 0000-8G-L12 and is the answer not in the manual?
Questions and answers