Table of Contents
Advertisement
Available languages
Available languages
Quick Links
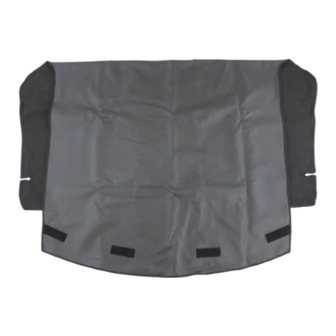
GENUINE MAZDA CARGO LINER
INSTALLATION INSTRUCTIONS
Thank you for purchasing a genuine Mazda accessory.
Before removal and installation, be sure to thoroughly read these instructions.
Please read the contents of this booklet in order to properly install and use the
Cargo Liner.
Keep these instructions with your vehicle records for future reference.
CX-9 Cargo Liner 0000 8K N05
1
Open lift gate. (Fig. 1)
Fig. 1
2
Lift rear storage compartment cover. (Fig. 2)
Fig. 2
3
Install rear pocket of liner on to compartment
cover. (Fig. 3)
Fig. 3
Page 1 of 12
Form #1350053
3/13
Advertisement
Table of Contents

Related Manuals for Mazda 0000 8K N05


Summary of Contents for Mazda 0000 8K N05
- Page 1 GENUINE MAZDA CARGO LINER INSTALLATION INSTRUCTIONS Thank you for purchasing a genuine Mazda accessory. Before removal and installation, be sure to thoroughly read these instructions. Please read the contents of this booklet in order to properly install and use the Cargo Liner.
-
Page 2: Installation Instructions
Fig. 5 Secure the cover to the third row seats by attaching the hook and loop fasteners below the headrests. (Fig. 6 and 7) Fig. 6 Fig. 7 Page 2 of 12 CX-9 Cargo Liner 0000 8K N05 Form #1350053 3/13... - Page 3 (Fig. 10) Fig. 10 Remove the 2nd row headrests. Re-install each headrest by inserting the rods through the corresponding grommets on the cover. (Fig. 11) Fig. 11 Page 3 of 12 CX-9 Cargo Liner 0000 8K N05 Form #1350053 3/13...
-
Page 4: Cleaning Instructions
2nd row seats. (Fig. 13) Fig. 13 Installation complete. CLEANING INSTRUCTIONS: Clean only with a damp cloth or sponge. Avoid use of detergents or harsh cleaning agents. Page 4 of 12 CX-9 Cargo Liner 0000 8K N05 Form #1350053 3/13... -
Page 5: Instructions D'installation
VERITABLE DOUBLURE DE COMPARTIMENT MAZDA INSTRUCTIONS D’INSTALLATION Nous vous remercions d’avoir acheté un accessoire d’origine Mazda. Avant le démontage et l’installation, assurez-vous de lire attentivement ces instructions. S’il vous plaît lire le contenu de ce livret afin de bien installer et utiliser le cargo. - Page 6 Fixez le couvercle à la troisième rangée de sièges en attachant le crochet et fermeture à boucle en dessous des appuie-tête. (Fig. 6 and 7) Fig. 6 Fig. 7 Page 6 of 12 CX-9 Doublure de Compartiment 0000 8K N05 Form #1350053 3/13...
- Page 7 Fig. 10 Enlever les appuie-tête à la 2e rangée. Ré- installer chaque repose-tête l’insertion des tiges dans les oeillets correspondants sur le couvercle. (Fig. 11) Fig. 11 Page 7 of 12 CX-9 Doublure de Compartiment 0000 8K N05 Form #1350053 3/13...
-
Page 8: Instructions De Nettoyage
Fig. 13 Installation compléter. INSTRUCTIONS DE NETTOYAGE: Nettoyez-le uniquement avec un chiffon humide ou une éponge. Evitez d’utiliser des détergents agressifs ou des produits de nettoyage. Page 8 of 12 CX-9 Doublure de Compartiment 0000 8K N05 Form #1350053 3/13... -
Page 9: Instrucciones De Instalacion
LINEA ORIGINAL DE MAZDA PARA CARGA INSTRUCCIONES DE INSTALACION Gracias por adquirir un accesorio original de Mazda. Antes de reemplazar e instalar, asegúrese de leer con cuidado las instrucciones. Lea el contenido de este manual para poder instalar apropiadamente y utilizar la línea de carga. - Page 10 Asegure la cubierta a la tercera fila de asientos uniendo el gancho al ojal provisto bajo el descanzacabeza (Fig. 6 and 7) Fig. 6 Fig. 7 Page 10 of 12 CX-9 Linea de Carga 0000 8K N05 Form #1350053 3/13...
- Page 11 Quite los descanzacabezas de la segunda fila de asientos. Reinstale cada descanzacabeza insertando las barras a través de las arandelas de la cubierta. (Fig. 11) Fig. 11 Page 11 of 12 CX-9 Linea de Carga 0000 8K N05 Form #1350053 3/13...
- Page 12 Fig. 13 Instalación completada Instrucciones de limpieza: Limpie solamente con un trapo húmedo o una esponja. Evite el uso de detergente o agentes de limpieza abrasivos. Page 12 of 12 CX-9 Linea de Carga 0000 8K N05 Form #1350053 3/13...
- Page 13 Step 3 (Pg. 1) Rear storage cover Step 9 (Pg. 3) Headrests Installation inspection sheet for cargo liner. Date: VIN: Approved Checked Person in charge The term of validity for this sheet: 12 months CX-9 Cargo Liner 0000 8K N05 Form #1350053 3/13...
- Page 14 Housse de rangement arrière Étape 9 (Pg. 3) Appuie-tête Installation fiche d’inspection de cargo Date: Numéro d’identification du véhicule: approuvé vérifié Responsable La durée de validité de cette fiche: 12 mois CX-9 Doublure de Compartiment 0000 8K N05 Form #1350053 3/13...
- Page 15 Paso 9 (Pg. 3) Descanzacabeza Hoja de inspección de instalación para el cortaviento Fecha: Matricula del vehiculo: Aprobado Revisado Personas encargadas Término de validez para esta hoja: 12 meses CX-9 Linea de Carga 0000 8K N05 Form #1350053 3/13...
Need help?
Do you have a question about the 0000 8K N05 and is the answer not in the manual?
Questions and answers