
Subscribe to Our Youtube Channel
Related Manuals for Midtronics inTELLECT EXP


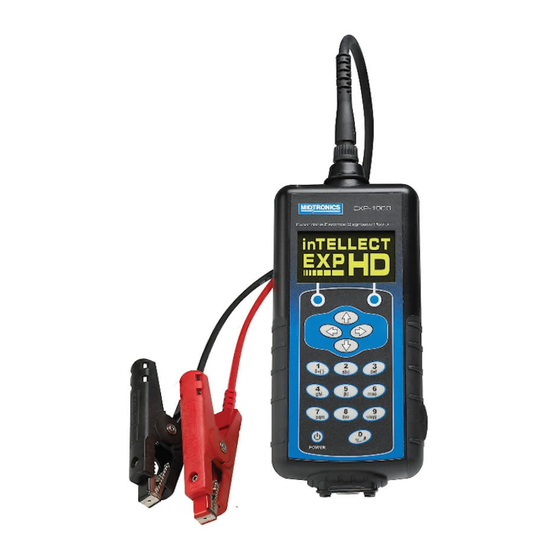
Summary of Contents for Midtronics inTELLECT EXP
- Page 1 Battery Management Innovation Expandable Electrical Diagnostic Platform For testing 6 and 12-volt automotive batteries and 12- and 24-volt charging systems INSTRUCTION MANUAL...
-
Page 3: Table Of Contents
Contents Contents Chapter 1: Before You Begin ................7 Safety ..........................7 General Precautions ......................7 Conventions Used in This Manual ...................7 Registering Your Analyzer ....................8 Chapter 2: Description ..................9 Test Leads, Connectors, and Data Ports ..............10 Display and Keypad ...................... 11 Data Entry Methods .......................12 Menu icons .......................... - Page 4 Contents Chapter 4: Battery Test ..................18 Additional Test Requirements ..................19 Surface Noise/Unstable Battery ..................19 Deep Scan Test ........................20 Battery Test Results ......................21 Chapter 5: QC Mode ..................22 Test Routine ........................22 Chapter 6: Utilities .................... 23 Clock ..........................23 Shop ..........................24 Display ...........................25 Coupon ..........................26...
- Page 5 View Test ........................29 View QC Test .........................29 Chapter 9: Troubleshooting ................30 The Display Does Not Turn On ..................30 The STATUS LED Flashes (Midtronics Printer) ............30 Data Will Not Print ......................30 Chapter 10: EXP Internal Batteries ..............32 Battery Power Indicator ....................32 Replacing the EXP Batteries ..................32...
- Page 6 Contents • •...
-
Page 7: Chapter 1: Before You Begin
Chapter 1: Before You Start Chapter 1: Before You Begin Safety General Precautions • DANGER—RISK OF EXPLOSIVE GASES: Batteries can produce a highly explosive mix of hydrogen gas and oxygen, even when the battery is not in operation. Always work in a well-ventilated area. -
Page 8: Registering Your Analyzer
In addition, you’ll be alerted to any important information, like product updates and special offers. To register, log on at www.midtronics.com/warranty.html and have your serial number ready. The number is at the bottom of the label on the back of the analyzer (Figure 1). -
Page 9: Chapter 2: Description
Tester at any time. Printer batteries Printer paper Cable storage Printer charger Side-post stud adapters Stud adapters Amp clamp IR printer Battery test cable inTELLECT EXP Figure 2 • •... -
Page 10: Test Leads, Connectors, And Data Ports
Chapter 2: Description Test Leads, Connectors, and Data Ports For the cable test leads (Figure 5), there are two connectors on the top of the tester (Figure 3). • For the battery test cable, there is a 6-pin connector with a locking ring. •... -
Page 11: Display And Keypad
Chapter 2: Description Display and Keypad The keypad and display work together to help you quickly fi nd and use the right tools at the right time. The display also keeps you on track with on-screen navigation aids, directions and messages. Figure 6 shows how the elements on the screen relate to the keypad. -
Page 12: Data Entry Methods
Chapter 2: Description Data Entry Methods To perform a particular test or function, the tester will ask for different types of information. This means that the methods you use to enter information will change depending on the type of information re- quested. -
Page 13: Menu Maps
Chapter 2: Description Menu Maps This section will help you get to your destination while letting you know what test leads you may need when you arrive. The test leads are represented by symbols for their connectors. Main Menu The Main Menu is the starting point for all tools and utilities, which are depicted as icons. Some icons lead directly to the function they represent, while others are menu icons that lead to two or more functions. -
Page 14: Info Menu
Chapter 2: Description Info Menu The Info Menu has three utilities to help you manage your test data, and track the usage and history of your tester. REPORTS Displays the total Battery An optional IR software Displays the software and System Tests per- and hardware package version, total tests from formed since the tester... -
Page 15: Utilities Menu
Chapter 2: Description Utilities Menu The Utilities Menu lets you customize your analyzer to suit your needs. SETUP (Screen 1) Settings to adjust the Settings to adjust the Enables you to confi gure date and time. screen contrast and the printer to IrDA. backlight time. -
Page 16: Chapter 3: Test Preparation
Chapter 3: Test Preparation Chapter 3: Test Preparation Inspecting the Battery Before starting the test visually inspect the battery for: • Cracked, buckled, or leaking case. If you see any of these defects, replace the battery. • Corroded, loose, or damaged cables and connections. Repair or replace them as needed. -
Page 17: Connecting An Accessory Cable
Chapter 3: Test Preparation If you connect the clamps in the wrong polarity (positive to negative or negative to positive), the tester displays CLAMPS REVERSED! Reconnect the clamps correctly. To make sure both sides of the clamps are gripping the terminals, rock the each clamp back and forth. A poor connection will prevent testing, and the tester will display the message CHECK CONNECTION. -
Page 18: Chapter 4: Battery Test
Chapter 4: Battery Test Chapter 4: Battery Test The tester will guide you through the steps of selecting your battery test parameters and interpreting the results. Before you start the test, review the instructions in Chapter 3: Test Preparation. Select the LOCATION OF THE BATTERY UNDER HOOD UNDER SEAT TRUNK... -
Page 19: Additional Test Requirements
Chapter 4: Battery Test Select the battery’s capacity rating standard. The standard, and the rating units required in step 5, are printed on the battery label. If the information is unreadable, contact the battery manufacturer. Press the NEXT soft key to continue. Press the UP/DOWN ARROW keys or use the numeric keys to select the battery rating or in the case of JIS, the part number. -
Page 20: Deep Scan Test
Chapter 4: Battery Test Deep Scan Test In some cases the tester may need to further analyze the battery to determine whether the battery should be replaced or it has a signifi cant chance to be recovered. It will then conduct a Deep Scan Test of the battery for a few seconds. -
Page 21: Battery Test Results
Chapter 4: Battery Test Battery Test Results After the test the tester will display the complete results in a series of screens as shown in Figure 14. Use the UP/DOWN ARROW keys to scroll through each result. To send the results to the IR receiver, point the tester towards the IR Receiver, press the TRANSFER soft key and wait until the hourglass has disappeared from the screen. -
Page 22: Chapter 5: Qc Mode
Chapter 5: QC Test Chapter 5: QC Test The tester has the ability to test multiple batteries one after the other without having to input the battery rating / settings. There are two types of QC tests: the STOCK CONTROL or the COMPOUND TEST. STOCK CONTROL is meant for batteries standing in a warehouse or on a pallet where as COMPOUND TEST is done when the battery is mounted in the vehicle. -
Page 23: Chapter 6: Utilities
Chapter 6: Utilities Chapter 6: Utilities The Utility Menu allows you to easily set up your analyzer: Clock The CLOCK ADJUST utility has four settings. Use the UP/DOWN ARROW keys to highlight the setting you want to change. MODE : AM/PM TIME : 9:07 PM... -
Page 24: Shop
Chapter 6: Utilities Date Use the LEFT/RIGHT ARROWS to highlight the hour, minutes, or AM or PM. To rapidly scroll, hold down an ARROW key. / 17 / 2005 Press the SAVE soft key to save your setting or the BACK soft key to return to the CLOCK ADJUST screen without saving the changes. -
Page 25: Display
Chapter 6: Utilities Display The LCD OPTIONS utility enables you to adjust the contrast of the text on the display and the backlight time. Contrast Level The contrast level is 0 (lightest) to 10 (darkest). To change it: Press the UP or DOWN ARROW to highlight the option. Current settings CONTRAST LEVEL BACKLIGHT TIME... -
Page 26: Coupon
Chapter 6: Utilities Coupon The COUPON SELECT utility enables and disables the printing of the custom coupon you’ve created in the EDIT COUPON utility. Use the UP/DOWN ARROWS or press the corresponding numerical key to move the dot to the option button of your choice. NO USER COUPON PRINTED USER COUPON Press the SAVE soft key to save your setting or the BACK soft key to return to the... -
Page 27: Format Disk
Chapter 6: Utilities Format Disk Select this utility to format an SD card to receive data or erase all data on the card. The Tester will warn you before formatting the disk and ask you if you want to continue. Update As software updates become available you’ll be able to use this utility to update the Tester software using fi... -
Page 28: Chapter 7: Info Menu
Chapter 7: Info Menu Chapter 7: Info Menu The Info Menu has 3 utilities to help you manage your test data and track the usage and history of your analyzer. Totals The TOTALS report displays the total number of battery tests performed since the Tester was fi rst used. Press the LEFT and RIGHT ARROW keys simultaneously to clear the total and reset the starting date. -
Page 29: Chapter 8: Print/View
Chapter 8: Print/View Chapter 8: Print/View The Print/View Menu enables you to view and print the results of the Battery, System, and Cable Drop Tests before you perform another test and overwrite the results in memory. View Test VIEW TEST gives you the option of viewing and printing the results of the Battery and System Tests. To print the results, align the analyzer’s IR transmitter with the printer’s receiver, and select the PRINT soft key. -
Page 30: Chapter 9: Troubleshooting
Chapter 9: Troubleshooting Chapter 9: Troubleshooting If you have problems with the display or the Midtronics printer, try these troubleshooting suggestions: The Display Does Not Turn On • Check the connection to the vehicle battery. • Press the POWER button. - Page 31 If you are unable to print after ensuring the analyzer is functioning, the printer is on, the batteries are good, and the IR transmitter and receiver are aligned, check the printer manual for further instructions or call Midtronics at 800-776-1995 for assistance. (See “Patents, Limited Warranty, Service” for more information.) •...
-
Page 32: Chapter 10: Exp Internal Batteries
Chapter 10: EXP Internal Batteries Chapter 10: Tester Internal Batteries The Tester uses 6 AA, 1.5-volt batteries (alkaline recommended) to allow testing of batteries down to 1 volt and supply power while the menu is active. The analyzer can test batteries down to 5.5 volts when the internal batteries are not functioning. - Page 33 MIDTRONICS SERVICE PARTNERS Slovakia Europe, ME and Africa Portugal Homola SPOL S.R.O. Lusilectra LDA Midtronics b.v. Dlhé diely I/18 Rua Eng. Ferreira Dias Lage Dijk- Noord 6 84104 Bratislava 4 771, 4100-247 Porto 3401 VA IJsselstein Tel.: +421 24 3415 450 Tel.: +351 226 198 750...
- Page 34 • •...
-
Page 35: Patents, Limited Warranty, Service
This analyzer is warranted to be free of defects in materials and workmanship for a period of two years from date of purchase. Midtronics will, at our option, repair or replace the unit with a remanufactured unit. This limited warranty applies only to the analyzer, and does not cover any other equipment, static damage, water damage, overvoltage damage, dropping the unit, or damage resulting from extraneous causes including owner misuse.
Need help?
Do you have a question about the inTELLECT EXP and is the answer not in the manual?
Questions and answers