Advertisement
Quick Links
Advertisement

Subscribe to Our Youtube Channel
Related Manuals for Midtronics WALMART GR8-1150


Summary of Contents for Midtronics WALMART GR8-1150
- Page 1 June 2009 168-716C : /0 57 DWWHU RVWlF 6WDWlR ,16758 7,21 0 18 /...
- Page 2 K SD H WH W...
- Page 3 R WH WV : /0 57 R WH WV 6KRS 6DIHW , VWUXFWLR V 8VHUV ,PSRUWDQW 6DIHW ,QVWUXFWLRQV (QWHULQJ D 1HZ 8VHU , 3HUVRQDO 3UHFDXWLRQV HOHWLQJ D 8VHU , 3UHSDULQJ 7R KDUJH DWWHU LVSOD URXQGLQJ QG RQQHFWLRQV RQWUDVW /HYHO KDUJHU /RFDWLRQ DFNOLJKW 7LPH RQQHFWLRQ 3UHFDXWLRQV RXSRQ...
- Page 4 R WH WV : /0 57 LDJQRVWLF KDUJLQJ 7UDQVIHU 5HFRYHU 0RGH 9HUVLRQ ERUWLQJ D KDUJH 6HVVLRQ KDSWHU 3UL WL 7HVW 5HVXOWV RPSOHWLQJ D KDUJH 6HVVLRQ LDJQRVWLF KDUJH 5HVXOWV KDQJLQJ WKH 3DSHU LQ WKH ,QWHUQDO 3ULQWHU 6WDWH RI HDOWK 62 7R UHSODFH WKH SDSHU UROO 5HPRYLQJ DQG 5HLQVWDOOLQJ WKH ,QWHUQDO 3ULQWHU KDSWHU 7HVW 0HVVD HV...
- Page 5 6DIHW , VWUXFWLR V : /0 57 6DIHW , VWUXFWLR V ,PSRUWD W 6DIHW , VWU FWlR V 1.7 Do not disassemble charger; take it to a quali ed service center when repair is required. Incorrect reassembly may result in a risk of electric shock or re. 1.8 To reduce risk of electric shock, unplug the charger from 5LVN RI H SORVLYH DVHV the AC outlet before attempting any maintenance or...
- Page 6 6DIHW , VWUXFWLR V : /0 57 HFWlR V 2.7 Before working with a lead-acid battery, remove personal metal items such as rings, bracelets, necklaces, watches, 4.1 The charger must be grounded to reduce risk of electric etc. A lead-acid battery can produce a short circuit current shock.
- Page 7 6DIHW , VWUXFWLR V : /0 57 4.3 An extension cord should not be used unless absolutely that the pins on plugs of the extension cord are the same necessary. Use of an improper extension cord could result number, size, and shape as those of the plug on the char- in a risk of re and electric shock.
- Page 8 6DIHW , VWUXFWLR V : /0 57 7.4 Turn OFF all vehicle loads, including door lights, and cor- FOLLOW THESE STEPS WHEN THE BATTERY IS INSTALLED rect any defects in the vehicle’s electrical system that may IS OUTSIDE OF THE VEHICLE. A SPARK NEAR THE BATTERY have caused low battery.
- Page 9 KDSWHU %HIRUH RX %H L : /0 57 KDSWHU %HIRUH RX %H L Battery acid is highly corrosive. If acid enters your eyes, im- 6DIHW 5HPl GHU mediately ush them thoroughly with cold running water for at least 15 minutes and seek medical attention. If bat- For safe, e cient, and accurate charging and testing, review tery acid gets on your skin or clothing, wash immediately the safety and operating instructions in this manual before...
- Page 10 Center the holes on the bottom of the control module with the bolts (circled), and lower the module onto the top of To assemble the cart refer to “Instruction Sheet: Midtronics the bracket. Firmly pull the module down at an angle (ar- Battery Testing Cart”...
- Page 11 KDSWHU %HIRUH RX %H L : /0 57 WWDFKl WKH KDU HU DEOHV Insert the screws (circles) through the holes in the cover and sheet metal. Tighten the screws securely with a small The two connectors for the charger cables are located on screwdriver.
-
Page 12: Control Module
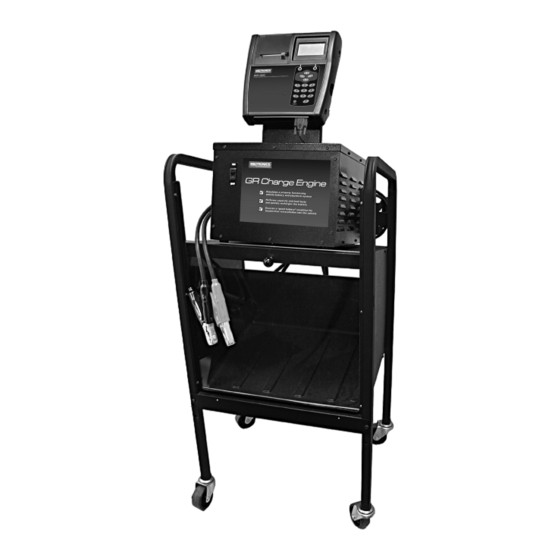
KDSWHU 2YHUYLH : /0 57 KDSWHU 2YHUYLH DWWHU RVWlF 6WDWlR UR W lHZ The controls to the Battery Diagnostic Station are accessible on the front of the Control Module and the GR Charge Engine. Control Module Backlit graphical display and keypad for data entry. Provides battery analysis and controls the charge session. -
Page 13: Ac Power Cord
KDSWHU 2YHUYLH : /0 57 DWWHU RVWlF 6WDWlR 5HDU lHZ Connectors for the charger cables, serial cable, and power cord are on the back of the GR Diagnostic Charge Engine. The serial number, which you will need in order to register the Battery Diagnostic Station, is on the back of the Control Module. Serial Number On bottom of label;... -
Page 14: Power Key
KDSWHU 2YHUYLH : /0 57 lVSOD D G .H SDG The Battery Diagnostic Station display and keypad work together to help you quickly nd and use the right tools at the right time. The display also keeps you on track with on-screen navigation aids, directions and messages. The illustration shows how the elements on the screen relate to the keypad. - Page 15 KDSWHU 2YHUYLH : /0 57 Scroll Bar To add a space, press the RIGHT ARROW key. To erase a space and insert a character, press the LEFT ARROW Another navigational aid is the scroll bar on the key. right side of the screen. The position of its scroll box shows you whether the screen is the top (or Refer to the table below for the characters associated only screen), middle, or last in a series.
- Page 16 KDSWHU 2YHUYLH : /0 57 WU 0HWKRGV 6FUROOL /LVWV Scrolling lists contain items that To perform a particular test or function, the Battery Diagnostic extend above and below the Station requires di erent types of information. This means screen. The rst number above that the methods you use to enter information will change the right soft key indicates depending on the type of information requested.
- Page 17 3URYLGHV DFFHVV WR WKH GPLQ 8WLOLW 0HQX ZKLFK DOORZV RX WR FXVWRPL H WKH XVHU LQWHUIDFH DQG FUHDWH 8VHU , V Provides a list of topics and de nitions. Also includes Midtronics Customer Service phone QXPEHUV , IR 0H X The Info Menu has utilities to allow you to view and print test results, track the usage and history of your Battery Diagnostic Station, and manage test data.
- Page 18 KDSWHU 2YHUYLH : /0 57 $GPL 8WLOLW 0H X The Admin / Utility Menu lets you customize options in the user interface to suit your needs. Before using the Battery Diagnostic Station for the rst time, check the default values to see what options you may want to change, add, or delete. 0H X ,FR HVFULSWLR 6HWWLQJV WR DGMXVW WKH GDWH DQG WLPH...
- Page 19 KDSWHU $GPL 8WLOLW 0H X : /0 57 KDSWHU $GPL 8WLOLW 0H X The Admin / Utility Menu has several utilities that customize the user interface. The utilities have default settings that you can change, depending on your requirements. H D W HWW 6HWXS )X FWLR HIDXOW 6HWWL /2 .
-
Page 20: Down Arrow Key
KDSWHU $GPL 8WLOLW 0H X : /0 57 ORFN )RUPDW Use the UP or DOWN ARROW or press the corresponding The CLOCK ADJUST utility has four settings. Use the numerical key (1 or 2) to move the dot to the option UP or DOWN ARROW key to highlight the setting button of your choice. - Page 21 KDSWHU $GPL 8WLOLW 0H X : /0 57 6KRS To erase a character, press the LEFT ARROW key. Insert a character by pressing the alphanumeric key asso- The SHOP INFO utility allows you to create a header ciated with the character as many times as needed. You for your printed test results with your business loca- can center text by inserting blank spaces with the RIGHT tion information when the Admin option 3-PRINT...
- Page 22 KDSWHU $GPL 8WLOLW 0H X : /0 57 To clear the default characters, press the LEFT ARROW Press the ADJUST soft key to display the option’s numeri- key. To add a space, move the cursor forward by pressing cal scroll box. the RIGHT ARROW key.
- Page 23 KDSWHU $GPL 8WLOLW 0H X : /0 57 GlW R SR To create and edit a coupon, see the procedure under “Shop” The EDIT COUPON utility allows you to create and store in this chapter for using the keypad to enter and backspace a promotional coupon or message on the printed test over characters.
-
Page 24: Change Admin Pin
KDSWHU $GPL 8WLOLW 0H X : /0 57 2SWLR V If you use the alphanumeric keypad to enter the number preceding the option button, no additional keypress is needed In the OPTIONS section there are four functions that allow you to save your selection to control user access to the Main Menu and Admin / Utility Menu. - Page 25 KDSWHU $GPL 8WLOLW 0H X : /0 57 6WRUH , RUPDW lVN The next screen asks you to enter your store ID Select this utility to format an data card to receive data number. or erase all data on the card. The Battery Diagnostic Station will warn you before formatting the disk and ask if you want to continue.
- Page 26 The menu also provides troubleshooting information and phone numbers for Midtronics Customer Service, in case you encoun- xture. Tighten or replace as needed. ter a problem and/or need technical assistance.
- Page 27 KDSWHU RVWLF KDU L : /0 57 KDSWHU RVWLF KDU L l DV D 8 UH lVWHUHG 8VHU The Battery Diagnostic Station is initially set to require a default USER ID to access the Main Menu. The instructions in The default setting requires a user name and password to this section will help you quickly put your Battery Diagnostic display the Main Menu.
- Page 28 KDSWHU RVWLF KDU L : /0 57 RVWlF KDU l 0RGHV Select the POST TYPE. The REMOTE option appears for the IN VEHICLE test. Diagnostic Charging has three modes that the Battery Diag- nostic Station may use to determine the State-of-Health of the ...
- Page 29 KDSWHU RVWLF KDU L : /0 57 DPLF 6FD 7HVW If you select AH, the Battery Diagnostic Station asks for the battery’s part number. Scroll to the part number. To In some cases the Battery Diagnostic Station may need to increase your scrolling speed, hold the UP or DOWN AR- further analyze a deeply discharged battery to determine ROW key, or use the LEFT or RIGHT ARROW key to move...
- Page 30 KDSWHU RVWLF KDU L : /0 57 6WDWH RI HDOWK 62 Step 2: The Battery Diagnostic Station measures the battery’s CCA (approximately 8 seconds) A factor that a ects a battery’s ability to crank an engine is its actual condition or State-of-Health (SOH). It is a measure of the battery’s condition relative to a fresh battery.
- Page 31 KDSWHU RVWLF KDU L : /0 57 DWWHU HFlVlR V RVWlF KDU H %DWWHU HFLVLR 5HFRPPH GHG $FWLR 77(5 5HWXUQ WKH EDWWHU WR VHUYLFH 5(3/ 77(5 5(3/ 77(5 UHVXOW PD DOVR PHDQ D SRRU FRQQHFWLRQ EHWZHHQ WKH EDWWHU FDEOHV DQG WKH EDWWHU IWHU GLVFRQQHFWLQJ WKH EDWWHU FDEOHV UHWHVW WKH EDWWHU XVLQJ WKH RXW RI YHKLFOH WHVW EHIRUH UHSODFLQJ LW (// 5(3/...
- Page 32 KDSWHU 7HVW 0HVVD HV : /0 57 KDSWHU 7HVW 0HVVD HV The table below will help you troubleshoot test messages. If troubleshooting does not solve the problem, call Midtronics Customer Service at 1-800-776-1995. 0(66$*( ( 3/$1$7,21 DWWHU 7RR ROG 7KH ( 3 PD GLVSOD...
- Page 33 KDSWHU , IR 0H X : /0 57 KDSWHU , IR 0H X /DVW The Info Menu has six utilities to help you print and view your test data and track the usage and history of your Battery The LAST 100 LOG shows the last 100 tests performed by User Diagnostic Station.
- Page 34 DO NOT force cover to close if roll is too large. The Battery Diagnostic Station uses only thermal printing paper. Replacement rolls are available at authorized Midtronics distributors as well as most o ce supply stores such as those listed in the table below.
- Page 35 7R UHL VWDOO WKH SUL WHU Insert the printer into the its compartment in the housing. If the internal printer needs service, contact Midtronics Cus- tomer Service for a shipping instructions and a return autho- Gently guide—do not force—the printer into the housing rization number.
- Page 36 It also includes 7KH L WHU DO SUL WHU LOO RW SUL W Midtronics Customer Service phone numbers. AC power and the POWER button is pressed to the ON 3UREOHPV ZlWK WKH lVSOD position.
- Page 37 : /0 57 0L W...
- Page 38 3$7(176 The EXP-1200 Bench Battery Diagnostic Station is made in the U.S.A. by Midtronics, Inc. and is protected by one or more of the following U.S. Patents: 4,816,768; 4,825,170; 4,881,038; 4,912,416; 5,572, 136; 5,585,728; 5,592,093; 5,757,192; 5,821,756; 5,831,435; 5,914,605; 6,051,976; 6,091,245; 6,163,156; 6,249,124; 6,304,087; 6,310,481; 6,316,914; 6,323,650; 6,351,102; 6,359,441;...
Need help?
Do you have a question about the WALMART GR8-1150 and is the answer not in the manual?
Questions and answers