
Related Manuals for Midtronics EXP-1000 FHD


Summary of Contents for Midtronics EXP-1000 FHD
- Page 1 EXP-1000 FHD Expendable electrical diagnostic platform INSTRUCTION MANUAL FOR TESTING 12-VOLT TRUCK- AND AUTOMOTIVE BATTERIES AND 12 AND 24-VOLT CHARGING SYSTEMS...
-
Page 2: Table Of Contents
BATTERY TEST RESULTS CONNECTING THE BATTERY TEST CABLE BATTERY GROUND TEST TOTALS NEW BATTERY TEST RESULTS DISPLAY AND KEYPAD STARTER CIRCUIT TRANSFER DATA DATA ENTRY METHODS ALTERNATOR CIRCUIT VERSION INFO MENU STRUCTURE OTHER CIRCUIT www.midtronicseurope.com Midtronics B.V. Hoofdveste 6 3992 DG HOUTEN... - Page 3 DATA WILL NOT PRINT SHOP INFO COUPON EDIT COUPON CHAPTER 13: TESTER INTERNAL BATTERIES LANGUAGE FORMAT CARD BATTERY POWER INDICATOR UPDATE REPLACING THE TESTER BATTERIES VEHICLE DRAIN BATTERY ID PATENTS & LIMITED WARRANTY www.midtronicseurope.com Midtronics B.V. Hoofdveste 6 3992 DG HOUTEN...
-
Page 4: Before You Begin
When the tester is first used the operator is asked to enter a injury. To register, log on at www.midtronics.com/warranty.html • couple of items such as language, date and time. Changes inefficient operation of the tester. -
Page 5: Chapter 2: Description
When you first connect the analyzer to a battery it functions card, leave the card in the slot. as a voltmeter. The voltage reading appears above the left soft key until you move to other menus or functions. www.midtronicseurope.com Midtronics B.V. Hoofdveste 6 3992 DG HOUTEN... -
Page 6: Data Entry Methods
Use the UP/DOWN or LEFT/RIGHT ARROW keys to scroll backlight time. stock or compound batteries. and confi rm this with the > key. To return one or more steps use the < key. www.midtronicseurope.com Midtronics B.V. Hoofdveste 6 3992 DG HOUTEN... -
Page 7: Test Preparation
A poor connection will prevent testing, and the tester will display the message CHECK CON- NECTION. If the message reappears after you have correctly reconnected the clamps, clean the terminals and reconnect. www.midtronicseurope.com Midtronics B.V. Hoofdveste 6 3992 DG HOUTEN... -
Page 8: Battery Test
The tester AGM SPIRAL may prompt you to remove the surface charge before it displays a test result. Press the NEXT soft key to continue. www.midtronicseurope.com Midtronics B.V. Hoofdveste 6 3992 DG HOUTEN... -
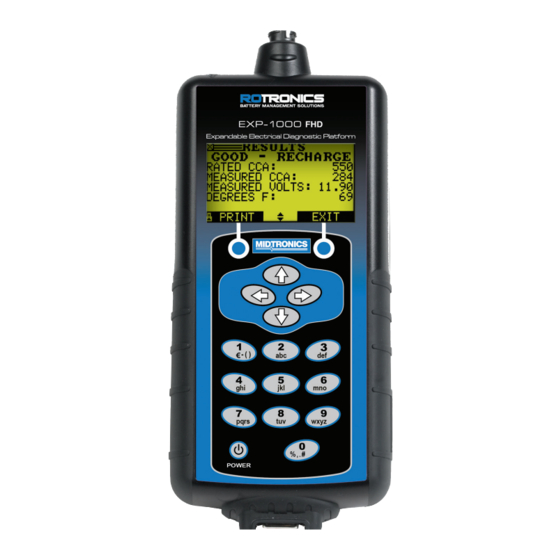
Page 9: Battery Test Results
Thaw the battery and retest. Do NOT BATTERY charge the battery! All battery, starting and charging test results are stored on the SD card. This data can be copied from the card and used to verify/compare results. www.midtronicseurope.com Midtronics B.V. Hoofdveste 6 3992 DG HOUTEN... -
Page 10: Starter Test
Tester will zero out the Amp clamp. ning. Press the NEXT soft key to continue. AGM SPIRAL Place Amp clamp around negative cable. www.midtronicseurope.com Midtronics B.V. Hoofdveste 6 3992 DG HOUTEN... - Page 11 Amp • Check the connections from the clamp. alternator to the battery. If the connection is loose or heavily corroded, clean or replace the cable and retest. www.midtronicseurope.com Midtronics B.V. Hoofdveste 6 3992 DG HOUTEN...
-
Page 12: Chapter 6: Generate Pair
UP or DOWN ARROW key. JIS????????????? Press the NEXT soft key to start the test. Measure the TEMPERATURE. Aim the tester 5 cm from the sides or top of the battery www.midtronicseurope.com Midtronics B.V. Hoofdveste 6 3992 DG HOUTEN... -
Page 13: Cable Drop Test
BUS/TRUCK There’s no need to run the engine. The Cable Drop Test CAR/LCV uses Midtronics’ conductance technology to send a signal through the circuit at the component under test. The tester Press the NEXT soft key to continue. then simultaneously calculates voltage drop on the positive (+) and negative (–) sides of any circuit as well as the total... -
Page 14: Other Circuit
The default is 10 A. Testing at 135A connect main clamps to battery positive post and negative clamp to vehicle chassis. Press the NEXT soft key to continue. www.midtronicseurope.com Midtronics B.V. Hoofdveste 6 3992 DG HOUTEN... -
Page 15: Chapter 8: Qc Test
SPIRAL For selection of the MANUAL input see the previous explana- tions and screens. Press the NEXT soft key to continue. Select the RATING UNITS Press the NEXT soft key to continue. www.midtronicseurope.com Midtronics B.V. Hoofdveste 6 3992 DG HOUTEN... -
Page 16: Chapter 10: Print/View
Quality Control Test. To print the results, align the analyzer’s IR transmitter with the printer’s receiver, and select the PRINT soft key. To return to the Main Menu, press the END key. www.midtronicseurope.com Midtronics B.V. Hoofdveste 6 3992 DG HOUTEN... -
Page 17: Chapter 9: Info
Version info displays the software version, the date the software was released, and the serial number of the analyzer. The utility keeps a permant count of the number of battery tests performed since the analyzer was first used. www.midtronicseurope.com Midtronics B.V. Hoofdveste 6 3992 DG HOUTEN... -
Page 18: Config Tester
If you use the alphanumeric keypad to enter the BACK soft key to return to the SHOP INFO screen BACKLIGHT TIME number preceding the option button, no additional key- without saving the changes. press is needed to save your selection. www.midtronicseurope.com Midtronics B.V. Hoofdveste 6 3992 DG HOUTEN... -
Page 19: Config Printer
Press the SAVE soft key to save your setting. test result. Its two information screens contain eight lines of text with up to 16 characters each. www.midtronicseurope.com Midtronics B.V. Hoofdveste 6 3992 DG HOUTEN... -
Page 20: Chapter 12: Troubleshooting
CHAPTER 12: TROUBLESHOOTING DATA WILL NOT PRINT If you have problems with the display or the Midtronics printer, try these troubleshooting suggestions: • If the IR transmitter and receiver are not aligned, all the data may not print. The infrared ports on... -
Page 21: Tester Internal Batteries
Insert new batteries as shown in Figure 22. Make sure the positive and negative terminals are positioned correctly. Insert the door’s tabs into the slots on the analyzer and slide the door closed, making sure the latch locks. www.midtronicseurope.com Midtronics B.V. Hoofdveste 6 3992 DG HOUTEN... - Page 22 LIMITED WARRANTY Midtronics products are warranted to be free of defects in materials and workmanship for a period of one (1) year from date of purchase. Midtronics will, at our option, repair or replace the unit with a re-manufactured unit. This limited warranty applies only to Midtronics battery testers and does not cover any other equipment, static damage, water damage, overvoltage, dropping the unit, or damage resulting from extraneous causes including owner misuse.
Need help?
Do you have a question about the EXP-1000 FHD and is the answer not in the manual?
Questions and answers