Advertisement
Table of Contents
Advertisement
Table of Contents

Related Manuals for Showven SPARKULAR BT01


Summary of Contents for Showven SPARKULAR BT01
- Page 1 SPARKULAR USER MANUAL V1.1 Showven Technologies Co.,Ltd.
-
Page 2: Warnings And Cautions
SPARKULAR USER MANUAL Safety Warnings and Cautions These are designed to alert your attention to hazards and important information that assists you in carrying out your activities on this machine safely and efficiently. Examples and descriptions of safety statements have been provided as follows: WARNING: A WARNING ALERTS YOU TO HARMFUL OR POTENTIALLY LETHAL ACTIVITIES. - Page 3 Power Supply Requirement PLEASE SELECT QUALIFIED POWER CONNECTOR ACCORDING TO THE REQUIRMENT OF SPARKULAR. IF NECESSARY PLEASE CONTACT SHOWVEN DIRECTLY FOR SUGGESTION. PLEASE NOTE: ONE POWER SUPPLY CABLE CAN SUPPORT A MAXIMUM OF 6 SPARKULAR (BT01) / 3 SPARKU- LAR (BT02). EACH MACHINE CAN BE CONNECTED INDIVIDUALLY OR WITH THE POWER-CON SERIES CABLES SUPPLIED.
-
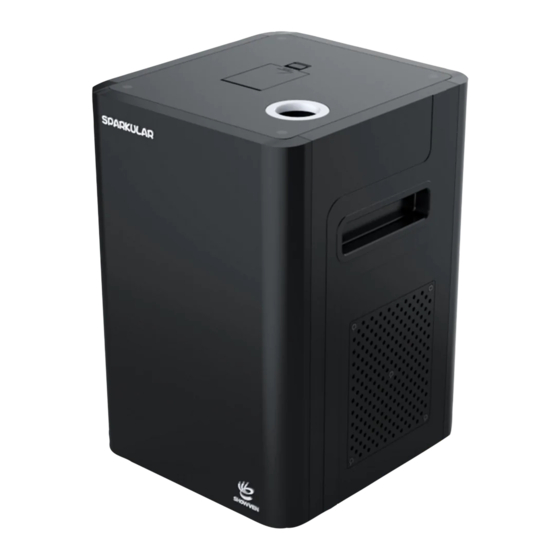
Page 4: Production Overview
DMX in/out, AC power in/out 2) Instructions The Sparkular system has two main components: Sparkular BT01/BT02 and Host Controller ZK6200/ZK6300. BT01/BT02 with series built-in safety features that is readable on the Sparkular and host controller. Please note the read out function is not applicable for other DMX console. - Page 5 a) LCD display: Shows operation menu and status of the machine. b) LED Displaying Area: READY: Flash means machine is preparing, LED keeps on means ready to operate DMX: Flash means DMX signal is connected, light OFF means there is no DMX signal FAULT: Light ON when error occurs HEAT: Light ON when system is heating up c) Control Button Area:...
- Page 6 Error Information Error Information Explanation E0 System IC Systematic error E1 Motor Protect Over current protection of the motor E2 Temp. Sensor Temperature sensor is not connected or damaged E3 P Temp. Over The equipment stops due to the over-temperature of the chassis E4 Time Remain Activated time for the machine is not enough, please swip RFID card E5 K Temp.
-
Page 7: Advanced Interface
Motor protect function, default setting is Off Select input power supply voltage. Power Selection 220/110Vac Default setting for BT01 is 220VAC. BT02 is 110VAC. *For better performance of SPARKULAR, please don’t change the default value of density without permission from SHOWVEN. - Page 8 6) DMX Channel Mode: The system occupies two channels. First Channel Function 0-15 Fountain Off 16-39 Fountain Height 1 40-63 Fountain Height 2 64-87 Fountain Height 3 88-111 Fountain Height 4 112-135 Fountain Height 5 136-159 Fountain Height 6 Fountain Height 7 160-183 184-207 Fountain Height 8...
-
Page 9: Host Controller
Special Effects and one user-definable special effect mode (together with SPARKULAREdit 200 software from SHOWVEN), supports 8 files and each file supports 36000 lines at maximum (special effects last for 30 minutes) d) There are multiple optional trigger sources. Hand, Music or Midi Inputs. - Page 10 3) Controller Operation Panel a) Cable Connection Area: AC Input: AC Power Input. CAN: CAN Communication Input/Output Ports. Tape In: Audio Signal Input Port of Main Channel Aux: Audio Signal Socket of Side Channel. Music: Displaying the Electrical Level of Audio Signal. MIDI In: Time Synchronous Signal Input of MIDI thru output.
- Page 11 d) LCD Area F1: Main Menu F2: File Selection Menu F3: Configuration Menu F4: About Menu e) Edit/Control Area Parameters can be programmed through number keys or up/down keys. Test: For test/demonstration of edit effects. When press the Test, Sparkular file will be operated and LED will display the effect, but communication won’t be output.
-
Page 12: Error Information
Option Scope Illustration FILE NO. File number FIRING HEIGHT 1-10 Fountain Height gear. “.” button can change height10 directly. FIRING DURATION 0.1-30.0s Duration of the Fountain TRIGER DELAY 0.1-30.0s Trigger delay between two machines REPEAT PERIOD 0.1-50.0s Time to start of next sequence/period REPEAT COUNTS Repeated times Note: Only “Pause or Stop, Forward”, “Rewind”... - Page 13 Option Range Description SPARKULAR Start No. 1-18 Select range SPARKULAR End No. 1-18 Select range Trigger Source HAND,AUDIO,MIDI Trigger Sources options under special effect mode Audio Level 1,2,3,4 Voltage classes1-4 after choosing Audio Trigger Mode Time toThe filtering time of trigger signals after choosing Audio Filter Delay 10-100ms Audio Trigger Mode start of next sequence/period...
-
Page 14: System Configuration And Connection
3. System Configuration and Connection 1) System Configuration Host Controller Standard DMX Communication Cable Standard DMX Communication Cable 3PIN Power Supply Cable Sparkular AC Input 2) System Connection a) Controller and Sparkular Host Controller (ZK6200) DMX Communication Cable Sparkular b) Sparkular Power Supply Cable Maximum of 6 units (BT01) / 3 units (BT02) Sparkular in series with one main power supply cable. -
Page 15: System Prepare And Start
Funnel and Nozzel plug (not standard Open the hopper lid Filling the hopper Close the lid of hopper configuration, can order from SHOWVEN) Warning: Please fill SPARKULAR by following above process. After adding the consumable, please do remem- ber to close the lid. -
Page 16: Parameters Setup
2) Turn On Host Controller Switch on host controller as below. 3) Turn On Sparkular Switch on Sparkular, 4) Parameters setup Programming SPARKULAR effects according to this manual. 5) Activate Sparkular machine Swip an RFID card after filling each bag of HC8200. Read the card as show below. SPARKULAR shows time remain if read successfully. - Page 17 8) Clear Material Please running Clear Material both before and after each show. Before delivery or not use machine in a long time, please pouring the HC8200 out of hopper, and store the remaining HC8200 in a dry sealed bottle for next time use. Tools To empty Granular material Warning: Please follow this process to clear material when necessary.
-
Page 18: Warranty Instructions
1. Damage caused by improper transportation, usage, management, and maintenance, or damage caused by human factors; 2. Disassemble, modify or repair products without Showven’s permission; 3. Damage caused by external reasons (lightning strike, power supply etc); 4. Damage caused by improper installation or use;... - Page 20 Showven Technologies Co., Ltd Add: Building B1, Changsha E Center No.18, Xiangtai Road, Liuyang Economic Development Zone, Changsha City, 410300, Hunan Province, P.R.China. Tel: +86-731-83833068 Web: www.showven.cn E-mail: info@showven.cn...
Need help?
Do you have a question about the SPARKULAR BT01 and is the answer not in the manual?
Questions and answers