Table of Contents
Advertisement
Quick Links
C
ONTENTS
Important User Information . . . . . . . . . . . . . . . . . . . . . . . . . . .2
General . . . . . . . . . . . . . . . . . . . . . . . . . . . . . . . . . . . . . .2
Manufacturer . . . . . . . . . . . . . . . . . . . . . . . . . . . . . . . . .2
Intended Use . . . . . . . . . . . . . . . . . . . . . . . . . . . . . . . . .2
Warranty . . . . . . . . . . . . . . . . . . . . . . . . . . . . . . . . . . . . .2
Note: Please read and understand these instructions before assembling the parts.
Note: Remove all items from the shipping cartons and arrange them in a convenient location.
Refer to the illustrations on the following pages.
If you need additional information, contact Wenger Corporation using the information below.
©Wenger Corporation 2014
Wenger Corporation, 555 Park Drive, P.O. Box 448, Owatonna, Minnesota 55060-0448
Questions? Call.....USA: 1-800-4WENGER (493-6437) • Worldwide: 1-507-455-4100 • www.wengercorp.com
Before You Begin . . . . . . . . . . . . . . . . . . . . . . . . . . . . . . . . . .3
Required Tools . . . . . . . . . . . . . . . . . . . . . . . . . . . . . . . . . . . .3
Leveling the Cabinet . . . . . . . . . . . . . . . . . . . . . . . . . . . . . . . .4
Securing the Cabinet(s) to the Wall . . . . . . . . . . . . . . . . . . . .6
Numbering System . . . . . . . . . . . . . . . . . . . . . . . . . . . . . . . . .7
Changing Shelf Locations . . . . . . . . . . . . . . . . . . . . . . . . . . .8
Printed in USA 08/14
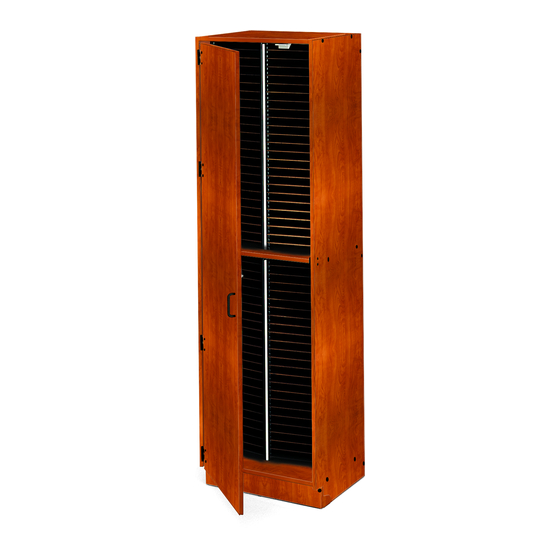
Assembly Instructions
Tall Folio Cabinets
Part #146M329-03
Advertisement
Table of Contents

Related Manuals for Wenger 146M Series


Summary of Contents for Wenger 146M Series
- Page 1 Note: Remove all items from the shipping cartons and arrange them in a convenient location. Refer to the illustrations on the following pages. If you need additional information, contact Wenger Corporation using the information below. ©Wenger Corporation 2014 Printed in USA 08/14 Part #146M329-03 Wenger Corporation, 555 Park Drive, P.O.
- Page 2 Wenger Corporation. Wenger Corporation does not assume any responsibility for any errors that may appear in this manual. In no event will Wenger Corporation be liable for technical or editorial omissions made herein, nor for direct, indirect, special, incidental, or consequential damages resulting from the use or defect of this manual.
- Page 3 EFORE EGIN • The Tall Folio Cabinet is shipped almost entirely assembled. To install, level the unit and attach the few remaining components as outlined in these instructions. • Read the complete assembly procedure before you begin. • Remove all items from the shipping carton, and lay them out approximately in their final position. EQUIRED OOLS The following tools must be available to assemble the Tall Folio Cabinets:...
- Page 4 EVELING THE ABINET NOTE: Do Not try to level the cabinet to match soffits. Do Not try to plumb the cabinet to match adjacent walls. Do Not install door handles until cabinets have been leveled.For proper door alignment, follow these instructions carefully. See “Changing Shelf Locations”...
- Page 5 EVELING THE ABINET ONTINUED 3. Measure A and B with a tape and adjust the front levelers until A=B (+ 1/32 inch). 4. Adjust both front levelers equally until the front edges of the cabinet are plumb (front-to-back). 5. Recheck that A=B and that the door is even with the top panel. Readjust if necessary (steps 2 - 4).
- Page 6 ECURING THE ABINET TO THE There are L-shaped brackets in the hardware bag for attaching the cabinets to your wall surface. Because of the variety of possible wall surfaces, fasteners are not included. Have your maintenance people recommend an appropriate type for safe, secure attachment. NOTE: Make sure all the cabinets are secured together before you attach them to the back wall.
- Page 7 UMBERING YSTEM 1. To assign numbers to individual slots, use enclosed number strips or blank strips. They can be added or removed in the black extrusions as your numbering system changes. Refer to Step 1 under “Changing Shelf Locations” to remove extrusions. Letters or numbers can be written on the strips using ink pen, marking pen or permanent markers and can be easily erased with all purpose cleaner (or industrial cleaner for dry erase markers) or slide the pre-printed enclosed number strip...
- Page 8 A Philips Head Screwdriver is required to change the shelf locations. 1. Wenger Mobile Folio Cabinets are shipped with the shelves already installed. They are held in place by an aluminum extrusion which runs from top to bottom of each compartment.
Need help?
Do you have a question about the 146M Series and is the answer not in the manual?
Questions and answers