Rinnai Symmetry RDV3611 Maintenance Instructions Manual
Hide thumbs
Also See for Symmetry RDV3611:
- Installation manual (28 pages) ,
- Operation manual (20 pages) ,
- Instructions (2 pages)
Table of Contents
Advertisement
Quick Links
Advertisement
Table of Contents

Related Manuals for Rinnai Symmetry RDV3611


Summary of Contents for Rinnai Symmetry RDV3611
-
Page 1: Maintenance Instructions
Maintenance instructions Symmetry Models: RDV3611, RDV3610, and RDV3600... - Page 2 Important: Appliance must be installed with a Rinnai approved flue system. This appliance shall be installed in accordance with: Manufacturer’s installation instructions AS/NZS 5601 Local regulations and municipal building codes Installation, servicing and repair shall be carried out only by authorised personnel.
-
Page 3: Table Of Contents
Checking the performance Appendix A: Flue configurations and flue restrictor positioning Operating information for this appliance is available in the customer operation manual. Please ensure the customer has this before going on site, if not it can be downloaded from www.rinnai.co.nz. -
Page 4: Introduction
Introduction Rinnai New Zealand understands that peace of mind is associated with a safe and well maintained gas fireplace. This is why Rinnai recommends this appliance is serviced every two years by a licensed gasfitter. If the appliance is in a particularly... -
Page 5: Engine And Log Set Components
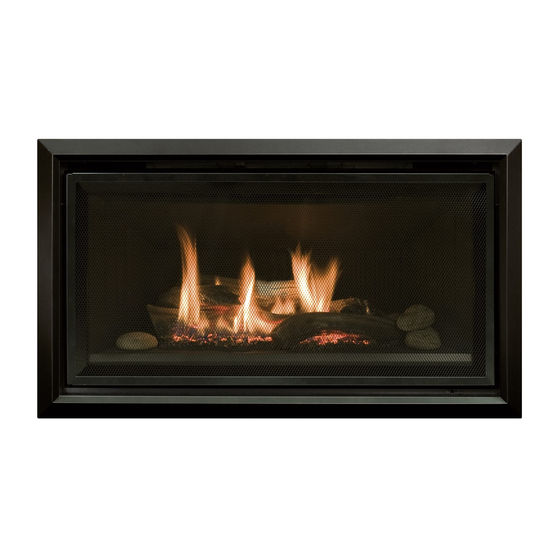
Front base Top log Round flat Front middle left log (with right log rock moulded rock) There may also be small clumps of Rinnai Rock Wool burn media located on the burner bed. Symmetry Maintenance Instructions 11699-B 02-12 | 5... -
Page 6: Dismantling The Appliance
Dismantling the appliance Before commencing any maintenance work, ensure the gas and power supplies to the appliance are disconnected. Also read these instructions to get an overview of the IMPORTANT steps required before starting any maintenance work. There are a number of checks that need to be performed as the appliance is dismantled. -
Page 7: Combustion Chamber Pressure Relief
Combustion chamber pressure relief A check on the combustion chamber pressure relief should be performed before the glass frame is removed. This is to ensure the springs that operate to release the glass panel (when there is gas build-up) are in good working order. With hands placed either side of the glass panel, pull the glass panel towards you. -
Page 8: Glass Gasket
Glass gasket The glass front seal is critical to the safe and effective operation of the appliance. When removing the glass panel check the gasket to ensure there is a complete seal and that no part of the gasket is worn or damaged. The gasket seal on the combustion chamber glass should have no visible signs of wear and tear. -
Page 9: Log Set
(small chipping is acceptable). The log set should not be mixed with any other burn media (except Rinnai Rock Wool). When you reposition the log set it is important to position the pieces as shown. Incorrect placement can create carbon build up and affect performance—refer page 5 for log set arrangement. -
Page 10: Burner Bed And Gasket
Burner bed and gasket Removal of the burner bed will allow you to remove excess soot and check the burner gasket as this can break down over time. 1. To lift out the burner two brackets will need 2. Carefully lift out the burner bed. Note hand to be removed. -
Page 11: Pilot Assembly And Injectors
Pilot assembly and injectors This step (completed once the unit has been dismantled) involves a general check of the pilot assembly and removing any build-up in the injector which can affect performance. 1. Lift out the pilot head. 2. Unscrew the pilot injector, check, clean and return. -
Page 12: Flue Restrictor Position And Heat Exchanger
Flue restrictor position and heat exchanger Check the flue restrictor position against the flue configurations shown on pages 17-18 to ensure correct placement. It is important that this is in the right position for the type of flue installed as this can affect the draw and performance of the fire. Inspect the heat exchanger for any sign of corrosion. -
Page 13: Fan
Vacuum in and around the fan (if installed) to remove any dust or debris. Do not remove the combustion chamber bottom panel to access the fan as this could damage the sealing gasket. Symmetry Maintenance Instructions 11699-B 02-12 | 13... -
Page 14: Testing The Gas Pressure
Testing the gas pressures To check and set the burner pressures Outlet test point Inlet test point 1. Turn on the gas and power supply to the unit. 2. Refer to the data plate for applicable test point pressures. Gas outlet 3. -
Page 15: Checking The Performance
If the appliance can not be made to perform correctly, please contact Rinnai. Symmetry Maintenance Instructions 11699-B 02-12 | 15... -
Page 16: Appendix A: Flue Configurations And Flue Restrictor
Appendix A Flue configurations & flue restrictor position... - Page 17 RDV3611/10 flue configurations Vertical termination with Vertical termination with 90 ° bends Horizontal termination with a 45 ° bends 90 ° bend Max. 1.2 m Max. 5.4m Max. 5.4 m Max. 5.4 m Restrictor position # 2 Restrictor position # 3 Restrictor position # 2 4.2 m 4.2 m...
- Page 18 RDV3600 flue configurations Vertical termination with Vertical termination with 90 ° bends Horizontal termination with a 45 ° bends 90 ° bend 1.2m Max 5.4m Max 5.4m Max 5.4m Restrictor position #2 Restrictor position #3 Restrictor position #2 4.2m 4.2m 4.2m Restrictor position #4 Restrictor position #3...
- Page 20 Experience our innovation Rinnai.co.nz 0800 746 624 http://www.youtube.com/rinnainz...
Need help?
Do you have a question about the Symmetry RDV3611 and is the answer not in the manual?
Questions and answers