Advertisement
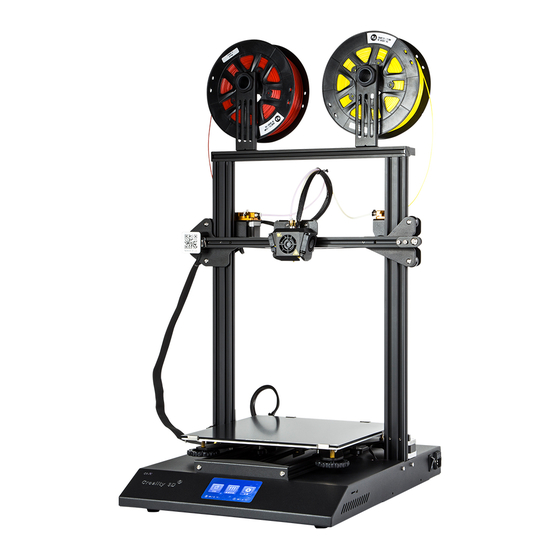
CR-X 3D Printer
◆
This user manual is for standard CR-X.
◆
Because of software or hardware upgrades and model differences, new
revisions may not be listed in this guide.
◆
Please plug the power cord into a three-hole power jack.
◆
Detailed instructions for use are available on the TF card.
User Manual
V.1.2
Advertisement
Table of Contents

Related Manuals for Creality CR-X


Summary of Contents for Creality CR-X
- Page 1 CR-X 3D Printer User Manual ◆ This user manual is for standard CR-X. ◆ Because of software or hardware upgrades and model differences, new revisions may not be listed in this guide. ◆ Please plug the power cord into a three-hole power jack.
- Page 2 Notes Do not use the printer any way other than described herein in order to avoid personal injury or property damage. Do not place the printer near any heat source or flammable or explosive objects. We suggest placing it in a well-ventilated, low-dust environment. Do not expose the printer to violent vibration or any unstable environment, as this may cause poor print quality.
-
Page 3: Table Of Contents
CONTENTS Dear Consumers: Thank you for choosing our products. For the best experience, please read the instructions before operating the Printer. Our 3D team will always be ready to give you the best service. Please contact us via the phone number or e-mail address provided at the end when you encounter any problem with the Printer. -
Page 4: Introduction
Parameters Introduction Model CR-X 300*300*400mm Printing Size 270X270X400mm(Dual Color) Molding Tech. Nozzle Number Slice Thickness 0.1mm-0.4mm Nozzle Diameter 0.4mm Precision ±0.1mm Fliament 1.75mm PLA File Format STL/OBJ/AMF Working Mode Online or TF card offline Creality Slicer/Cura/Repetier- Slice Software Host/Simplify3D Input:100-240V 50/60Hz... -
Page 5: General List
General List Tool Box Base Frame Gantry Frame Filament(1kg) Tool List Image Name Image Name Image Name Wrench & Screw Filament Holder 1 set PTFE Tube Bracket Driver TF Card & Reader 1 set Filament Holder Tube Spare Parts 2 set Filament Holder Tube M5X25 black Hex-Bolt and Spade... -
Page 6: Device Installation
M4X8 4pcs 4pcs Device Installtion M5X25 M4 T-nut X-Axis Spacer Gantry Frame Installation Filament Holder Installation M4X8 & T-nut 4pcs X axis adjustment 100mm 100mm M5X25 4pcs... -
Page 7: Cable Connection
Cable Connection Ribbon Cable *Please plug the power cord into a three-hole power jack. -
Page 8: Screen Information
Screen Info. Main Sub Menu Explanation Menu Screen Information Stop Pause Print Automatic Printing Speed Manual TF card Selected File Nozzle Temp. Cooling Hot-bed Preheat Fan(off\on) Levelling Automatic PLA\ABS(185°\220°) Refuel Nozzle Preheat Manual Moving Hot-bed Preheat Temp Motor Cooling yes\no Printer Info (off\on) Language... -
Page 9: Loading Filament
Feeding Loading Filament Preheat Method 1、 Press and hold the extrusion clip, insert the filiment from the inlet Method 2、 to the position with red line above the small pneumatic connector. * Check and ensure that the filiment are on the position with the red line above the small pneumatic fittings before each print to ensure, otherwise, it will can cause plugging during printing. -
Page 10: Bed Leveling
Bed Levelling The nozzle is too far away from the platform, so the c o n s u m a b l e s c a n n o t adhere to the platform. Filament are extruded evenly, just sticking on the platform. Tighten the four levelling nuts at the bottom of the platform before initial levelling. -
Page 11: Software Installation
Software Installation 1. Double click to install the software. 3. Select language→Next→Select your machine→Next→Finish. 2、Double click to open the software. -
Page 12: First Printing
How to print in two colors (Dual-Color printer) Load all parts of models 1.Slicing First Printing Insert TF card into computer with Reader. Open the software→Load→Select the file→Wait for slicing to finish ,and save the gcode file to TF card. R-Click to merge models 2. -
Page 13: Corrective Maintenance
Corrective Maintenance... -
Page 14: Circuit Wiring
Circuit Wiring... - Page 15 After- Sales Service (3) Equipment failure or damage caused by unauthorized modification Service of the equipment (private modification includes: 1. modification of the nozzle assembly; 2. modification of the machine structure; 3. use 1, The printer can be returned within seven days, 15 days replacement, of third-party components;...
- Page 16 SHENZHEN CREALITY 3D TECHNOLOGY CO., LTD. 12/F, Block 3,JinChengYuan,Huafan Road,Tongsheng Community, Dalang, Longhua District,Shenzhen,China,518109 Official Website :www.creality3d.cn Tel:+86 755-2105 9455 E-mail:info@creality3d.cn cs@creality3d.cn Website QR code...
Need help?
Do you have a question about the CR-X and is the answer not in the manual?
Questions and answers