Advertisement
Table of Contents
- 1 Table of Contents
- 2 About the Printer
- 3 Device Specifications
- 4 Creality Cloud Distribution Network Method
- 5 List of Parts
- 6 Installing the 3D Printer
- 7 Using the 3D Printer
- 8 Creality Cloud Distribution Network Method
- 9 Offline Printing
- 10 Start Printing
- 11 Resetting Network
- 12 Printer Maintenance
- 13 Circuit Wiring
- 14 Troubleshooting
- Download this manual
Advertisement
Table of Contents

Related Manuals for Creality CR-10 Smart Pro


Summary of Contents for Creality CR-10 Smart Pro
- Page 1 CREATE REALITY,ACHIEVE DREAMS CR-10 Smart Pro CR-10 Smart Pro 3D Printer User Manual V1.2...
- Page 2 To Our Dear Users Thank you for choosing Creality. To make using our products easier, please read this User Manual before you start and follow the instructions provided carefully. Creality is always ready to provide you with high-quality services. If you encounter any issues or have any questions when using our products, please use the contact information at the end of this manual to contact us.
- Page 3 Instructions for Use Do not use this printer by methods or operations not described in this manual, otherwise it may result in accidental injury or property damage. Do not place this printer near flammable materials, explosive materials or high heat sources. Please place this printer in a ventilated, cool and low-dust environment. Do not place this printer in a vibrating or any other unstable environment, as the printing quality will be compromised when the printer shakes.
-
Page 4: Table Of Contents
01-01 Device Specifications 02-02 List of Parts 03-03 Installing the 3D Printer 04-09 Using the 3D Printer 10-17 Creality Cloud Distribution Network Method 1 18-18 Creality Cloud Distribution Network Method 2 19-19 Offline Printing 20-21 Start Printing 22-22 Resetting Network... -
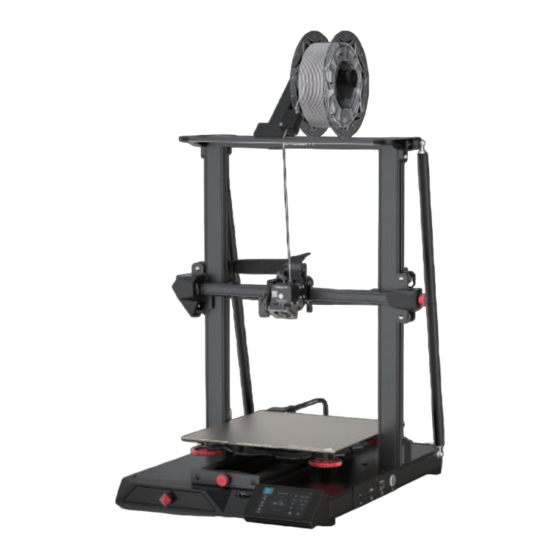
Page 5: About The Printer
1. About the Printer Memory Card Slot Rack Module Pull Rod LED Light Touch Screen Screw Rod Filament Detector Wi-Fi QR code Coupling X-Axis Limit Switch Online Port Z-Axis Motor Nozzle Module Camera Port Power Switch Printing Platform Network Port AC power connector Y-Axis Belt Adjustment Knob Power On Button... -
Page 6: Device Specifications
2. Device Specifications General Specifications Model CR-10 Smart Pro Modeling Dimensions 300 mm x 300 mm x 400 mm Modeling Technology Number of Nozzles Slice Layer Height 0.1 to 0.4 mm Nozzle Diameter 0.4 mm (standard) Printing Accuracy ±0.1mm Printing Material 1.75mm PLA/ABS/TPU/PETG/Wood/Carbon/PA... -
Page 7: List Of Parts
3. List of Parts Chassis x 1 Gantry x 1 Touch Screen x 1 Power Cord x 1 Rack x 1 Teflon Tube x 1 Filament x 1 Pull Rod x 2 M5x45 Combination M5x12 Hexagon Flat Round M5x20 Hexagon Flat Round M5 Extra Large Gasket x 2 Screw x 4 Head Screw x 2... -
Page 8: Installing The 3D Printer
4. Install the Gantry Chassis x 1 X Axis Install the two Z-axis profiles on the inner steps of the Y-axis bottom profile. Gantry x 1 Turn the coupling so that the X-axis rises to the position shown in Figure 16. M5x45 Combination Screw x 4... - Page 9 5. Install the Pull Rod Adjust the pull rod assembly to a suitable length and install it in the position shown in the figure. M5x12 Hexagon Flat Round Head Screw x 2 M5x20 Hexagon Flat Round Head Screw x 2 M5 Extra Large Gasket x 2...
- Page 10 6. Install the Nozzle Module Nozzle Module x 1 The screws have been fixed on the nozzle assembly, users need to disassemble and assemble by themselves...
- Page 11 7. Install the Rack Install the rack on top of the printer as shown in the figure. Rack x 1 Teflon Tube x 1...
- Page 12 8.Install the Touch Screen Touch Screen x 1 1、Connect the cable on the base to the touch screen. Install Disassemble 2、Align the three mounting holes on the back of the touch screen horizontally with the three screw posts on the chassis, and gently press them in place in the direction of the arrow.
- Page 13 9. Connect Cables Power Cord x 1 Loosen the screws before connecting the nozzle module, and then tighten the screws afterwards. Fix the middle of the black positioning label on the cable to the wire clamp. 、Connect the X-axis motor to the 6-pin port as shown in the figure. B、Connect the X-axis limit switch to the 2-pin port as shown in the figure.
-
Page 14: Using The 3D Printer
10. Leveling the Platform Select home leveling to enter the leveling mode. >> -2.6 Do not touch the nozzle cable during the leveling process. - Page 15 10. Leveling the Platform Move the nozzle to near above the leveling nut. Twist the nut to adjust the printing platform to make it fit the nozzle just with a distance of about 0.1mm (a standard leveling card, or use A4 paper). Level the four corners in order.
- Page 16 10. Leveling the Platform We can use a piece of A4 paper to assist in leveling, so that the nozzle can just make scratches on the A4 paper. Complete the adjustment of the leveling nuts on the four corners one by one. Continue to adjust until you can feel the slight resistance from the nozzle when you pull the A4 paper.
- Page 17 10. Leveling the Platform 1. Enter the automatic leveling, the motor starts, and wait for the automatic leveling to complete. 2. After the leveling is completed, adjust the Z-axis compensation value appropriately according to the adhesion of the printing consumables and the glass platform . >>...
- Page 18 11. Warming Up Since the warm-up process may take a long time, you may start the warm-up process before selecting the model and configure other parameters to save time. Method 1 >> Note: The operating interface shown in this manual is for reference only. The actual operating interface may vary.
- Page 19 11. Warming Up Method 2 >> Note: 1. The warm-up parameters are already configured at the factory. PLA warm-up standards — nozzle temperature: 200℃, hotbed temperature: 60℃. ABS warm-up standards — nozzle temperature: 240℃, hotbed temperature: 70℃. If you need to adjust the parameters due to printing materials or other reasons, please go to Homepage →...
- Page 20 12. Loading the Filament Please hang the filament on the rack while waiting for the temperature to rise. In order to successfully load the filament, the end of the filament should be in the position as shown in the figure.
- Page 21 12. Loading the Filament When target temperature is reached, insert the filament through the filament detection module into the hole of the extruder until it reaches the nozzle. If the filament flows out of the nozzle, it is properly loaded. How to adjust the tightness of the extrusion spring: Move the arrow to the left to loosen it and right to tighten it (as shown in Figure A).
-
Page 22: Creality Cloud Distribution Network Method
13. Creality Cloud Distribution Network Method 1 >> >> >> >> 1.Scan and download 2.Register 3.Log in 4. Select bluetooth 5.Add equipment CR-10 Smart Pro >> >> >> >> >> CR-10 Smart Pro 6. Connect to local WiFi 7. Select model 8. - Page 23 14. Creality Cloud Distribution Network Method 2 >> >> >> >> >> 1.Scan and download 2.Register 3.Log in 4. Scan QR Code 5. Network settings 6. Connect machine WiFi CR-10 Smart Pro >> >> >> >> >> CR-10 Smart Pro 7.
-
Page 24: Offline Printing
1. Visit our official website (https://www.creality.com) to 3. Go to Select language → Next → Select model → Next → Finish to 4. Launch the Creality slicing software → Load → Select the file. download and install the software, or install it via the complete the configuration. - Page 25 15. Offline Printing >> 5. Generate the G-code file → Save it to the memory card. 6. Insert the memory card. Note: 1. For details on using the software, please refer to the slicing The file name must be Latin letters or numbers, not Chinese software user manual on the memory card.
-
Page 26: Start Printing
16.Start Printing Please follow these steps to check the printer again: When the printer is powered off: 1. The nozzle is tightly connected and moves smoothly to the left and right. 2. The X axis is horizontal and stable (not wobbling up or down), and it moves run smoothly up and down. -
Page 27: Resetting Network
17. Resetting Network 11. Start Printing 开始打印 >> Note: When you use the printer for the first time or when you need to clear its stored information, tap “Restore Network Settings” on the touch screen and wait for 1 to 2 minutes. After that, rescan the QR code or connect via Bluetooth. -
Page 28: Printer Maintenance
18. Printer Maintenance 1. Turn the knob to adjust the tightness (clockwise to tighten and counterclockwise to loosen). Do not make it too tight, otherwise the belt may break and the printer may be damaged. (As shown in Figure A.) 2. -
Page 29: Circuit Wiring
19. Circuit Wiring Y-Axis Motor & Limit Switch Z1-Axis Motor Z2-Axis Motor Cable Port 1 Memory Card Slot Cable Port 2 Wi-Fi Port Screen Port Fuse Power Input Hotbed Power Output Hotbed Thermal Always-On Fan Power Off Module Reserved Port Filament Detection Wi-Fi Reset... -
Page 30: Troubleshooting
20. Troubleshooting Workflow Diagnostics Cause of Failure Solution Feedback 1. Clean the memory card. Memory Card Start 2. Format the memory card. 3. Use another memory card. Print via the 1. Rename the file. The new name File Name memory card? contains only letters and digits. - Page 31 Warning For pluggable equipment, the socket-outlet shall be easily accessible. Pour l'équipement pluggable, la prise de prise doit être facilement accessible. Do not use this apparatus near water. Ne pas utiliser cet appareil à proximité des sources d'eau. Clean only with dry cloth. Nettoyer seulement avec un chiffon doux sec.
- Page 32 SHENZHEN CREALITY 3D TECHNOLOGY CO., LTD. Add:18F,JinXiuHongDu Building, Meilong Blvd., Longhua Dist., Shenzhen, China 518131 Official Website: www.creality.com Tel:+86 755-8523 4565 E-mail: info@creality.com cs@creality.com 210-171764 5021078...
Need help?
Do you have a question about the CR-10 Smart Pro and is the answer not in the manual?
Questions and answers