Advertisement
Quick Links
Advertisement

Related Manuals for Lewmar AutoAnchor 150


Summary of Contents for Lewmar AutoAnchor 150
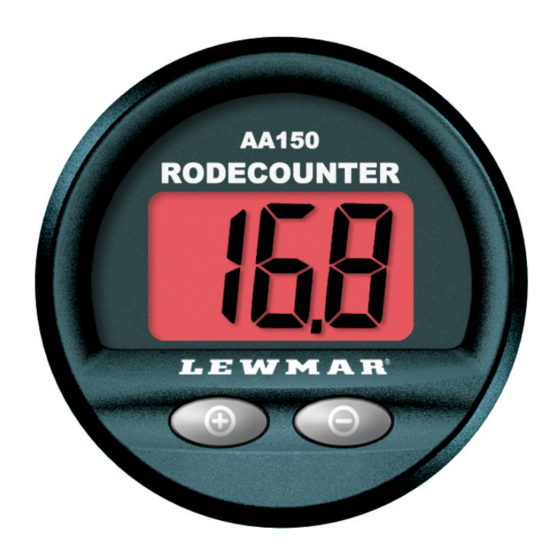
- Page 1 AutoAnchor 150 V1.34 Installation and Operation Instructions...
- Page 2 PART 1 IMPORTANT INFORMATION The AA150 can be fitted to most vertical windlasses. A horizontal windlass PART 2 INsTAllATION may require a sensor holder or a custom designed sensor which is not included in the standard pack. Check with your supplier or the AutoAnchor manufacturer. PART 3 seT uP The AA150 should only be installed by a qualified marine electrician. Do not PART 4 usING The AuTOANChOR 150 attempt to install the AA150 unless you are suitably qualified. PART 5 MAINTeNANCe The AA150 must be fitted to a windlass with a dual direction control box or solenoid pack. PART 6 TROuBleshOOTING Information for installation and operation of the AA150 is supplied including preset windlass profile lists and wiring diagrams. All instructions should be left on board for the owner. Non compliance with the instructions could impair the windlass and the AA150 operation, and could result in personal injury and/or damage to the boat. Non compliance with the instructions will negate the manufacturer’s warranty. The AA150 manufacturer and supplier accept no liability for personal injury...
-
Page 3: Power Supply
eleCTROMAGNeTIC COMPATIBIlITy (eMC) 1.2 CABle sPeCIFICATIONs FCC Information: All Cables: 1.0mm (AWG18) This device complies with CFR47 Part 15 of FCC Rules for Class B equipment. Rope/Chain Connections: If the brown and white wires are connected to the motor esTI Information (Ce): terminals for rope/chain counting short circuit protection is required. The load sensor This device meets the relevant standards set out in European Standard EN 60945:2002 for terminators supplied have motor terminal connectors with a 1000 ohm resister prefitted. If maritime navigation and radio communication equipment and systems. These These these terminators are not used a 1000 ohm resister must be fitted near the motor terminal. standards are intended to provide reasonable protection against interference by other emission generating products on the boat. Compliance with these standards is no guarantee that interference will not occur in a particular installation. The installation instructions must be followed to minimise the potential for interference. Note: If shielded cable is not used for the sensor connections this will compromise the EMC and may invalidate the warranty. 1.3 POweR suPPly The AA150 console must be installed at least 3 ft (1m) away from any transmission equipment or cables carrying radio signals eg VHF radios, cables and antennas or radar ThE PoWER SuPPly MuST BE DISCoNNECTED DuRINg INSTAllATIoN AND WhEN antennas; and at least 6 ft (2m) away from any SSB equipment. AA150 cables must be MAkING ANY CHANGES TO WIRING OR ELECTRICAL CONNECTIONS. installed at least 1.5ft (500mm) away from such items. - Page 4 PART 2 INsTAllATION Fitting the sensor: Do not force the sensor into the hole. hammering the sensor head can damage the internal electronics. Ensure the sensor head is positioned so that it will not be hit by the chainwheel during windlass operation and that it is at least 300mm (1ft) away 2.1 MAGNeT ANd seNsOR INsTAllATION from the battery and motor cables. Secure the sensor using a good quality neutral cure silicone or a strong adhesive eg. Sikaflex 291 or 3M 5200. PleAse ReAd BeFORe COMMeNCING INsTAllATION 2.1.3 PluG ANd PlAy seNsOR CABle Correct magnet and sensor installation is critical for successful AutoAnchor operation. The AutoAnchor plug and play sensor extension cable must be used to connect the sensor to the console unit. The AutoAnchor can be installed on vertical windlasses and most horizontal windlasses.
- Page 5 2.1.5 INsTAllATION VeRTICAl wINdlAss - ChAIN ONly dual Installation page 4 Refer to the Overview Notes on before starting installation. use the T junction connector Part #9506 and the 2m (Male/Female) extension cable Part #9505. Chainwheel Chainwheel Magnet Magnet Part 9506 Seal with minimum 1mm epoxy. Seal with minimum 1mm epoxy. Deckplate Deckplate Fig 1a - Grey AA sensor Sensor Sensor Fig 1 - All sensors may be offset up to 20mm Magnet size: Standard size is 10mm x 8mmm (#9061). This may be replaced with the # 9506 AutoAnchor smaller 6mm x 4mm (#9009) magnet if required for your windlass.
- Page 6 2.1.6 INsTAllATION VeRTICAl wINdlAss - ROPe & ChAIN 2.1.7 INsTAllATION hORIZONTAl wINdlAss - ChAIN ONly Refer to the Overview Notes on page 4 before starting installation. Refer to the Overview Notes on page 4 before starting installation. It is not For an accurate rope and chain count, the rode must run between the sensor and possible to set out a single installation method for horizontal windlasses.
- Page 7 2.1.8 INsTAllATION hORIZONTAl wINdlAss - ROPe & ChAIN See the note below re wiring for multiple console installations. Before starting check with the AutoAnchor manufacturer or supplier, that it is For dual console operation, the sensor must be reset before calibrating the consoles. To do possible to fit the sensor and magnet to your horizontal windlass. this clear the counter to zero twice. Press and hold any button. The AA150 will beep and clear within 4 seconds. rE will be displayed during the second clearing indicating the reset For an accurate rope count the rode must run between the sensor and magnet. On is okay. a horizontal windlass the magnet and sensor must be fitted by the oEM windlass manufacturer. 2.3 wIRING If it is not possible to have the sensor and magnet fitted to achieve this you can use the chain only horizontal windlass installation above. This provides an accurate count of All cables must be connected. Refer to the Wiring Diagrams.
- Page 8 PART 3 seT uP 3.3.2 CusTOM ROPe ANd ChAIN wINdlAsses you need to know the length of chain per turn and the length of 3.1 TO eNTeR seT uP MOde: rope per turn to enter these settings. see the instructions overleaf to calculate this. The AA150 is automatically turned on when powered up.
- Page 9 PART 4 usING The AA150 Calculating the chain per turn This is the length of chain that is released during one complete revolution of the chainwheel. The chain per turn for some windlasses is listed in Appendix 1. If your 4.1 INsTAllATION, seT uP ANd TesTING windlass is not listed follow the instructions below to calculate it. Before the AA150 is used it is must be set up for the windlass and rode on the Step 1 use adhesive tape to place a mark on the boat and tested in a calm, safe environment.
- Page 10 4.3 ChANGe BACklIGhTING leVel (This is best done in low light). PART 6 TROuBleshOOTING The AutoAnchor is not faulty if these messages display. Tap either button / to adjust the light level up and down. There are 4 light levels. The diagnostics help identify problems with the installation and sensor. The messages display briefly during operation and/or power up. A beep will sound and after 3 seconds the message will be cleared. 4.4 ReseT dIsPlAy TO ZeRO The count will not be accurate until the cause of the error is fixed. Press and hold the key. The AA150 will beep and the display will clear to 0.0 within 4 seconds.
- Page 11 The count pauses during This is not a fault. The rode is changing from rope to chain. retrieval. FOR AddITIONAl TROuBleshOOTING: Contact AutoAnchor support on: www.autoanchor.co.nz/autoanchor-installation-help.php Fill in the information form. Email: support@autoanchor.co.nz or Telephone: +64 9 419 1219 To the best of our knowledge the information in these instructions was correct at the time of printing. however, the AutoAnchor products are continuously being reviewed and improved and product specifications may be changed without notice. The latest product specifications may not be reflected in this version of the instructions. The documentation relating to the AutoAnchor products is created in the English language and can be translated from English to another language. In the event of any conflict between translated documents, the English language version will be the official version. uK and International Distribution Australia/Asia Lewmar Lewmar Incorporated lewmar Navtec Australasia Pty ltd Southmoor Lane 351 New Whitfield Street 4/224 Headland Road havant Guilford CT 06437 Dee Why Hampshire PO9 1JJ New South Wales 2099 England Tel: + 1 203 458 6200 Australia Tel: +44 23 9247 1841 Fax: + 1 203 453 5669 Tel: +61 2 9936 7111 Fax: +44 23 9248 5720 Email: info@lewmar.com Fax: +61 2 9936 7112 Email: info@lewmar.com...
Need help?
Do you have a question about the AutoAnchor 150 and is the answer not in the manual?
Questions and answers