Table of Contents
Advertisement
Quick Links
Advertisement
Table of Contents

Subscribe to Our Youtube Channel
Related Manuals for Lewmar V1


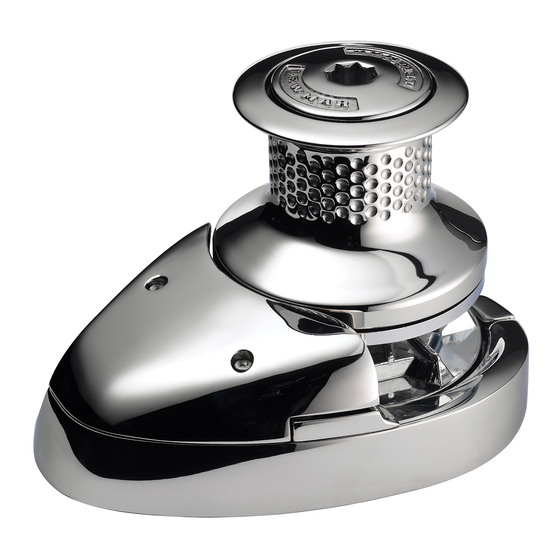
Summary of Contents for Lewmar V1
- Page 1 www.lewmar.com...
- Page 2 3.9 Joining rope to chain To the best of our knowledge, the information in this manual was correct when it went to press. However, Lewmar cannot accept liability for any inaccuracies or omissions it may contain. In addition, our policy of continuous product improvement may change specifi...
-
Page 3: Installation
Thank you for choosing Lewmar windlass. Lewmar products are Throughout this manual, you will see safety and product damage Gypsies fi tted to the V1 range of windlasses are ideally suited Typical working fi gures: world renowned for their quality, technical innovation and proven warnings. - Page 4 fi nal tightening of the mounting nuts. • Fully screw the four mounting studs into the base of the windlass. Screw the studs into the base fi nger tight, with the fl ats towards the base as shown (Fig 1.6-5). V1 Windlass V1 Windlass...
-
Page 5: Electrical Wiring Installation
2. Electrical wiring installation 2.4 V1 Wiring diagram Choice of cable thickness depends on total cable length: 2.1 Electric cable selection 2.2 Wiring Model Motor Breaker / Isolator Contactor A + B + C + D + E = To achieve the best performance and to safeguard your electrical Plan the installation to suit the controls and give the operator a full system it is essential that any electrical windlass be fi... -
Page 6: Maintenance
This should be carried out with the gypsy (31) removed as the anchor whilst underway. detailed above. To remove the control arm (23). Unscrew the V1 Windlass V1 Windlass... -
Page 7: Parts List
30(1) V1 Baseplate Machining 66000624 9(1), 16(1), 20(1), 66000631 Mounting Kit (Metric) V1 Chainpipe Cover 66000625 26(4), 27(4) V1 Manual Recovery Pawl 66000628 66000632 Fast Fit Assy. 36(1), 37(1) Fast Fit Deck Unit Adaptor 66000633 66000633 Deck Spacer Kit 13(1), 32(4) -
Page 8: Troubleshooting
Notice of a claim for service under this warranty shall be made promptly ii Responsibility for the selection of products appropriate for the use and in writing by the end user to the Lewmar outlet which supplied the intended by the Buyer shall rest solely with the Buyer and Lewmar product or to Lewmar at Southmoor Lane, Havant, Hampshire, England accepts no responsibility for any such selection. - Page 9 © Copyright 2006 Lewmar Ltd. All rights reserved. 65001067 Produced by T. Connell UK (+44) 023 9263 9265 Ref:T2140/05/2007...
Need help?
Do you have a question about the V1 and is the answer not in the manual?
Questions and answers