
Related Manuals for M Design Venus True Vision Series


Summary of Contents for M Design Venus True Vision Series
- Page 1 INSTRUCTIONS FOR INSTALLATION AND USE VENUS TRUE ISION Distributor/Manufacturer M-Design Benelux BVBA B-8210 Zedelgem - Belgium V-01-2020...
- Page 2 V E R Y I M P O R T A N T I N S T A L L A T I O N I N S T R U C T I O N S F O R T H E M - D E S I G N G G A S F I R E P L A C E S T H E S U P P L I E R T A K E S N O R E S P O N S B I L I T Y F O R A N Y P O S S I B L E D A M A G E , P O O R W O R K I N G A P P L I A N C E S A N D...
-
Page 3: Table Of Contents
SUMMARY 1. GENERAL REMARKS ............... 2. CONNECTION ................. 3. INSTALLING THE FIREPLACE ............3.1. Positioning the fireplace ............3.2. Nearbox (Gasunit) ..............3.3 The Gas connection ..............3.4 Electrical connection ..............3.5 Modification natural gaz to propane ........4. INSTALLING THE CHIMNEY ............4.1 Roof Exit ................... - Page 4 OPEN EN CLOSE THE DOOR For initial setup, you need to clean the window and clear the fireplace of any dust and gre- ase that is left behind. This is also the only maintenance action that may be performed on the device by the user.
-
Page 5: General Remarks
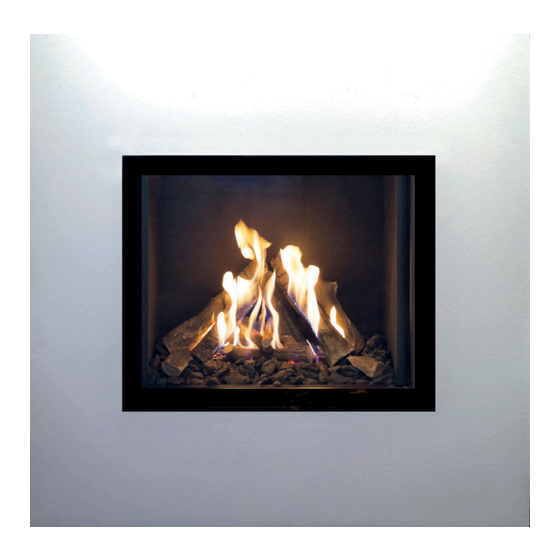
1. General remarks This is an appliance using the closed combustion system, designed for the atmosphere and comfort of your living-room. It constitutes an efficient source of heat and gives the impres- sion of a real fire. The balanced flue appliances are based on the principle of natural extraction from the fi- rebox, which eliminates flue gas outside and brings in air (oxygen) from outside the house which is necessary for combustion of the gas. -
Page 6: Installing The Fireplace
3. Installing the fireplace After having checked the appliance, you are ready to install your appliance. This is done as follows 3.1 Positioning the appliance Place the appliance on a stable surface using the adjustable feet. Adjust the height of the appliance turning the bolt. -
Page 7: Nearbox (Gasunit)
3.2 Nearbox (gasunit) For safety reasons, The gasbattery or “NEARBOX” is fixed with screws on the pallet. IT IS MANDATORY TO UNSCREW THE BATTERY FROM THE REAR PRIOR TO INSTALLATION . reciever DFGT-03MC01 V09 to second burner or side burner to main burner Electro magnet ventil 1 or 2 burners gas connection1/2”... -
Page 8: The Gas Connection
3.3 The Gas connection After the “NEARBOX” has removed from the of the back of the fire, you can place it loosely on the ground in proximity to the opening provided in the wall of mantelpiece. The device is always connected with an approved gas tap 1/2, and preferably with a yellow gasflexible that is reachable at all times. -
Page 9: Installing The Chimney
4. Installing the chimney Install the concentric flue duct as indicated by ONTOP - METALOTERM. The only authorised pipes are ONTOP Metaloterm™. ONTOP-METALOTERM tested our appliances with their conduct and we only guarantee a good working of the appliance with those. Between the external wall of the pipe and the wall or the ceiling, you should allow for a clearance of at least 50mm and protection that is suitable against temperatures of around 130°C. -
Page 10: Roof Exit Via Existing Chimney
4.2 ROOF EXIT VIA EXISTING CHIMNEY (C91S) Ø150 / Ø 100 Appliance C (min) C (max) Restriction (as from 4m) Venus True Vision 730 Ø 60 Venus True Vision 850 Ø 60 Ø200 / Ø 130 Appliance C (min) C (max) Restriction (as from 4m) Venus True Vision 730 Ø... -
Page 11: Roof Exit With Bend
4.3 ROOF EXIT WITH BEND USDVC13+USAB USSR USDP USLS USMB USB90 Ø200/Ø130 USKB US 100/50/25 Ø200/Ø130 Ø 150/100 Appliance A (min) B (max) C (min) (A+B+C )max Venus True Vision 730 (A+C)+7m B-A-1m Venus True Vision 850 (A+C)+6m B-A-8m Ø 200/130 Appliance A (min) B (max) -
Page 12: Wall Exit
4.4 WALL EXIT (C11) USB90 Ø200/Ø130 USMPG USKB USDHC13+USAB USDHC4 13+USAB US 100/50/25 Ø200/Ø130 Ø 150/100 Appliance A (min) B (min) B (max) Restriction Venus True Vision 730 Wall Exit A+0,5m Ø 75 Venus True Vision 850 Wall Exit Ø 60 Ø... -
Page 13: Flame Adjustment Settings
Après avoir installé le foyer, vous devez régler la flamme en fonction tirage avec les anneaux de restriction (voir le chapitre 9. Installation de cheminée + utilisation des bagues de restriction). 5. Flame adjustment settings L'entrée d'air pour la flamme peut être réglée dans les foyers LUNA GAS GAZ TRUE VISION, VENUS GAS. -
Page 14: Convection Current
Do not insulate the device! Certainly do not use glass wool or rock wool, other types of in- sulation material (PVC, PUR, foam, plaster, etc.). These go through the convection channels discoloration cause annoying odors. Ensure that no waste remains in the housing. 7. -
Page 15: Convection Grills
7.1. Convection grills EXIT CONVECTION: You can choose between 3 models of grids according to your taste or according to the fireplace: Grid Design (2 connections), Grille design long small model (2 connections) or long model (4 connections) AIR ARRIVAL (ENTRY CONVECTION): You have the option to choose between inlets 2dm² or 4dm²... -
Page 16: Positioning The Logs
8. Positioning the logs 8.1. SET H1 for : True Vision Venus 730 and 850 Set H1 Gas 650 DC True Vision WARNING: DO NOT PUT ANYTHING ON THE IGNITION STEM AND IN THE RECTANGULAR AREA. TRY TO AVOID POSITIONING VENUS GAS 730 THE COAL IMITATION ON SMALL BURNER OPENINGS. - Page 17 In the case you ordered angel`s hair arrange them after photo 4 according photo 8A and then put imitation coal on it (8B) and continue with wood logs 5,6,7. DO NOT PUT ANYTHING ON THE IGNITION STEM Wood logs set GAS 650 DC True Vision, VENUS GAS 730,850 H1 2 / 2 Instructions for installation and use - Venus True Vision Gas English...
-
Page 18: Set H2
8.2. SET H1 for : True Vision Venus 730 and 850 Set H2 VENUS GAS 730, 850 WARNING: DO NOT PUT ANYTHING ON THE IGNITION STEM AND IN THE RECTANGULAR AREA. TRY TO AVOID POSITIONING THE COAL IMITATION ON SMALL BURNER OPENINGS. DO NOT USE DUST FROM THE IMITATION COAL with hole with hole... - Page 19 In the case you ordered angel`s hair arrange them after photo 5 according photo 8A and then put imitation coal on it (8B) and continue with wood logs 6,7. DO NOT PUT ANYTHING ON THE IGNITION STEM Wood logs set VENUS GAS 730, 850 H2 2 / 2 Instructions for installation and use - Venus True Vision Gas English...
-
Page 20: First-Time Use
After the first few fires, a light deposit may appear on the window. It comes from the paint- work. Once the appliance is cold you can get rid of this deposit by using M Design’s Bio- Clean cleaning product. This product may be used later on for cleaning the window. -
Page 21: Guarantee
11. Guarantee This page is your warranty card. The guarantee is only valid for faults caused by construction defects or defects in the parts used to build the appliance. M-Design offers a 12 month guarantee on all electronic parts and a 8 year guarantee on the appliance construction. -
Page 22: Remote Control
12. Remote control 1. First use (Connect the remote control) Keep pressing the button until 24:00 appears in the top left corner (1). Press several times on until you see “bnd” on the screen (2) Press shortly on You see the temperature on the screen. - Page 23 3. Manual control (continua- To light up the side burners 2, press First you see the wave settings (page 30). Press a second time and you will see a “b0” or “b0” Remark: If after a previous use of the fireplace, you turned it off in “b1” mode, next ignition, the burners 1,2 and 3 will light simultaneously.
- Page 24 5. ECO WAVE each model is standard delivered with ECO-WAVE ECO-WAVE is an automatic cycle of fluctuating flames. At each start-up of the fire, the system starts in ECO-WAVE mode ! Switch off WAVE Press 1x short on the menu Symbol that indicates Press the arrow up or down.
-
Page 25: Drawings
13. Drawings Venus True Vision 730 Venus True Vision 850 Instructions for installation and use - Venus True Vision Gas English... -
Page 26: Design Grills
14. Dessign Grills 1223 2 dm 4 dm Instructions for installation and use - Venus True Vision Gas English...
Need help?
Do you have a question about the Venus True Vision Series and is the answer not in the manual?
Questions and answers