
Related Manuals for Rcom MARU DELUXE Hatcher & Brooder MX-100HBD


Summary of Contents for Rcom MARU DELUXE Hatcher & Brooder MX-100HBD
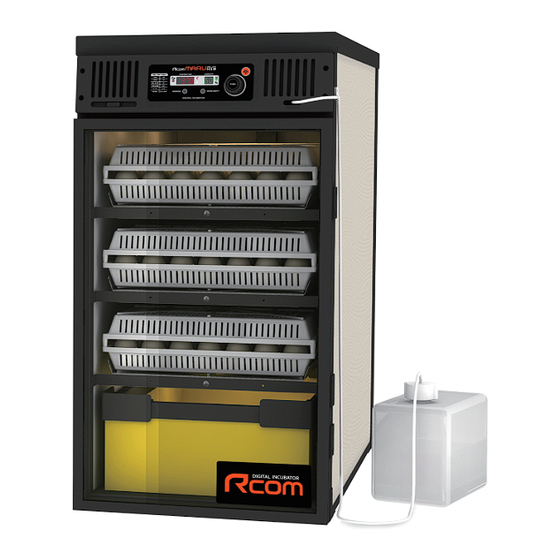
- Page 1 Love of life begins with "Rcom" Ver. 2.5 DIGITAL EGG INCUBATOR USER'S MANUAL MARU DELUXE Hatcher & Brooder (100 / 380) MX-100HBD / MX-380HBD...
-
Page 2: Table Of Contents
(2) Troubleshooting(FAQ) (3) Specification Successful hatching depends on many numbers of factors. Neither Autoelex (Rcom) nor its global distributors and vendors can be held responsible for loss of life or property damage caused by user neglect, alteration, modification or painting, change of use or power failure. To avoid errors, mishaps and danger, carefully check this User Manual before initial use. - Page 3 Moreover, the Rcom MARU H&B has been carefully designed to provide an optimal setting and or hatching environment, therefore, before using the incubator, we strongly recommend that you read the manual carefully.
-
Page 4: Introduction
1. Introduction (2) Safety Precautions Electrical hazards Be careful the details below when you use. Do not use a damaged power Do not pull the cord when Never pull the plug out of the Do not twist or crush electric Do not insert multiple cord or loose outlet. - Page 5 (3) Identification of Parts 1. Introduction and Composition * MX-380HBD model image Identification of Parts Serial NO is located on the upper front cover. (ex. RCM0000000) is a product specific number. Air Vent (Front) Power Connecting (the rear) For connecting power cord. Jog Dial Air inlet vent Nipple for water hose...
- Page 6 (4) Name & Function of 1. Introduction Operation Parts Name & Function of Operation Parts Rcom MARU DELUXE H&B 100 / 380 ● Names and components of each part ① Heater Operation Lamp : Light on when working ② Temp. Display : Current Temperature Display ③...
-
Page 7: Before Use
(1) What is an Incubation Room? 2. Before use (2) How to install this MARU H&B What is an Incubation Room? The Incubation Room is a confined space for setting and operating an MARU H&B efficiently. An Incubation Room environment has a considerable effect on hatch rate. Controlling the MARU H&B environment is recommended;... -
Page 8: Hatching And Brooding
(2) How to install this MARU H&B 2. Before use (1) Preparing for Hatching and Brooding / 3. Hatching and Brooding How to Start Hatching and Brooding [ Rotary wheel assembly method ] - Rotary wheels are sold separately Sold Separately Pieces : 18EA (2EA) (2EA) - Page 9 (1) Preparing for Hatching and Brooding / 3. Hatcing and Brooding 3. 부화 How to Start Hatching and Brooding ▶ For the first two seconds, after power on, FND blinks and the pump starts working (until the internal humidification water tank is filled : In case of water shortage the pump runs for 2min.) and for another one second, the version number will be displayed on FND.
- Page 10 ▶ No power switch for the machine. The power cord should be unplugged to turn the machine off after hatching and brooding. ▶ Rcom MARU do not need to be initialized after hatching and brooding. When you need the same condition as the previous set, Power Cord all you need to do is to plug in your machine.
- Page 11 (3) Humidity and Condensation principles, 3. Hatcing and Brooding Air Flow considerations, and Post-Hatch maintenance, Dew Condensation Humidity and Condensation principles, Air Flow considerations ▶ When hatching, humidity should be relatively high to prevent the thin membrane from drying out or hardening before hatching.
- Page 12 (Please refer to Rcom website for helpful information on birds) [ H&B cabinet Cleaning ] ▶ Clean all the contaminants off the cabinet floor and replace sawdust, wood shavings or finely cut paper.
-
Page 13: Maru H&B Function Settings
It could be recalibrated by the user if the user wishes to do so, but this is not recommended. When in need of adjustment, please refer to our homepage (www.Rcom.co.kr → Information → User Manual Category) or contact the place of purchase. Commercially available thermometer and hygrometers may have drastic measurement deviations, so it is recommended to use thermometer and hygrometer designated for this purpose. - Page 14 (3) The Abnormal High 4. MARU H&B Function Settings and Low Alarm Setting The Abnormal High Alarm Settings What is the abnormal high temperature alarm? It is a function that lets the users know that the cabinet temperature increased due to unusual external temperatures, when the temperature of the incubating cabinet increases beyond the set value due to increased internal temperature , this alarm will ring along with the “HI”...
- Page 15 (4) How to change between Centigrade and 4. MARU H&B Function Settings Fahrenheit Temperature units (5) Sound ON /OFF (6) Room Light ON/OFF Setting How to change between Centigrade and Fahrenheit Temperature units ▶ From the abnormal LOw temperature alarm setting, press Step 9 the jog dial once and “C.F”...
-
Page 16: How To Clean
(1) Instructions for 5. How to Clean your MARU H&B Disassembling and Cleaning Instructions for Disassembling and Cleaning * MX-380HBD model image Power cord must be removed from the outlet of the machine. ▶ If you turn the machine off and then leave the machine door closed after high humidity hatching and brooding, accumulated moisture inside the machine evaporates and sticks to electric and electronic circuits. - Page 17 (1) Instructions for 5. How to Clean your MARU H&B Disassembling and Cleaning [ Air filter Cleaning ] ▶ Open the H&B door, remove the air filter located in the cabinet ceiling moving it in the direction of the arrow, clean with water and dry.
-
Page 18: Product Information
250V 8.0A Ø5*20mm General maintenance All our Rcom digital products of Autoelex Co., Ltd. are made by precision systems under strict quality control. But occasionally some defective products are found on the way of their distribution.If any problem occurs, then please contact Autoelex service center or distributorsin your country. - Page 19 6. Product Information (2) Troubleshooting(FAQ) For more detailed self-diagnosis, see Rcom homepage Troubleshooting(FAQ) “SELF DIAGNOSIS” category. Circumstance Items to be confirmed Solutions ▶ Check electric cord is properly connected. ▶ Connect the cord again. No signs of power ▶ Check if there is a power outage.
- Page 20 6. Product Information (3) Specification 1-1 Name : Rcom MARU DELUXE Hatcher & Brooder 100 / Specification Rcom MARU DELUXE Hatcher & Brooder 380 1-2 Model : MX-100HBD / MX-380HBD Capacities The number of NAME Model No. [Chick Functional Ranger...
- Page 21 6. Broken or problem caused by ‘Customer’s mistake or fault’ ※ Product Registration Procedures If you are a new member of Rcom, you need to log in our website at www.Rcom.co.kr 1. Click “SIGN UP” on top of the right corner.
- Page 23 Rcom PRO MINI (PX-03) Rcom KINGSURO MAX 20 (MX-SURO) Rcom MAX 20 (MX-20D) Rcom Bird Brooder&ICU (MX-BS500) Rcom PRO 20 (PX-20D) Rcom MARU DELUXE MAX 380 (MX-380CD) Rcom USB 20 (UX-20D) Rcom PRO 50 (PX-50D) Rcom DIGILOG Rcom DIGILOG2 (PX-V1)
- Page 24 ● TEL : 82-55-337-2560 (Di r ect t o sal e s t e am) / 82-55-337-2561~3 (Off i c e) ● FAX : 82-55-337-2568 ● E-MAI L : Rcom@Rcom.co.kr Rcom is the Best Design with High Quality, Value, and Perf o rmance!
Need help?
Do you have a question about the MARU DELUXE Hatcher & Brooder MX-100HBD and is the answer not in the manual?
Questions and answers