Englefield VALENCIA ELITE Installation Instructions Manual
Angle corner pivot
Hide thumbs
Also See for VALENCIA ELITE:
- Installation instructions manual (20 pages) ,
- Installation instructions manual (14 pages) ,
- Installation instructions manual (14 pages)
Table of Contents
Advertisement
Quick Links
INSTALLATION
INSTRUCTIONS
SHOWER
Englefield has a history
of making superb showers
and their popularity is
testament to their quality
and affordability.
It's the details that Englefield
cares about - from pioneer-
ing the latest technology, to
innovative design, it's all to
make your showering
experience the very best it
can be.
1393318-A02-A
July 2019
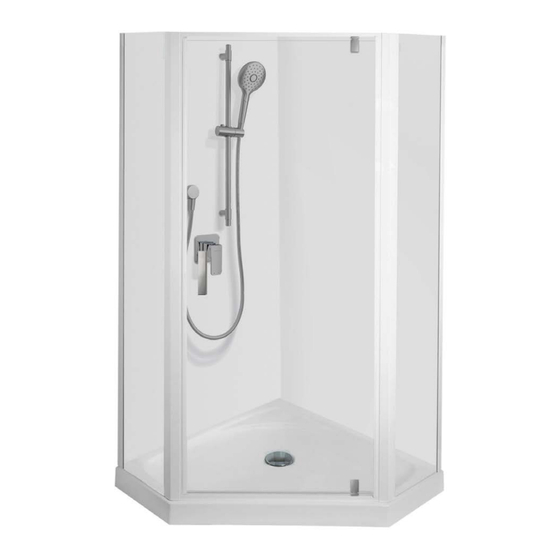
VALENCIA ELITE
Angle Corner Pivot
Note: Tapware and accessories not included.
Advertisement
Table of Contents

Subscribe to Our Youtube Channel
Related Manuals for Englefield VALENCIA ELITE


Summary of Contents for Englefield VALENCIA ELITE
- Page 1 Englefield has a history of making superb showers and their popularity is testament to their quality and affordability. It’s the details that Englefield cares about - from pioneer- ing the latest technology, to innovative design, it’s all to make your showering experience the very best it can be.
-
Page 2: Before You Begin
+/- 4mm/m. ® 2. Please install this door onto an ENGLEFIELD Quick - Fit shower tray only, unless installing directly onto tiled walls and floor. 3. Care must be taken when drilling into walls and floors to avoid any hidden pipes or wires. - Page 3 VALENCIA ELITE Angle Corner Pivot INSTALLATION INSTRUCTIONS 2 x Corner Post 2 x Wall Edge 2 x Wall Channels Finishing Strips Screw Covers 2 x Return Panels 1 x Door 2 x Corner Covers...
- Page 4 VALENCIA ELITE Angle Corner Pivot INSTALLATION INSTRUCTIONS 8x Wall Plugs 1 x Fittings Kit 1x Hex Key 6 6 x Cover Caps 16x ST4*12 Screws 8x Fixing Screws 1 x Handle Kit ...
-
Page 5: Installation Instructions
VALENCIA ELITE Angle Corner Pivot INSTALLATION INSTRUCTIONS CONSTRUCTION REQUIREMENTS ATTENTION Due to the weight of the glass panels Englefield strongly recommends constructing double studs (as below) to fix the wall retainers to. Size Dim ‘A’ Dim ‘B’ 900 x 900... -
Page 6: Installation Options
INSTALLATION INSTRUCTIONS VALENCIA ELITE Angle Corner Pivot INSTALLATION - Options OPTION 1 - Acrylic Wall & Tray Tray: For tray installation refer to the instructions supplied with the tray. Wall: For wall installation refer to the instructions supplied with the wall. - Page 7 INSTALLATION INSTRUCTIONS VALENCIA ELITE Angle Corner Pivot INSTALLATION Caution: Ensure tray or tiled floor is level & walls are vertical & square. ± 0 mm ± 0 mm Tip: Cover the waste to prevent the loss of small parts. If installing onto a tray protect the tray surface during installation.
- Page 8 VALENCIA ELITE Angle Corner Pivot INSTALLATION INSTRUCTIONS 3 mm 15 mm Position the wall channels on the wall. The flange with pre-drilled holes should face inside the shower enclosure. Using a level, make sure that the channel is upright. Mark the position of the fixing holes down the centre of the channel, then remove the channel.
- Page 9 VALENCIA ELITE Angle Corner Pivot INSTALLATION INSTRUCTIONS Insert the return panels into the wall channels, ensuring that the aluminium strip is at the bottom of the glass. Carefully rotate the door frame so that it is in the desired orientation.
- Page 10 VALENCIA ELITE Angle Corner Pivot INSTALLATION INSTRUCTIONS Lift the door frame into position and insert into the 45° corner posts of return panels. Adjust the panels so that the door magnetic seals sit correctly and the gap between the door glass and horizontal rails is equal.
- Page 11 Angle Corner Pivot ± Centralise the door frame within the corner posts, ensuring the door frame is square. From the inside of the enclosure drill four holes in each of the four posts, through the centre-marked points in the aluminium with a 3mm HSS drill (not supplied). Install and tighten the assembly screws Ensure the corner post screw cover clips are in place and insert the cover strips.
- Page 12 Angle Corner Pivot Drip Strip Drip Strip Install the vertical and horizontal door seals onto the door panel. Install the door handle, ensuring that the grub screws are on the underside. Fit the caps to the top of the posts. Add silicone or modify caps to fit if required. Page 11...
- Page 13 Angle Corner Pivot Full length Full length 200mm up 200mm up Full length Page 12...
-
Page 14: Cleaning And Maintenance Instructions
VALENCIA ELITE Angle Corner Pivot INSTALLATION INSTRUCTIONS Scan the QR barcode on the packaging or underside of top caps to identify the product SKU and date of manufacture. Wall Retainer Component Kit 1278347-** 1393422-** Handle Assembly 1365840-** Retainer Cover Clip...
Need help?
Do you have a question about the VALENCIA ELITE and is the answer not in the manual?
Questions and answers