Advertisement
Installation Instructions
Ground Fixed
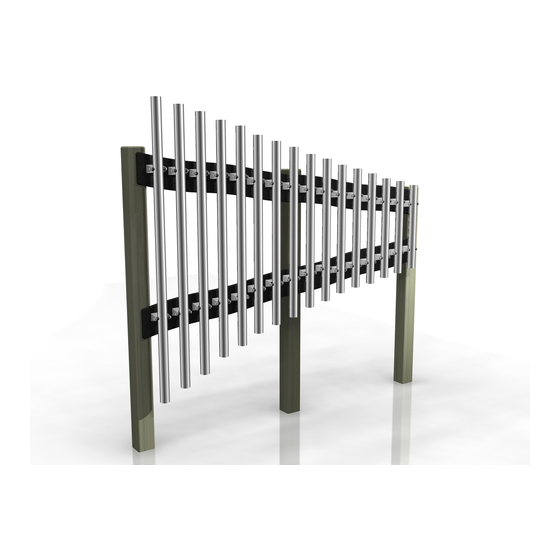
Freechimes
Symphony
Page 1 of 4
Components:
Eye Straps
X3
10x38mm
Secure Screw
X6
6x80/50
Screw X10
Metric Conversion:
600mm/ 24"
850mm/ 33"
1.5m/ 59"
Weight of heaviest part
BS EN 1176
1. Carefully lay 3 x legs on a
level surface and check
distance between each leg is
equal. Join together the 2
parts of the symphony. Line up
pre drilled holes in the
backboards with the legs and
ensure the instrument is
aligned square with the legs.
Fix in place using 6x80mm
screws supplied (see
installation guide)
2.(See ground fix
sheet)Excavate 3 holes on site
of installation approximately
600mm deep ( adjust depth
according to age range for
intended players)
3. Carefully raise the
instrument from the ground
with legs attached and locate
(lower) legs into holes making
sure they are vertical and level
prior to concreting in place.
4. Once happy with location
and levels, fill holes using
rapid hardening concrete. Be
sure to compact concrete
around legs and leave to dry
according to manufactures
guidelines
12kg
(Freechimes Left Panel)
Pair Small
Beaters X3
5. Beaters can be fixed to
wooded posts with fixings
provided
1.5m
Ground Surface
KS2 – 850mm
percussionplay.com
Install Instrument
with 1.5m free space
(from widest point)
around it.
1.5m
KS2
600mm
Spares available form
25 Kg
or from your
local distributor
Advertisement
Table of Contents

Subscribe to Our Youtube Channel
Related Manuals for Percussion Play Freechimes Symphony


Summary of Contents for Percussion Play Freechimes Symphony
-
Page 1: Installation Instructions
Installation Instructions 5. Beaters can be fixed to Install Instrument 1. Carefully lay 3 x legs on a with 1.5m free space wooded posts with fixings level surface and check (from widest point) provided distance between each leg is around it. equal. - Page 2 Assembly Guide PPFREC Tools: TX 25 Driver Bit TX 30 Driver Bit Ground Fixed Freechimes Symphony Page 2 of 4 COMPO NENTS LIST: Black Plastic S crew Cap X10 White Plastic washer X10 8x70 screw X10 Instrument S addle Strap X3 Components: 10x38 Pin TX Screw X6 Eye Straps...
- Page 3 Ground Fix Installation Ground Fixed Freechimes Symphony Page 3 of 4 (1.1) Components: 3 Treated Posts 90x90x2000 Carefully lay 3 x legs on a level surface. Line up pre drilled holes in the backboards with Metric Conversion: the legs and ensure the instrument is aligned square with the legs. Fix in place using 50mm/ 2”...
- Page 4 Ground Fix Installation Foundations should not present a hazard. These foundations are Excavate 3 holes with a 250mm diameter tapering down to 350mm diameter and 650mm depth recommended as a guide, for more information on foundation details for various surface see Part 7 of BS EN 1176. Ground Fixed Freechimes Symphony...
Need help?
Do you have a question about the Freechimes Symphony and is the answer not in the manual?
Questions and answers